74 Canva Tips and Tricks for Better Designs
In this article, I’m going to share some of the best tips and tricks inside Canva for creating better designs.
Canva is the world’s best graphic design tool. However, if you are new to Canva, it can be overwhelming to learn the myriad of tips and techniques to get the most out of the software. That’s why I have decided to create a list of my 74 favorite Canva Tips and Tricks.
Now before we get going, I should note that most of these tips utilize tools and features using a Canva Pro account. If you don’t already have Canva pro account, click the button below to sign up and follow along. We’ll get a little kickback from Canva if you do plus, you’ll have access to the best design tool in the world. So it’s a win-win.
Canva Tips and Tricks Video Tutorial
I created a video showcasing all of the Canva tips and tricks outlined in this article. If you enjoy visual examples when learning about graphic design, I can’t recommend the video enough. It’s also full of corny jokes…
Canva Tips and Tricks Free PDF Guide
I’ve also created a free PDF guide with all of these tips and tricks that you can download and print. If you’d like to download this freebie, feel free to snag it by filling out the box below.
Now for the tips…
74 Canva Tips and Tricks
This first section of Canva tips will cover a few design hacks that will help you become a better graphics designer in 10 seconds.
Canva Tip #1: Match Image Colors with Graphic Colors
One of the fastest ways to create cohesive designs is to simply select a color from the image you use for your design elements. In fact, if you look at most high-end designs, they almost always use this same technique.

To select a color from an image in Canva:
Select the object you want to recolor
Select the color box
Click the ‘+’ icon
Select the part of the image you want to grab the color from.

Image courtesy of Jahid Hasan Raji
Canva Tip #2: Never Use Drop Shadow
Never use drop shadow. Just don’t. It usually comes across as unprofessional. So instead, try to pick the right backgrounds, reposition elements, and change colors to help your design pop on screen without needing a shadow.

Canva Tip #3: Limit Your Design to Two Fonts
New designers tend to use way too many fonts in their designs. This usually comes across as amateur or just plain ugly. Instead, only use 2 fonts on your design:
One font for titles and
One font for the body copy
If you use more fonts than that, your design will likely be busy and unapproachable.

Image example from Nick Barclay
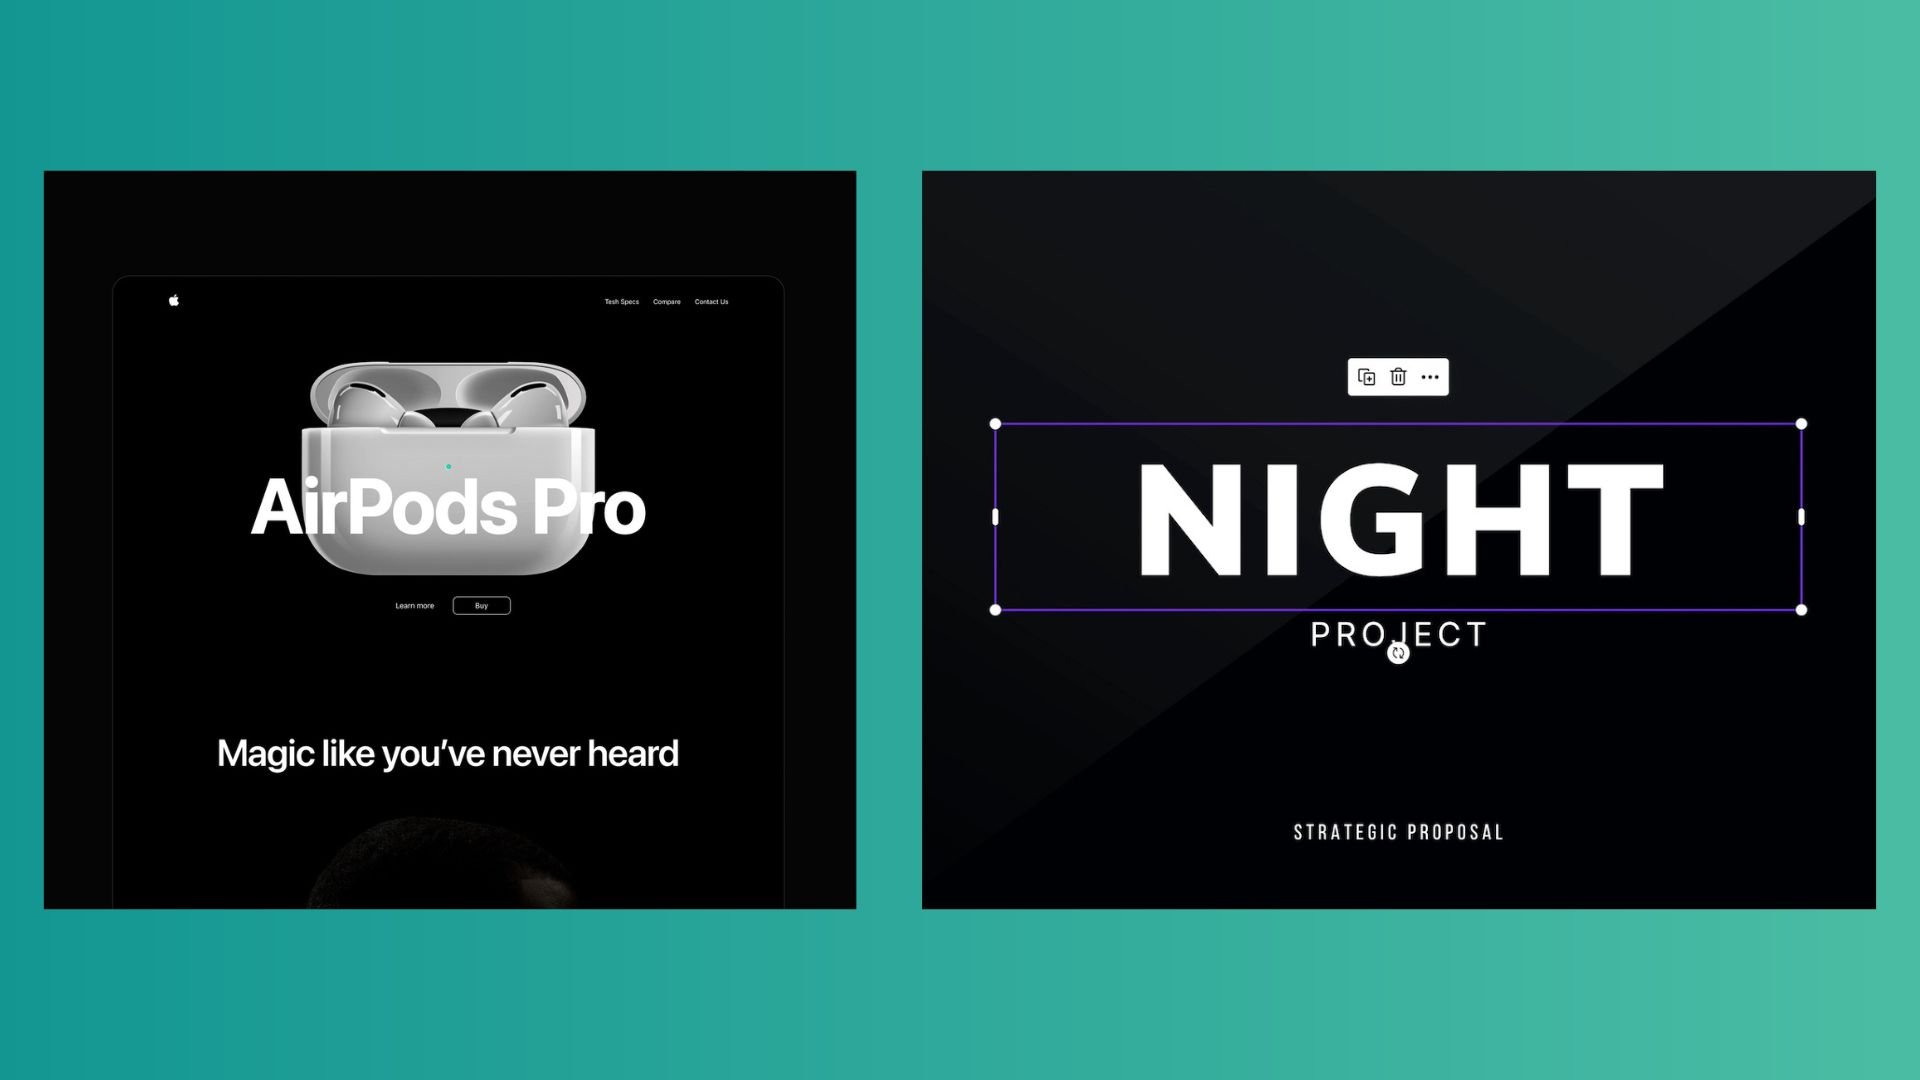
Canva Tip #4: Keep Title Sizes Smaller Than You Think
If your design is going on a screen, you want the titles to be about 20% smaller than what you think they should be. Why is this? I’m not sure, for some reason when we design for screens, we tend to make titles way too big.

By scaling down your titles you will create negative space that will allow your overall project to breathe a bit.
Canva Tip #5: Get Better Inspiration
The templates inside Canva are awesome, but I find that it’s even better to go and find some inspiration from professional designers around the web. My favorite place to browse really good design work is Behance.
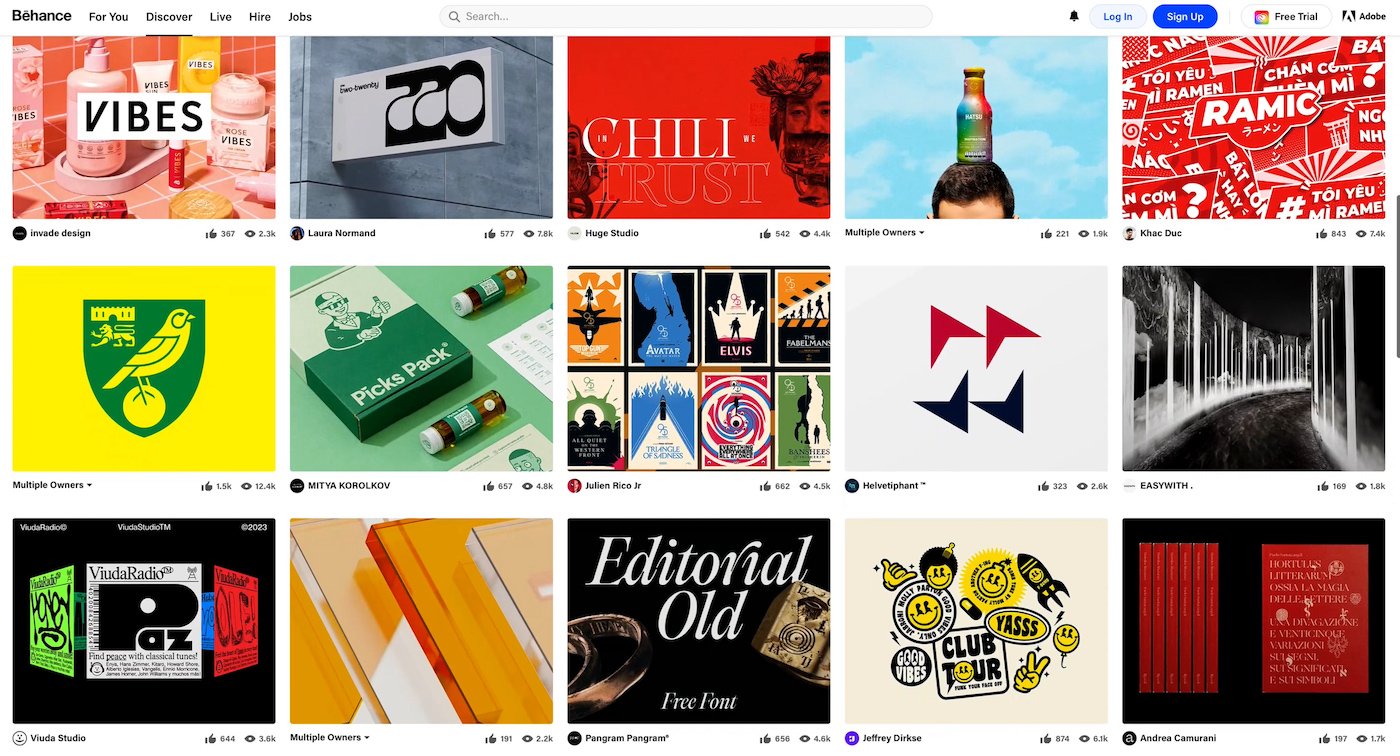
Behance is essentially a place where professional designers show off their work to one another. If I ever have a big project, I will create a folder with the project name and find designs that support my creative direction.
Canva Tip #6: Design With Whiteboards
Using a whiteboard space, you can copy and paste inspiring designs as references as you work through your design.

To create a whiteboard space simply click ‘Create a design’ and select ‘Whiteboard’.
Now you can use the canvas to collect references and design just like an artboard in other high-end design tools like Photoshop.
Once you’re ready to move your design to a canvas, you can copy and paste your elements and resize them as needed.
Canva Tip #7: Contrast the Important Parts
As humans, our eyes are drawn to contrast where there are big differences between the light and dark parts of an image.

Image courtesy of Borondo Studio
So in your designs, make sure to remember that if you have any parts that are very contrasty, your audience’s eyes will be drawn there first.
If something is contrasty that is actually unimportant, try decreasing the contrast or changing the image entirely. Remember, you’re trying to control your viewer's eyes.
Canva Tip #8: Consistent Spacing
Great designs should have consistent spacing. The great news is, Canva has a tool that can help with developing consistent spacing.

Just select all of your elements and choose the ‘Position’ button at the top of the frame. Now, you can evenly space your elements using consistent vertical or horizontal spacing.
Canva Tip #9: The Split the Difference Rule
Sometimes you want certain elements to be closer to other elements to create a connection, like with titles and body copy.

In these instances, you can split the difference in spacing between other elements directly in half to create a connection.
In most of my designs, I will have a specific distance for space between elements, and a half-distance for elements that need to feel connected.
Keeping these distances consistent will help your overall design feel cohesive.
Canva Tip #10: Remove the Fluff
Now let’s get into some design basics that cover some of the basics inside Canva.
If you look at most professional designs in any industry, you’ll typically see they are very simple and utilize minimal elements.
Good interior design, minimal.

Image Courtesy of Abaco Bahamas
Good architecture, minimal.

Good graphic design, minimal.

Image courtesy of Nidheesh
New designers on the other hand often utilize designs that look like this.
So a great tip is to simply remove any extra elements from your design. There’s no room for freeloaders in good design.
Canva Tip #11: Negative Space
Do you know why the design on top looks a heck of a lot better than the one on the bottom? Well, it’s all about negative space.
Great design allows the audience to breathe. You shouldn’t just cram elements into every inch of your design.
Make sure your design has large sections that are simply empty to create a sense of order.
Canva Tip #12: Grid System
If you don’t know where to place images or text, you can use the grid system. Think about your design elements as a frame.
Try to connect and align, your text, subtext, and elements in this grid if possible. It’s a quick way to ensure great design.
Canva Tip #13: Best Fonts to Use
We can spend years learning about typography, but here are the basics that you need to know.
There are two types of typography, serif and sans-serif. Serif fonts have little tassels on the end of them, sans-serif fonts do not.

Serif fonts have tassels.

Sans-Serif fonts do not have tassles.
Serif fonts come across as classy, elevated, and distinguished. That’s why you see them in high-end magazines and institutional branding.

Most ‘distinguished’ brands incorporate serif fonts in their titles.
Sans-Serif fonts come across as modern and cool. That’s why you see them in modern branding and trendy brands.

Many modern brands use sans-serif fonts in their design. (Image courtesy of Anna Dmitrieva)
The space between letters is called kerning, you want to make sure the spacing is even between all your letters or it can be hard to read or distort your message.
Kerning mistakes are called Keming and there’s a hilarious Reddit channel dedicated to kerning mistakes.

Luckily, most fonts in Canva have consistent kerning. But many times you may want to adjust subtext letter spacing to make them seem more professional.
Be careful about going overboard with handwritten-style fonts. They can look cheap very quickly. The line between authentic and kitschy… is thin. I honestly recommend avoiding them in most instances.

Script fonts are often overused or kitschy. I don’t recommend using them on most projects.
My best advice for picking fonts is to look at other designs in the style you are going with and try to pick a font reminiscent of the one they are using.
Canva has some pretty great fonts already installed and they even categorize the ones that are most popular directly at the top. Most of these are really great to use. The key is to just keep it simple.
Canva Tip #14: Color Theory in a Nutshell
I could spend years writing about color theory, but here are the main points that you need to know..
Colors are all based on a color wheel (pictured below). In a color wheel, colors on the opposite ends tend to pop.

Colors on the opposite end of the Color Wheel tend to pop.
Colors nearby each-other on a color wheel tend to flow together.

Desaturated colors that are found in nature are known as earth tones. These colors create a sense of warmth and authenticity. Earth Tones are typically used in designs where a sense of authenticity or sustainability is important.

Image Courtesy of Arithmetic
Unnatural bright colors create a sense of excitement and flare. That’s why they're used in advertising.
Avoid using red and green together, because it comes across as Christmas-y.
If you ever don’t know what colors to use, simply pick a single color and use lighter and darker variants of the same color.
Or even better, go find an awesome design that you like and grab the colors from their design. I use the Color Pick Eyedropper extension in Google Chrome so I can easily grab colors that I like from around the web.
Every designer steals borrows colors from other designs. They just won’t admit it.
Canva Tip #15: Consistent Color Scheme
If you are doing more than one design, try to keep colors consistent across all of your designs. Consistency will create a solid brand identity and makes your entire company feel more professional. If a project has a completely different colored design, it can come across as disconnected and it can cheapen your brand.

With Curious Refuge, we try to make sure all of our emails, web pages, and videos use the same color scheme. It makes everything feel, well, better.
Canva Tip #16: Saving Templates
If time is money you’re about to become rich because this section will focus entirely on time-saving tips inside Canva.
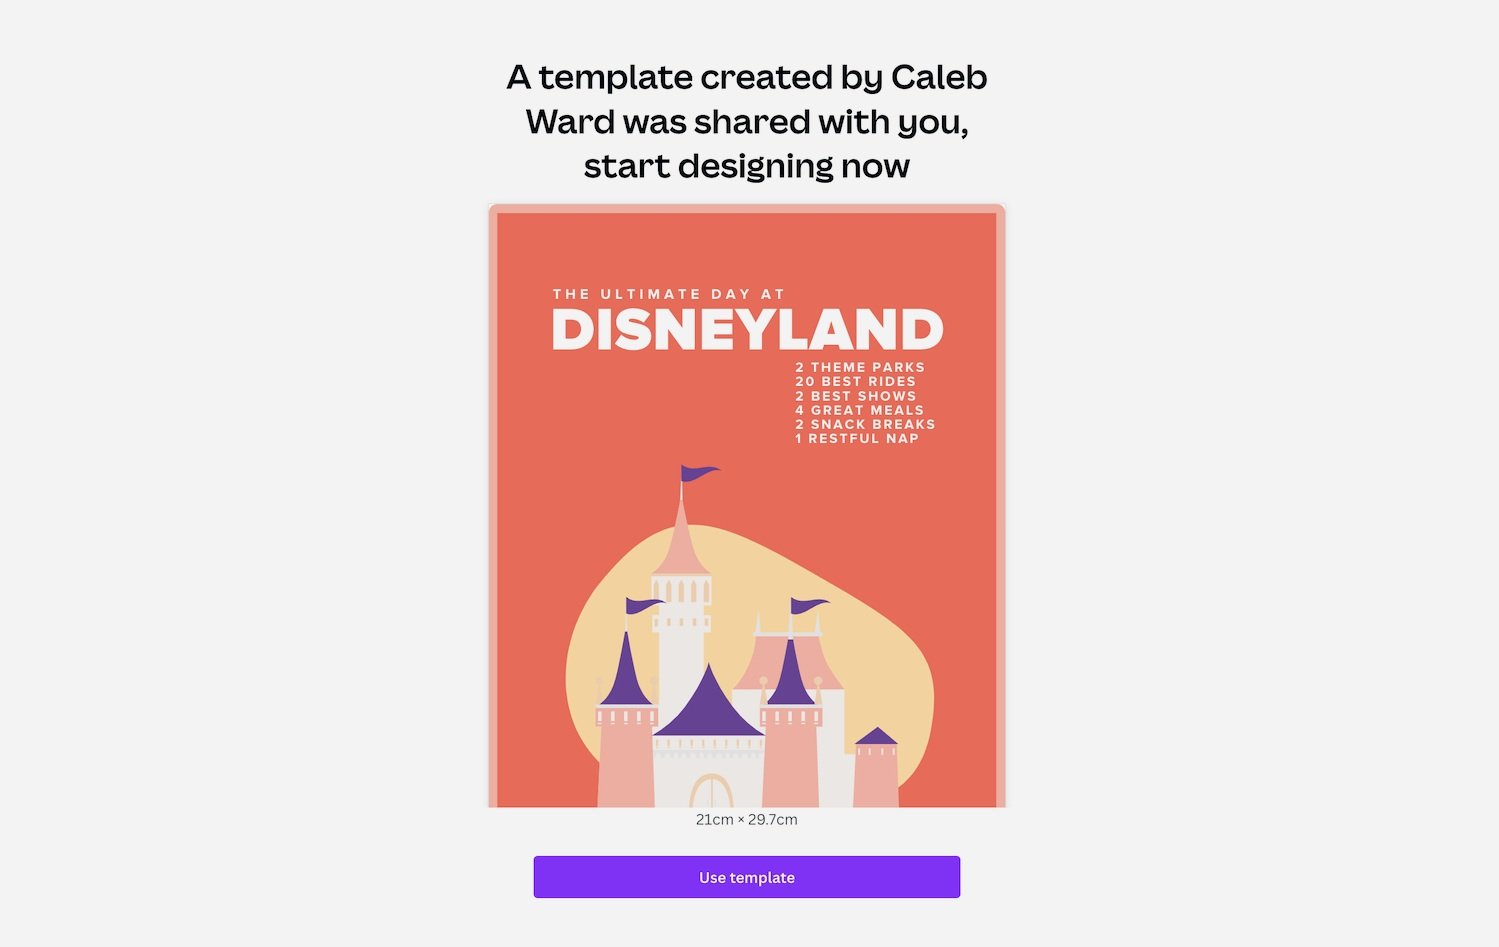
Templates are an amazing way to share your designs with other people. To save a template in Canva:
Go to your design
Click the ‘Share’ button at the top right corner of the page
Select ‘Template Link’
Now, you can share your template with others without messing up your original file.
Canva Tip #17: Brand Colors, Logos, and Fonts
If you’re a savvy designer, you probably have a brand logo, color scheme, and font style that you try to stick with. Good for you.
Well, instead of trying to remember all of that branding in your head, you can save those elements directly in the Brand Hub menu.

Some brand logos we use at Curious Refuge.
From here you can upload logos, colors, and fonts that you will use in your designs. Now, when you’re hard at work on a design, your elements can be accessed from the sidebar.
Canva Tip #18: Brand Templates
As a brand, you probably use similar designs again and again. Well, instead of searching for your design inside your project panels. You can save a design as a brand template by selecting ‘Share and then hitting ‘Brand Templates.
Now, you can access the design in the ‘Brand Templates’ folder. This will create a simple place where you can update and access your brand's files and even share them with others who need to access the templates on a regular basis.
Canva Tip #19: Uploading Fonts
You can add more fonts to your library than what is found directly inside Canva. To add a new font in Canva:
Select the text box at the top of a canvas
Select the ‘Upload a Font’ button at the bottom of a page.
Now, you can access and use this font on your design projects. You can also set this font as your brand’s default font from the Brand Kit menu.
This is perfect for all of your projects that need a ‘Bleeding Cowboy’ font…

World’s worst font…
Canva Tip #20: Duplicating a Design
There’s no need to copy and paste elements from different projects. Instead, you can easily duplicate a design by clicking the three dots in the corner of a design and selecting ‘Make a Copy’.
You can also duplicate a single page by selecting the ‘Duplicate Page’ button inside a project.
Canva Tip #21: Fast Color Schemes Using Styles
This tip is insanely cool.
You can easily colorize the entire project by using the style menu. Simply navigate to the Style tab and select either your pre-defined brand colors or the built-in color pallets created by Canva.
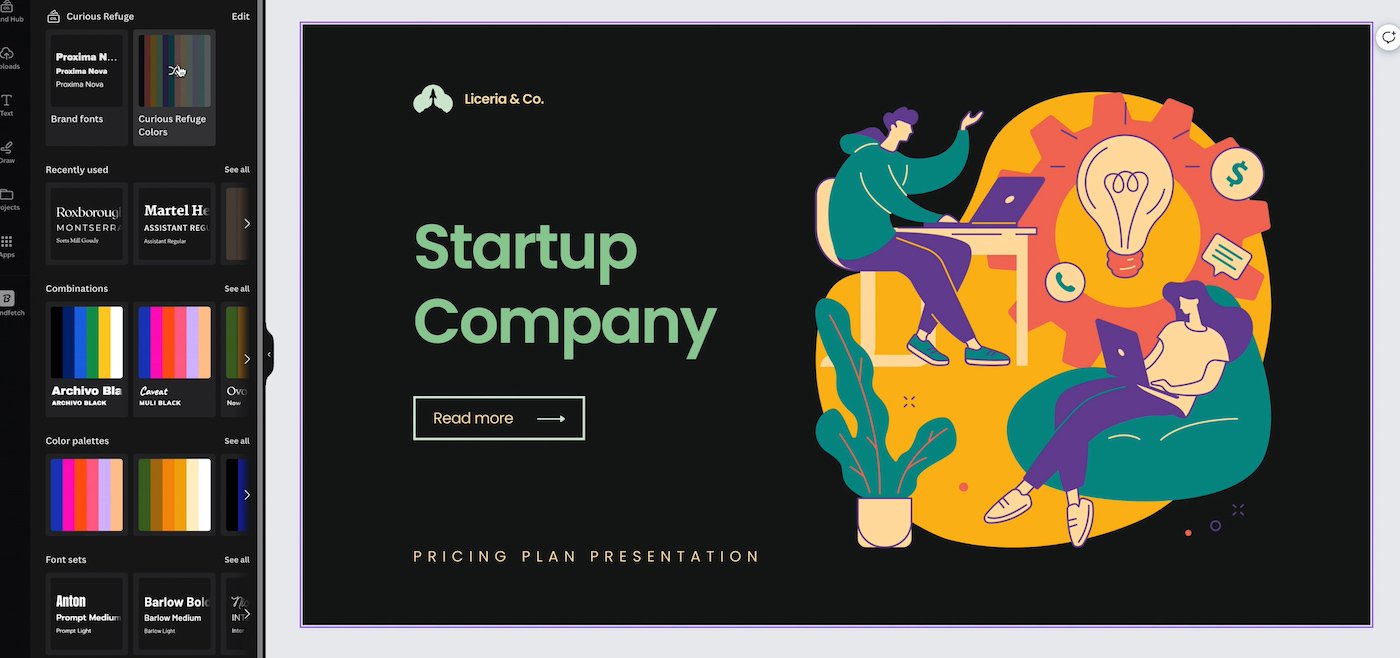
You can also change a design’s fonts with a single click from this menu as well.
You’ll see all of your design options inside your menu will now reflect the new styles if you are using these templates. How cool is that?
Canva Tip #22: Copy and Paste Images from Around the Web
Picture this. You go to the internet, find an image that you’re allowed to use, download it, upload it to Canva, and import it into your Canva design. If you’ve ever done this, you’re wasting your time.
Instead, simply copy and paste an image directly into your pages in Canva.
This feature is so simple, but it saves so much time.
Canva Tip #23: Removing Backgrounds from Graphics
Now let’s talk about some bread-and-butter Canva tips that everyone should know.
One of my favorite tips in Canva is to use the background removal feature. To use it, just select your graphic and hit the background removal filter.
This feature basically uses AI to remove backgrounds with just a click.
Canva Tip #24: Removing Backgrounds from Images
But wait… there’s more. Using the background removal feature you can remove backgrounds from entire photos.
Gone are the days of having to meticulously cut things out inside Photoshop.
This feature is shockingly good. So you’ll be living a fake Instagram life in no time!

Canva Tip #25: Using Shaped Framed Image Elements
Shaped frames are an awesome way to stylize images in your designs. You can find frames directly in the elements menu under the ‘Frames’ section. To use them, simply drag a photo onto them. But I like to take it one step further.

I will import a photo into a frame and remove the background. Then I’ll add a shape that is the same shape and width as the frame. From there, I will choose my brand colors to create a really cool design that feels custom-branded like this.
Canva Tip #26: Alignment Tool
Keeping all of your elements aligned is essential for helping your designs to feel cohesive.
So instead of eye-balling it, just select your elements and click ‘position’. From here, you can select whichever alignment makes the most sense for your project.

It’s like having a digital bubble level.
Canva Tip #27: Grouping Tool
Sometimes you may have multiple elements that you’d like to combine into a single group. By forming a group, you’ll be able to move and scale multiple elements at a single time.
To group elements inside of Canva, you can simply select all of the elements by selecting the shift button and clicking on the elements you want to add.
Then simply hit Command+G to group them in Canva.
If you decide to ungroup your elements, that’s no problem. You can ungroup a group in Canva, by hitting shift+command+G.
Canva Tip #28: Quick Animation for Gifs
Gifs are a super fun way to make your online designs have more life. And the best part is, Canva is super helpful for animating objects and creating GIFs.
To animate any part of your design in Canva, simply select your element and click the ‘Animate’ button. There are a ton of built-in styles for your animation.
You can also go to the elements tab and filter graphics by ‘Animated’. This will give you only moving elements.
Once you’re happy with the way your animation looks, you can save your gif by clicking ‘Share’ and then selecting GIF from the dropdown menu.
Canva Tip #29: Creating Charts
Need to create a quick chart for a super fun business meeting? No prob.

Instead of designing it by hand, you can create the chart easily by visiting the elements tab and selecting ‘charts’. Now, just select your chart and add the information. You can also, customize the chart to match your branding.
Canva Tip #30: Resizing Designs
You can easily resize a design in seconds using the magic resizer tool inside Canva. Just navigate to the ‘Resize’ button in the top left corner of the screen, and select the different sizes you want to use from the dropdown menu.
When you’re ready, select Resize, and boom, you’ll now magically have new sizes created for all of your designs.
Canva Tip #31: Locking Elements
You can lock elements to prevent them from being moved by selecting the element, right-clicking, and selecting the ‘lock’ option from the menu.

Canva Tip #32: Business Logos
Let’s say you need to quickly create a logo, what are you going to do?
Well, in the past, you would have to hire a designer, wait a few weeks, and end up with a logo that probably looked pretty bad.
There’s a better way…
Just go to Canva Logo Templates. There are a million and 4 logos to pick from, but the search feature makes it easier to filter the results.
In our case, we’ll create a logo for a spicy sparkling water company.
I personally recommend using a logo that is visually simple and would look great when scaled up and down.
Canva Tip #33: Option Drag for Duplicating
Now let’s get ready for some finger jujitsu with some of our favorite keyboard shortcut tips for saving time in Canva.
To quickly duplicate something inside of Canva simply hold down the option key and drag. You can also hit command+D to duplicate an element as well. Or just copy and paste.
The choice is totally up to you.
Canva Tip #34: Alt Drag for Scaling Proportionally
Instead of scaling from a corner and moving an element over, you can hold down the option key and drag the corner of an element to have it proportionally scale from the middle.
Canva Tip #35: Select All Elements
You can select all elements in your entire scene by hitting Command+A.
Canva Tip #36: Add a Line with L
There are also different shortcuts for adding elements to your scene. For example,
You can add a line by clicking the letter L.
Canva Tip #37: Add a rectangle with R
You can add a rectangle by clicking the letter R.
Canva Tip #38: Circle with C
You can add a circle by clicking the letter C.
Canva Tip #39: Text box with T
You can add Text by clicking the letter T.
You can also edit the text using all the normal text modifiers that you would find in other software. For example:
To bold, the text hit command+B
to underline hit Command+U.
To italic hit Command+I.
I could go into all the other text shortcuts, but honestly, they’re a little boring. So I won’t.
Canva Tip #40: Recording Presentations
Now let’s talk about presentation tips.
You may not realize this, but Canva is one of the most intuitive and powerful presentation tools in the world. In my opinion, it is 10x better than PowerPoint.

You probably already know that you can present your designs like a slideshow by clicking ‘Share’ and selecting the Present button. However, you may not realize that you can also record your presentation screen at the same time.
Just go to ‘Share’, Present, and select present and record. From here, you can choose to have a video bubble or just your screen recording. This is a wonderful way to make informative videos like the one at the top of this article.
You can download these videos after you record them from the menu at the top.
Canva Tip #41: Notes for Presenting
Instead of trying to remember all of your notes off the top of your head, you can actually write down notes that you want to see during your presentation by clicking the ‘Notes’ tab at the bottom of the page.

Now, if you go to ‘Presenter View’ you will be able to see your notes in the sidebar. If you’re recording your screen, don’t worry, Canva won’t show your notes in the recorded presentation.
Canva Tip #42: Chat During Presentations
Presentations are great, but making them interactive makes them so much better. If you agree, leave a comment at the bottom of this article with your favorite ice cream flavor! Just kidding, you don’t have to do that.
Let’s say you’re speaking at a trade convention and you want your audience to interact with you by asking questions. That’s no problem, to create a chat inside Canva:
Click on the ‘Canva Live’ tab
Select ‘Start new session’.
From the presentation screen, you can show the link and code for your audience by clicking the ‘show’ button.
Now, when your audience posts a new chat you will see the comment directly in your sidebar.
If you really like a chat question or comment, you can make it bigger for your whole audience to see by selecting the ‘Make Bigger’ button on the comment.

It’s a great idea to set up the chat at the beginning of your presentations to get everyone excited.
Canva Tip #43: Presentation Countdown Timer
You may want to give your audience a countdown timer to build anticipation for your epic presentation.

Well, to create a countdown for a presentation in Canva, just select any number 0-9 from your presentation page. Now, a countdown timer will start.
The best part is, your audience will see the countdown timer, but you can still review your notes without distraction.
It’s a good idea to have an intro slide encouraging folks to ‘Join the Chat’ during this time if you will have an interactive chat box.
Once the timer hits 0 you can hit the ‘X’ key to clear your screen.
Canva Tip #44: Making Presentations Funner
There are some really fun keyboard shortcuts for spicing up your presentations. Some of my favorites are:
Blurring the Screen with the ‘B’ key
Drumroll with the D key
Mic Drop with the M key
Confetti with ‘C’ (My personal favorite)
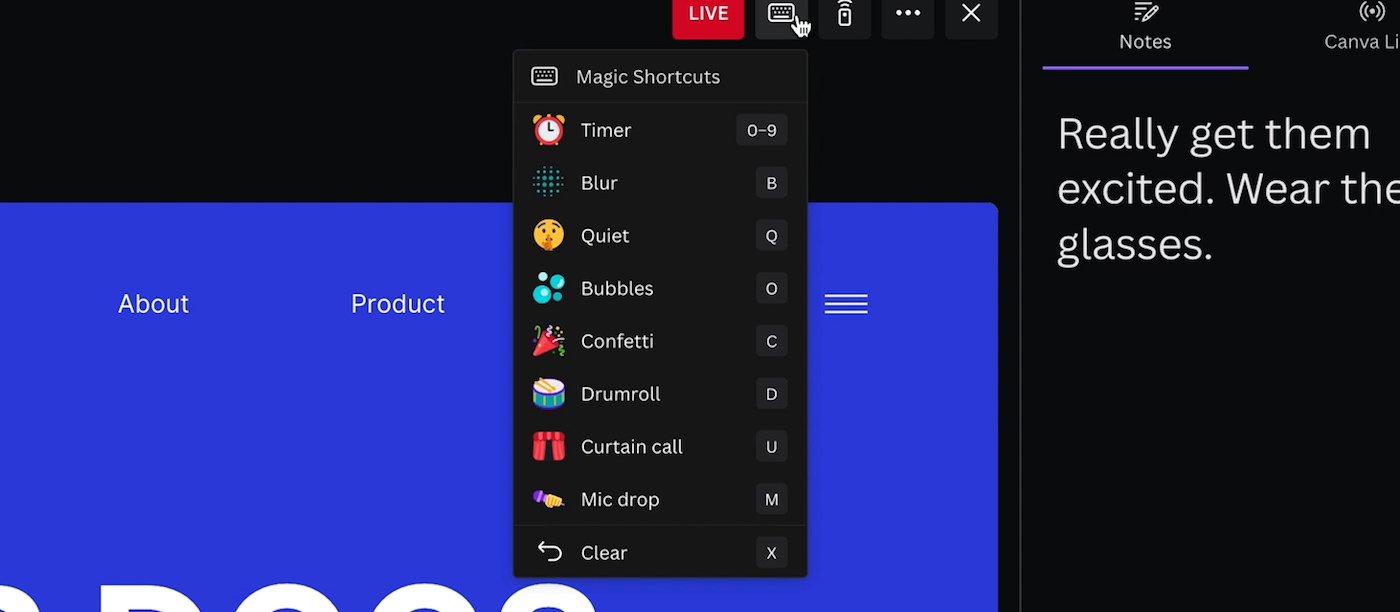
You can see the full list from the keyboard shortcut inside the presentation menu at the top.
Canva Tip #45: Remote Control
Let’s say you’re giving a presentation on a screen but you want to control the slides from your phone. That’s no problem. To create a remote control inside Canva:
Go to your presentation
Click the remote icon at the top of the screen
Select ‘Share Remote Control’
Now, you can copy the link and control your deck from any device in the world. Plus, as a bonus, you can activate the very important confetti feature from this remote control as well.

Canva Tip #46: Delivery Formats
All the tips up to this point have been leading us to this specific moment in time. Here are some pro tips in Canva.
This is an important tip that you need to know.
In Canva when you save a file there are different formats that you can choose from. However, If you’re like most people, you probably either pick JPG or PDF 90% of the time, but these formats aren’t right for many different scenarios.
So instead, here’s a quick breakdown of delivery formats in Canva:
JPEGs are great for regular photographs. However, if you save a JPEG with graphics it will create weird artifacts on the edges. So don’t do that.
PNGs are great for graphics and illustrations. But if you try to save a regular image as a PNG the file is probably going to be quite large.
Standard PDFs are perfect for digital documents.
Print PDFs are great for printing.
SVGs are great for web graphics.
MP4 video is a video format, but it is also highly compressed. If you ever need an MP4 video from Canva, it’s usually best to export it as double the size you need so it retains your graphic information.
A Gif is an animated sequence of images. The quality isn’t great, but what they lack in quality they make up for in hilarity.
Canva Tip #47: Transparent Backgrounds
PNGs and SVGs are great because you can save them with transparent backgrounds. So instead of a rectangular background, you can export the image in any shape you want.
To export a PNG or SVG with a transparent background in Canva:
Go to Share
Select PNG or SVG from the dropdown menu
Select the transparent background
Click Download
Now, your element will be downloaded with a transparent background.
Canva Tip #48: Sending Prototypes
Sometimes you may want to send a design to a client without any of the Canva branding. You simply want them to be able to see the design and that is it. Well, Canva calls these prototypes.
To link to a prototype in Canva:
Click the ‘Share’ button
Select ‘More’
Select ‘Share Prototype’
Now you can share the link with your clients, friends, or anyone else who just needs to see the design.
Canva Tip #49: Changing Logo Colors
What happens if someone sends a logo in one color, but you need to recolor it to another color for something like a website?

This logo cascade serves as a trust indicator on our product pages.
Well, easy peasy, here’s how to recolor a logo in Canva:
Import the logo into Canva and activate the background removal tool.
Now, you’ll have an isolated logo.
To colorize the logo go to ‘Edit Image’ and select the Duo-Tone color filter
Select any of the presets.
Now, change both colors to your desired logo color.
Now, you can export the logo as a PNG with transparent background and share it anywhere you want.
Canva Tip #50: QR Code Generator
When I first heard about QR codes, I thought they were gimmicky, but now… a decade later, they are one of the best tools for quickly sharing website links. Don’t believe me, just scan this link.

Canva comes equipped with a QR code generator. To turn any design into a QR code in Canva:
Click ‘Share’
Select ‘More’
Hit ‘QR Code’
From here, you can define your target URL and the design page.
Once you’re ready you can just download the design to your computer.
I also like using this feature with just a simple blank background. You can then import your QR code to a design and save it as a file like a PDF with the QR code on the design itself.
Canva Tip #51: Collaborative Commenting
If you’re collaborating on a project, it can be helpful to get direct feedback on the design by adding comments to your elements. To collaborate in this way, simply share the design with the person you’re looking for feedback from.

Now, anyone shared can select any element and select the ‘comment’ button. This new comment will have a text thread and can be checked off once the comment is resolved.
Canva Tip #52: Graphic Search Tool
I love this Canva tip.
There are a ton of icons and designs inside the Elements tab, but let's say you need something specific. Well, to narrow down your results even further, simply select the filters button, and choose the filters based on your specific design requirements like color, background transparency, and more.
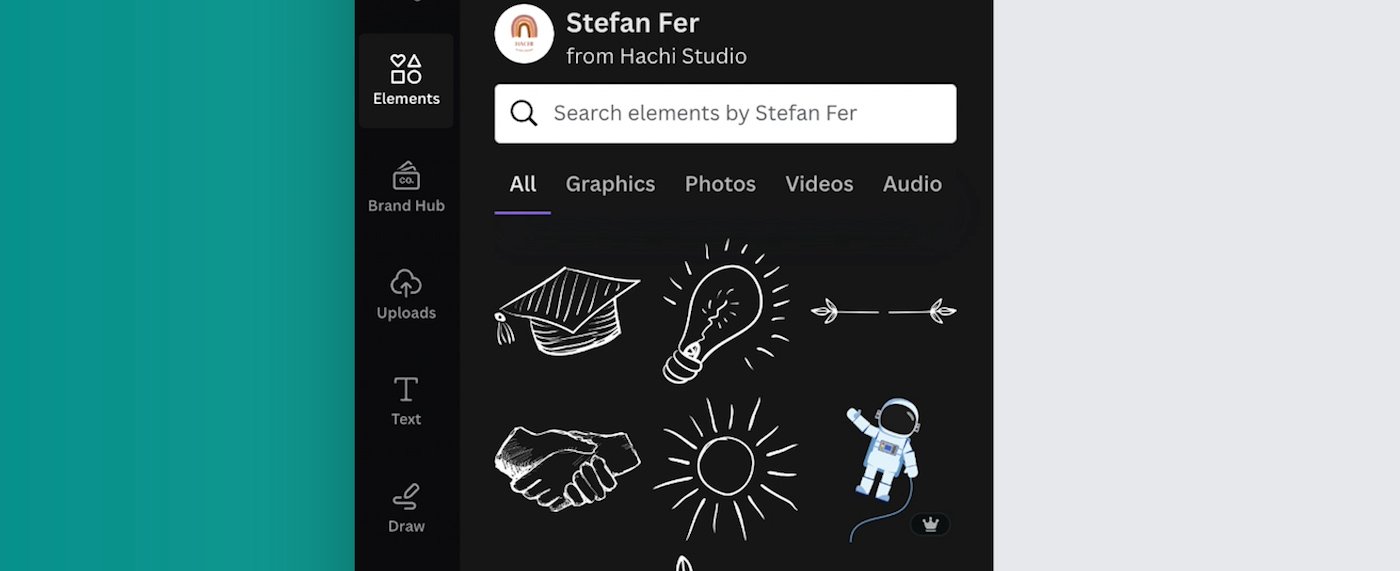
But if you really like a designer’s style, you can filter further by selecting the three dots at the top of the element inside the element search menu. Now, select the option to view more by that specific designer. This will pop up a new menu that will only show results from that specific designer.
Now, just like before, you can search to get designs in a similar style.
Canva Tip #53: Linking from Designs with PDFs
Sure, you can export a PDF with text in it, but did you know that you can link images and text in that PDF to other websites? To add a link to a PDF in Canva:
Just select the element you wish to link
Select the ‘Link’ icon from the top navigation. You can also hit Command+K to save time.
Now, drop in your link. Be sure to export as a ‘Standard PDF’.
You will now be able to click the link from the downloaded document.
Canva Tip #54: GIF Library
You can access tons of meme-worthy gifs using Giphy from the app menu.
From the search, you can access millions of GIFs.
Canva Tip #55: The Map Tool
You can add Google Maps directly to your designs. To use a map, just go to the App library and select ‘Google Maps’. Now just type in the place to be and click on it to add it to your design.

Canva Tip #56: YouTube Videos
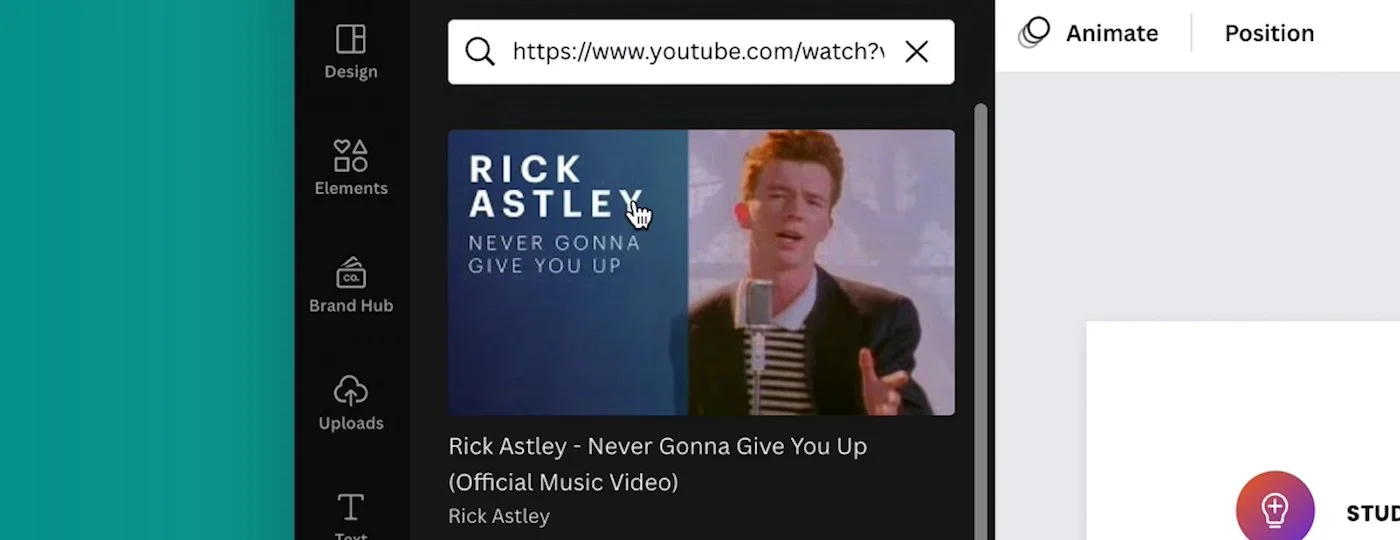
In a similar way, you can also embed YouTube videos directly into your designs. To add a YouTube video in Canva:
Navigate to Apps
Select YouTube
Search for Your Video
Click the Video to Drop it into Your Design
Now, when you present your design, you’ll have a YouTube video that will play back with sound.
Canva Tip #57: Quick Websites
You’ve just leveled up and it’s time to look at a few legendary tips inside Canva.
Did you know you can quickly create websites inside Canva? It’s absolutely bonkers.

While I wouldn’t recommend this system for any long-term sites, it can be a great way to do a quick landing page.
To create a website in Canva:
Select a website template from their website template menu
Customize your design
Click ‘Publish Website’.
You can pick a free Canva domain, or purchase your own domain for a fully customized website.
From the next page, you can customize your description for SEO and social sharing.
Remember those YouTube videos and Google Maps? They both still work on your new website. It’s pretty sweet!
Canva Tip #58: Social Publishing
You probably design social content directly inside Canva, which makes sense. But did you know you can publish your social content from Canva as well? This saves a ton of time from having to download the design and upload it to social media.
To share on social media from Canva:
Select ‘Share on Social’ from the share menu
Hit the account you want to share to.
Connect the account and share.
Canva Tip #59: Social Scheduling
Don’t want to share a social post right away? No problem. To schedule a social post in Canva:
Click ‘Share on Social’
Hit the ‘Schedule’ icon.
This will allow you to schedule your design at a future date.
I recommend trying out this tool a couple of times before you rely on it for long-term social planning.

Canva Tip #60: Animation Formats
Anybody can create a good design using templates, but if you give your design movement, it can really stand out. I like to animate my designs using the built-in animate feature. Just select the text or element you wish to animate and choose the animation style of choice.
But how do you know which format to save as? Well, here’s a quick breakdown of animation formats in Canva:
If you’re using simple graphics for a website, use the SVG setting.
If you’re using complex images for online sharing, use a gif.
If you’re using many complex elements for social sharing, use a video.

Canva Tip #61: Select Elements Behind Other Elements
Let’s say you want to select an element at the bottom of a stack of many layers. What are you supposed to do? Move them all out of the way one by one? Wrong… Just hold down command and click until you select the right element. Now you can move and scale the element as you need.
Canva Tip #62: Get Better Photos
The built-in stock photos in Cavna are good, but you can get even better photos by navigating to Apps and selecting the Pexels app. From here, you’ll have access to millions of incredibly high-quality images that you can use on any project for free.
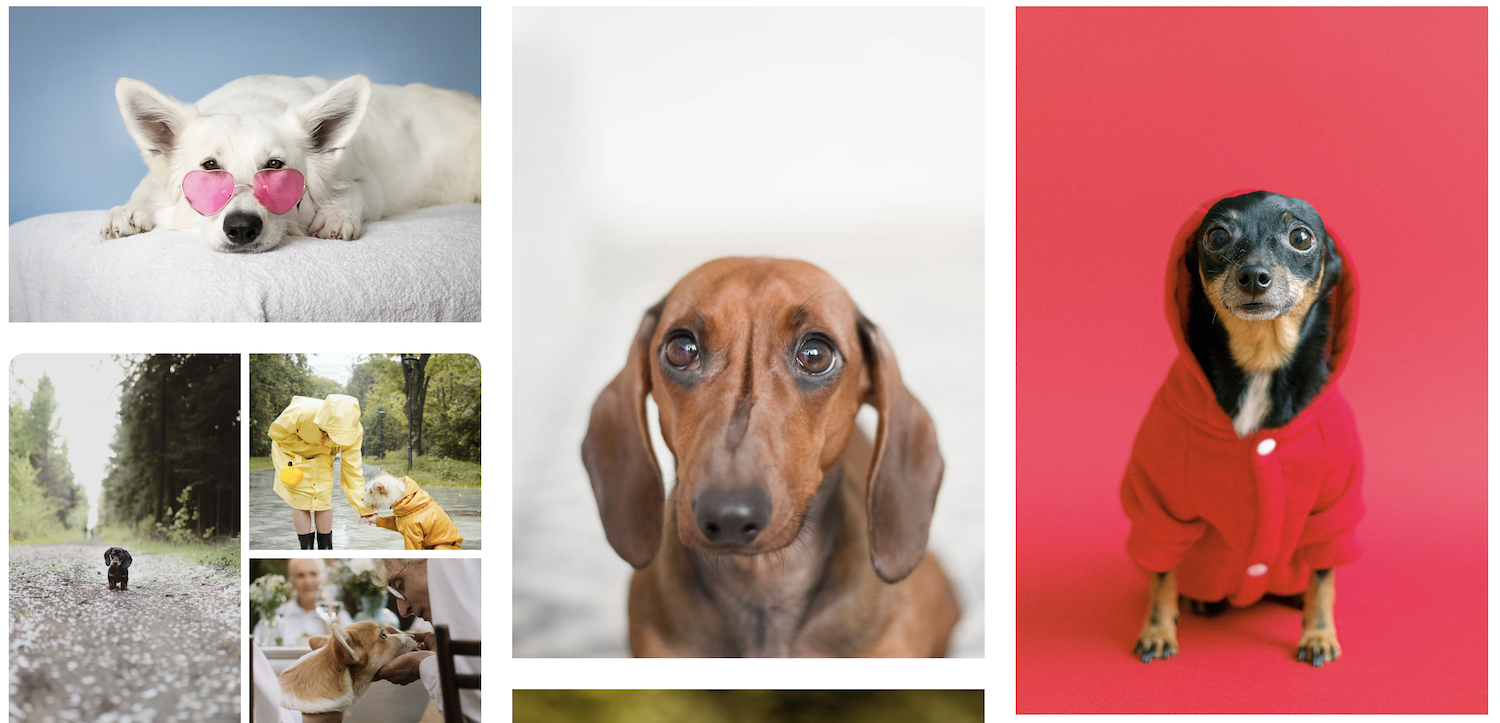
All the high-quality dog photos you could ask for…
Canva Tip #63: Access Brand Logos
If you do a lot of presentations, you may need to access brand logos from time to time. However, instead of running to Google to get brand logos, you can simply use the BrandFetch app to have an entire database of brand logos at your disposal.

Canva Tip #64: Tidy-Up Feature
A while ago, we talked about equal spacing in designs. It’s vitally important to have equal spacing to make your design feel cohesive, but instead of having to eyeball the design by hand, you can simply select all of the elements you want to align and hit the ‘Tidy Up’ feature.
This is a more advanced feature that will create consistent visual spacing both horizontally and vertically.
Canva Tip #65: Downloading Specific Items
Let’s say you need to download a few specific things from your design, and not the entire design itself. What are you going to do? Well, you could create a new design, adjust the size, remove unnecessary elements, and save. But that would be tedious.

Instead, just select the elements you want to export, right-click, and select “Download Selection”. This is a much faster way to access your elements.
Canva Tip #66: Font Pairing
Picking fonts that go well together can be tricky. If left to your own devices, you might pick Bleeding Cowboy and comic sans.
I don’t want this to happen to you, so if you’re ever in a pinch and are unsure about which fonts to choose, there’s a great blog article on Canva’s website that has a ton of great pairings with examples.

Some font pairing examples from Canva
I can’t recommend it enough if you are new to the world of typography.
Canva Tip #67: Brand Controls
If you work with more than one designer, it can be challenging to make sure all of your designs have the same general style.
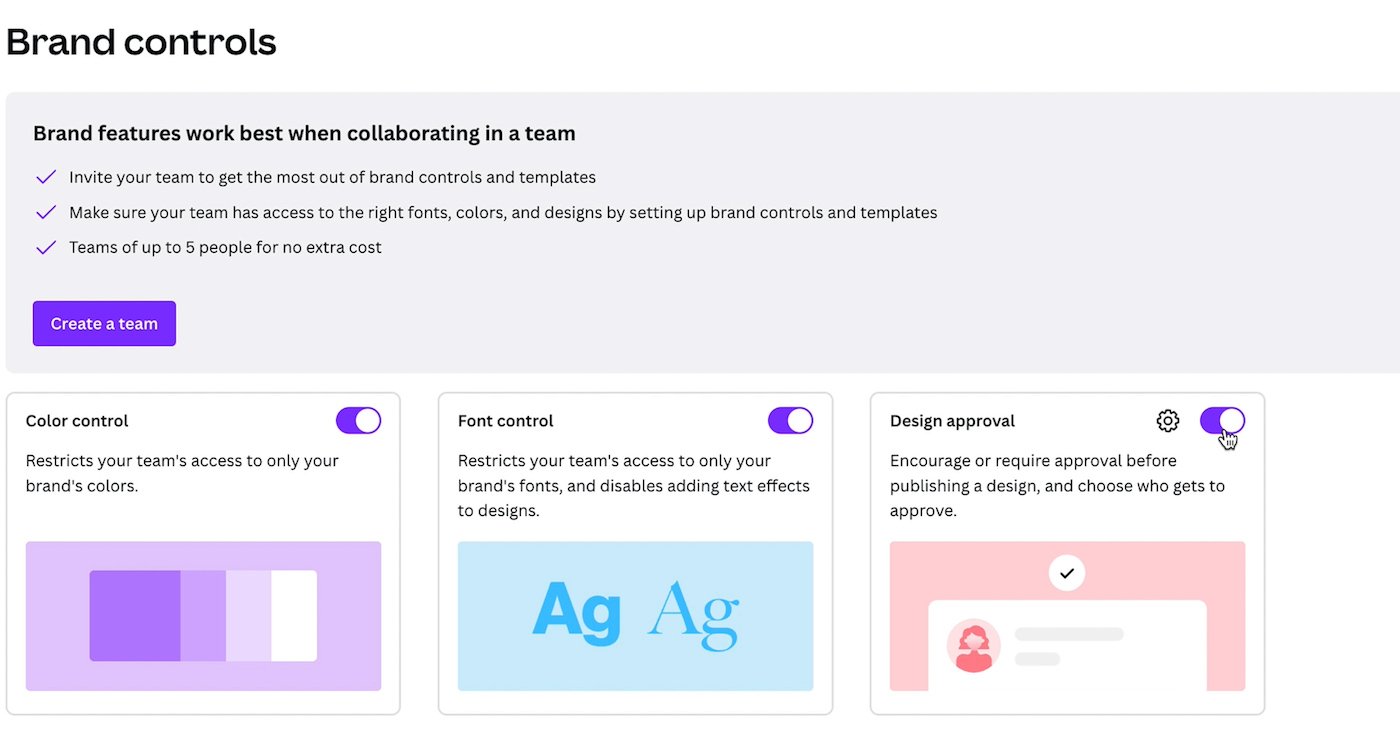
Well, you can fix this problem in Canva by using the Brand Controls Tab. From here you can restrict colors and fonts to be limited to the ones defined in your brand guidelines. If you have a creative director, you can require artists to submit projects for approval before publishing as well.
Canva Tip #68: Color Pallet Library
You should never pick colors by hand. Instead, it’s almost always better to use a color palette that has been created by a pro.
As I said earlier, you can steal borrow colors from other projects in Behance.
Or you can use Canva’s color palette library to find a good color scheme or the Coolors.co website to navigate good color schemes.
Inside Canva’s color palette library, you can even upload an image to get colors directly from a picture.

Canva Tip #69: Importing PDFs
By this point, you know that you can export PDFs, but you can also import and edit PDFs directly in Canva as well. Just import the PDF and select the elements to start editing. This allows you to change the design to your liking and utilize Canva’s elements and editing features to add your own creative flair.
Canva Tip #70: Smart Mockups
A mockup is a super quick way to visualize how your graphic will look in the real world. It can also be used to create a pretend prototype which can increase the perceived value of your designs.
To create a mockup in Canva:
Import an image that you want to use as a mockup.
Select the image and click the ‘Edit Image’ button.
Go to the Smartmockups tab and select ‘See all’ from the menu.
From here you’ll see a few dozen different mockups that you can use to create prototypes.
Select the one you want to use.
Click again to open up the settings menu.
From here you can adjust your design as needed.

Canva Tip #71: Print Your Designs
Canva has a built-in printshop on demand at any time. If you ever want to put your design on real-world swag like hoodies, canvases, or tote bags, you can easily print them.
To Print in Canva:
Just go to the ‘Share’ button
Select “Print Your Design”
You will probably need to resize your design to the exact specs of the print option, but once you’ve checked all your bases, you can print directly from Canva.
Plus, they guarantee their prints. So if you’re not happy with the quality they will make it right. They’ve also partnered with printshops like FedEx to allow you to pick up the prints locally as quickly as possible.
Canva Tip #72: Blemish Removal
You can utilize the power of AI to remove blemishes from your photos. To remove blemishes in Canva:
Just select the photo in your Canvas
Go to ‘Edit Image’
Select ‘Face Retouch’.
Now, you can adjust the settings as needed.
These changes are subtle, but the AI integration makes the corrections very natural compared to normal blemish-removal tools.
Canva Tip #73: AI Artwork
If you’re into AI artwork, you’ve probably used tools like Midjourney or Dall-e to create some cool designs, but you may not realize that Canva actually has an AI artwork tool directly inside as well.
To use AI to create artwork in Canva:
Just navigate to the ‘Apps’ panel
Select ‘Text to Image’
From here, you can type in just about any design idea in the world. For our example, we’ll say a Renaissance painting of a dog driving a motorcycle.
Your new artwork will be auto-generated and it can even be used with the built-in editing tools like the background remover.

Canva Tip #74: Magic Blurs
Typically in beautiful photography shots, you will have a subject with a blurry background. However, sometimes you will only have a photo with the entire frame in focus. But that’s no problem, we can make any photo look professional inside Canva.

To use the Magic Blur Tool in Canva:
Simply import your image into your canvas.
Now, select the ‘Edit Image’ button
Navigate to the ‘Auto-Focus’ button.
Canva will now interpret your photo and use AI to create a realistic blur.
The craziest part is, you can adjust the blur distance and level as if you are actually focusing on the scene. How is this even real?
Join Our Design Community for Free
If you’d like to join our free community with entrepreneurs and designers who can give you feedback on your artwork. You can sign up on our signup page to get access.
You’ll be able to join our private Discord channel and I’ll even give you a free PDF with all of these Canva tips inside.

Thank you so much for reading this article, and if you have any ideas for future content, let us know in the comments. Shelby and I are both so thankful for everyone who contributes to Curious Refuge. We’ll see you in the next one.