Create Cinematic AI Videos Using Haiper | A Step-by-Step Tutorial

In this article and video tutorial, I will show you how to use my favorite free AI video generator, Haiper.
When generating AI videos, there can oftentimes be a small barrier to entry for people who do not want to spend loads of money on tokens or generations. There are multiple free AI Video generators out there, but most of them don’t make the cut when it comes to quality.
We’ve tested them out and found that Haiper AI is the best free AI video generator on the market. In this article and video tutorial, I will show you how to create cinematic AI videos for free using Haiper.
Let’s hop in.
Haiper Video Tutorial: Create the Best Cinematic AI Videos for Free
Below is a Haiper AI video tutorial covering some of my favorite workflows for creating cinematic AI videos for free.

HOW TO CREATE CINEMATIC AI VIDEOS USING HAIPER
Let’s take a step-by-step look at how to create cinematic AI videos for free using Haiper.
1. Prompt an Image Using Your Favorite AI Image Generator
Haiper currently offers 3 different features, text to video, image to video, and video inpainting. For this tutorial we are focusing on utilizing Haiper’s image-to-video workflow.
When it comes to prompting for your images, you can use whichever image generator you prefer. Our favorite is midjourney.
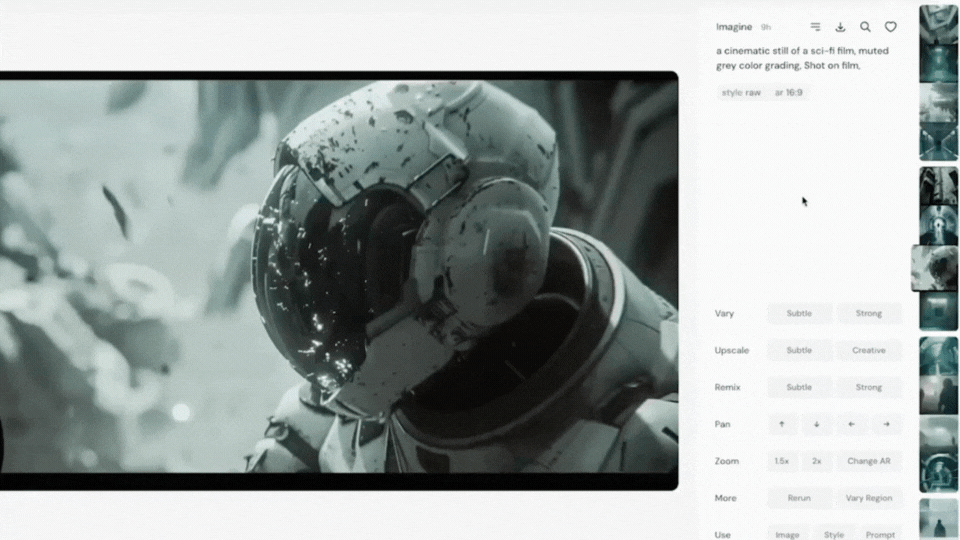
For this generation I’m going to say,
‘A cinematic still of a sci-fi film, muted grey color grading, shot on film’
As usual Midjourney prompted some spectacular images.

2. Upscale Your Image
Obviously, if you are not using Midjourney as your image generator, then feel free to jump to the next step.
Once you have prompted your perfect image, now it is time to upscale. Some image generators, like midjourney, have a built-in upscale feature. I typically utilize midjourney’s upscale feature, on top of another external upscale tool.
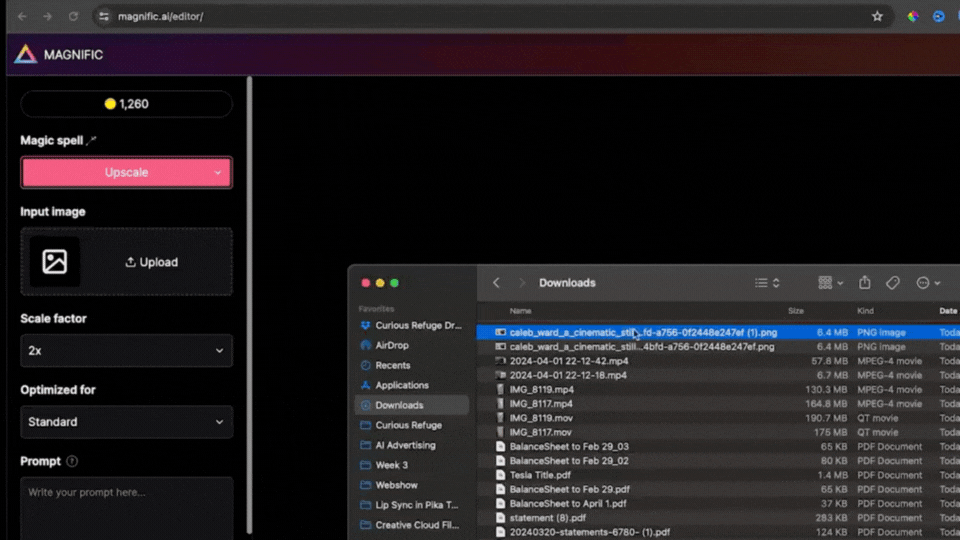
3. Upscale in Your Favorite AI Image Enhance Tool (Mine is Magnific)
As I mentioned before, some image generators, like Midjourney, have a built in upscale feature. I typically do utilize midjourney’s upscale feature, but I still use an additional image upscaler and have found Magnific to be my favorite.
Magnific tends to sharpen the images in a better way compared to midjourney’s image upscale to. Below is a quick step-by-step showing how to use Magnific.
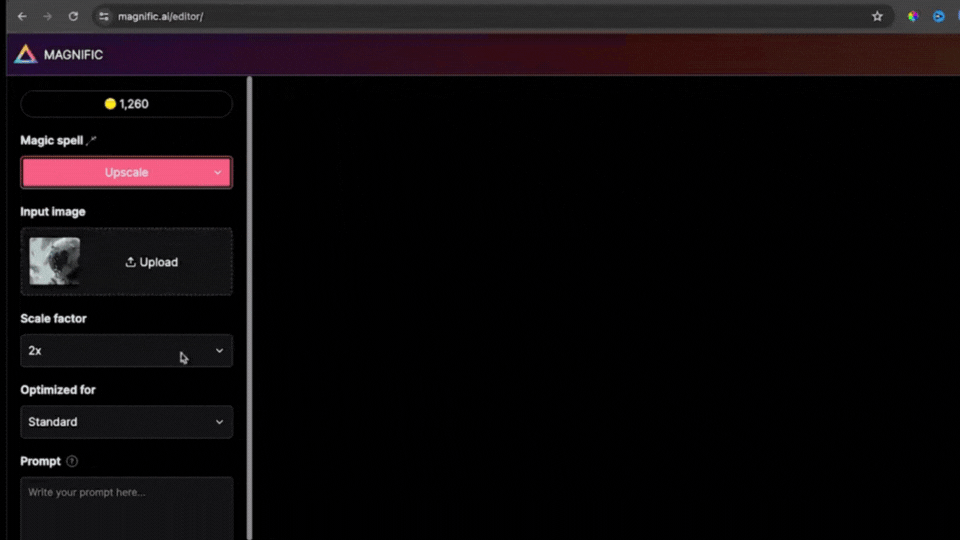
1. Upload Your Image
The next few steps will be helpful primarily for those specifically using Magnific. If you are not using Magnific, feel free to skip the next few steps.
You can drag and drop your image into Magnific, or click upload and navigate to the image you would like to upscale.
2. Select 2x for the Scale Factor
Feel free to choose a higher scale factor if you haven’t already upresed your image in midjourney.
3. Type in Your Prompt
Even though it may seem pointless, adding in a prompt when upscaling is an important step in refining your shot to be the most cinematic possible.
4. Turn Up The Resemblance
Turning up the resemblance helps to keep the output closer to the original image. Sometimes Magnific can taint the image in the upscale process a tad too much, where the output is too far off the original.

5. Click Upscale
Magnific tends to be pretty fast with their generating, so this shouldn’t take more than 10 to 20 seconds.
6. Download Your Image and Head Over to Haiper.AI
Click download in the top right corner, and you are good to go.
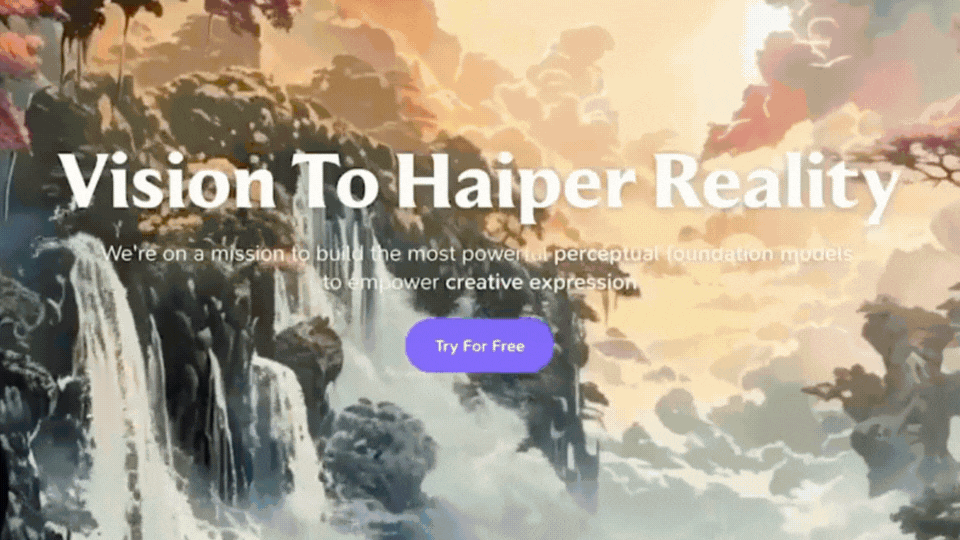
4. Go To Haiper’s Website
Once you have upscaled your image, head over to our favorite Free AI video generator, Haiper.
5. Click on ‘Try for Free’
‘Try for Free’ will take you to the studio where you can see the AI tools that Haiper offers.
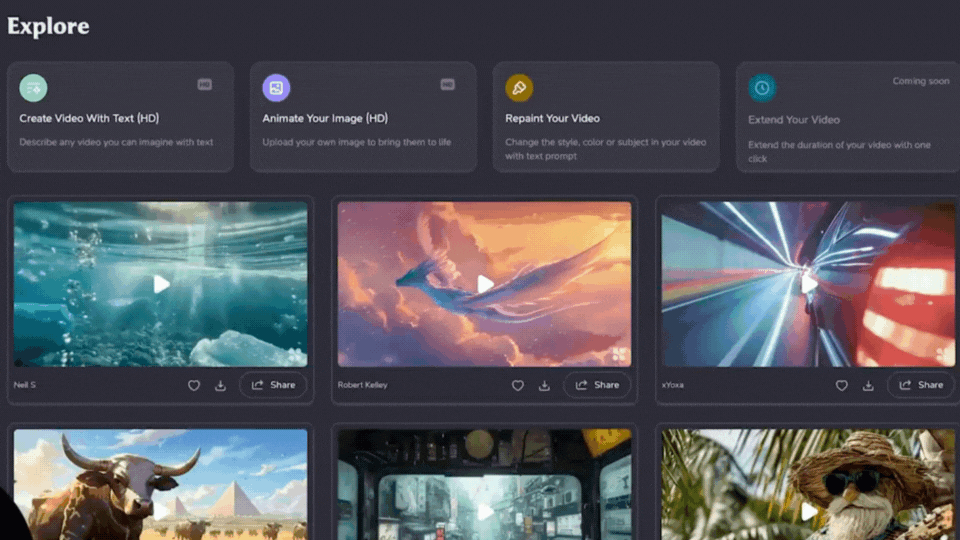
6. Don’t Get Distracted by Haiper’s Phenomenal explore page!
Haiper has a spectacular explore page that offers different films created utilizing their tools. You’ll definitely want to check it out, but don’t forget about the short film you are creating.
7. Click ‘Animate Your Image (HD)’
As I said, Haiper offers a handful of different tools, but for this tutorial we will use their image-to-video generator.
8. Upload Your Image
Do you remember the image we prompted in Midjourney? Now it’s time to upload it into Haiper.
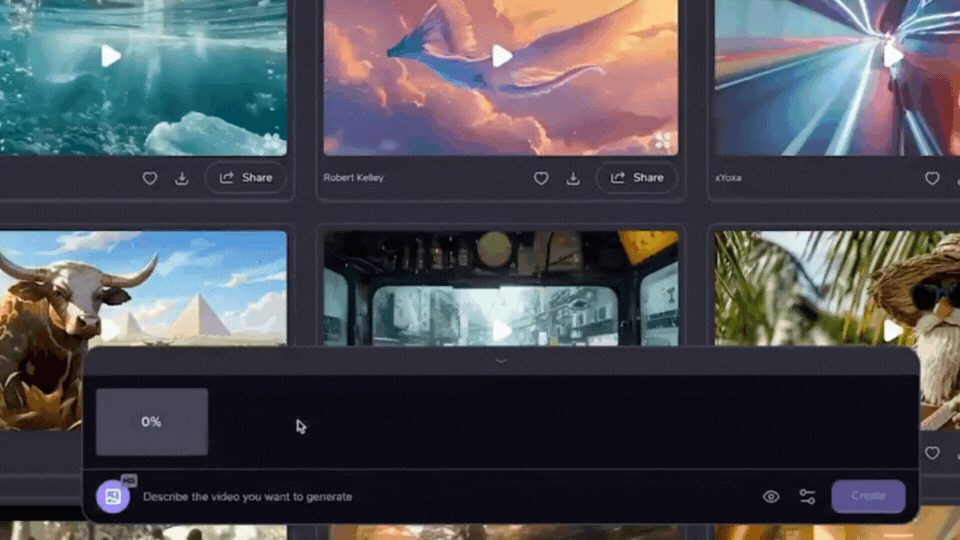
9. Type in your Prompt
Again, it may seem pointless to type in a prompt, but it is definitely not. Type in your prompt to help refine your scene to be better quality and closer to what you are wanting for your film.
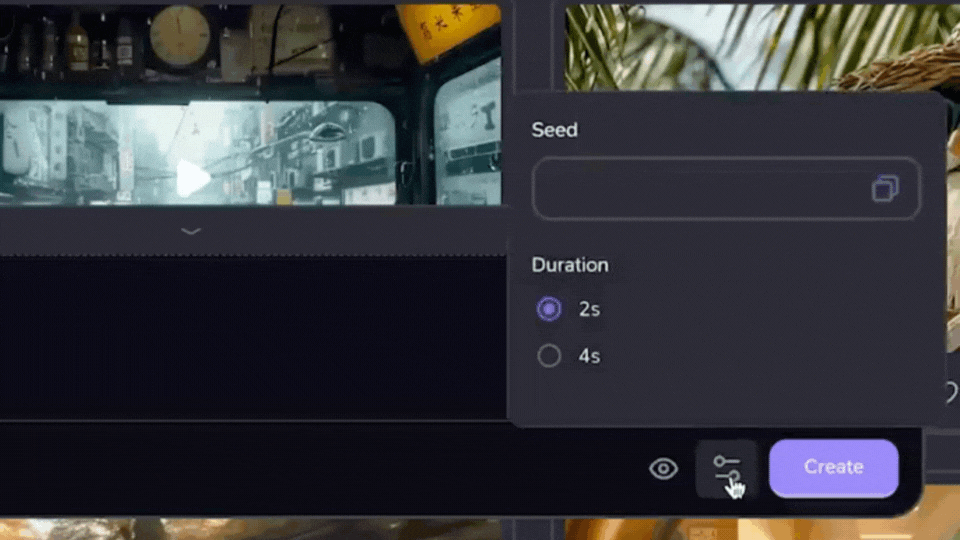
10. Select Your Desired Shot Length
Haiper gives you the option to generate a clip that is two seconds long, as well as 4 seconds long. I tend to prefer 4 seconds. 2-second clips feel as though they are often too short.
11. Upres Your Haiper AI-Generated Shot
When you download your AI video from Haiper, the quality is 1280x720.
Our favorite video upres tool is Topaz Video AI. They currently are the best tool on the market when it comes to upresing and interpolating videos.
Below I will show you how to utilize Topaz Video AI to upres your AI Video.
1. Upload your Shot into Topaz Video Ai
Similar to Magnfiic, you can either drag and drop your video or select ‘upload.’

2. Choose Your Desired Output Resolution
I typically use 4k, this way my computer isn’t bogged down by replaying 8k footage over and over while editing.
3. Select Your Desired Frame Rate
I keep the frame rate at 23.976fps because that looks the most cinematic, but choose whichever frame rate you need for your project.

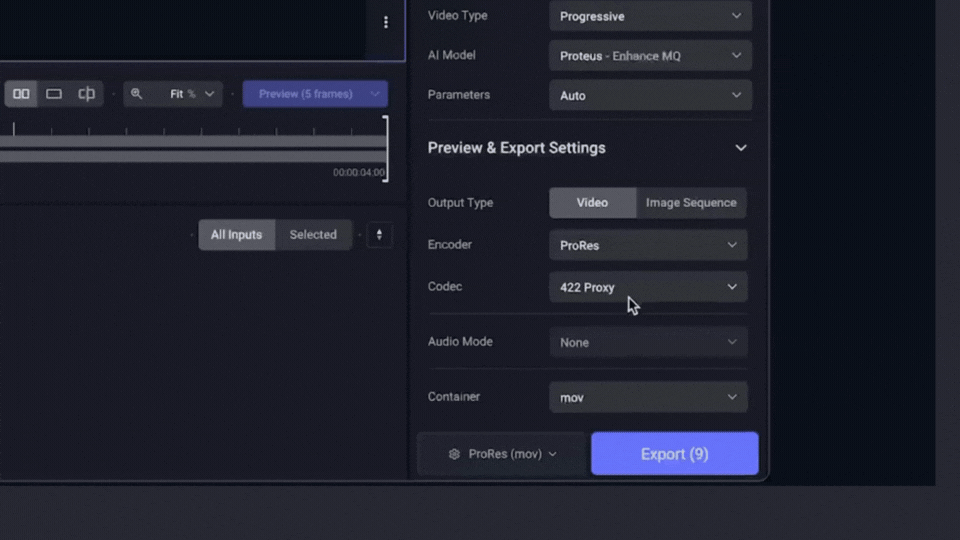
4. Choose Your Desired AI Model
We use different AI models for different types of shots, but the Proteus model is the one we most often use. This model tends to do that best with not tainting the originally video during to upres process.
5. Export Your Clip
Press export in the bottom right hand corner, then you’ll get to select where you want to export your upresed footage to.
12. Repeat Steps 1 Through 21
Now it’s time to start the process over. Repeat steps 1-21 until you get your desired shots. This will take some time because you will need to refine the shots until you get your ideal sequence.
13. Edit Your Shots Together
Now it’s time to choose your music, edit your shots together, and create a free AI video masterpiece.
14. Remember these Tips for Editing an AI Video Shot Sequence
Utilize Color Grading: Color grading can be a small thing that can help draw shots together and make the styles more similar.
Add sound FX: You can use AI-generated SFX, like the ones Pika and Elvenlabs offer, or you can go to a stock music library (our favorite is Artlist).
Extend Shots with Frame Interpolation: If you are trying to get more out of your shot, try interpolating it with Topaz Video AI, then modify it to 23.976 frames per second to extend it. This will slow down the footage, but will also extend it.
15. Share Your work on Social Media (Don’t forget to tag us)
We love being tagged in short films on social media. Wherever you post it, make sure you send it out way. We would love to see it. Who knows, maybe it will end up in our AI film gallery.
Learn to Utilize AI Video Generators in your Workflow
AI tools, specifically AI video generators, can often be intimidating. It seems like every single day there’s a new pool of AI tools released. In the last year, we have seen probably close to 10 new AI video generators competing for the spot as the best, and that’s not even including those tools updates.
One of our favorite things to do is train people on using AI tools just like this. We have multiple AI courses that do just that!
We are proud to offer courses for those desiring to learn AI Filmmaking, AI Advertising, and now AI Documentary as well. We would love for you to join us on your learning journey! :)


We completely understand if you are just looking for a way to stay up to date on the latest AI news and tools. Feel free to subscribe below. We send a newsletter every single week highlighting the latest tools and AI news as it relates to those in the creative industry.
We also offer a free AI Filmmaking course if you’re interested! Feel free to check it out and let us know if you have any questions at all!