How to Create an Animated Film Using AI | Step-By-Step

In this video and article, I will show you how to create an animated film using AI.
There seem to be a lot of people saying that there are now tools where you can now just plug in a script and it will create an animatred film for you in one click of a button.
That’s somewhat true, but the results are pretty bad.
In this article and video tutorial, I will show you exactly how to create an animated film utilizing the latest AI tools. This is a professional workflow that will help you create films that resemble a massive production.
Enjoy!
How to Create an Animated Film Using AI | Professional Workflow
Below is a video tutorial showing how to create an animated film utilizing AI.
How to Create an Animated Film Using AI Tools
Below is an in-depth walkthrough for how you can create an animated film using AI.
1. Start With a Story
Every great animated project begins with a solid story. Before you open any tools, spend time coming up with a simple premise and a few emotional beats.
AI can help you brainstorm ideas, but don’t let it become the author. Use ChatGPT to generate variations, twists, or character ideas, but keep your voice at the center.

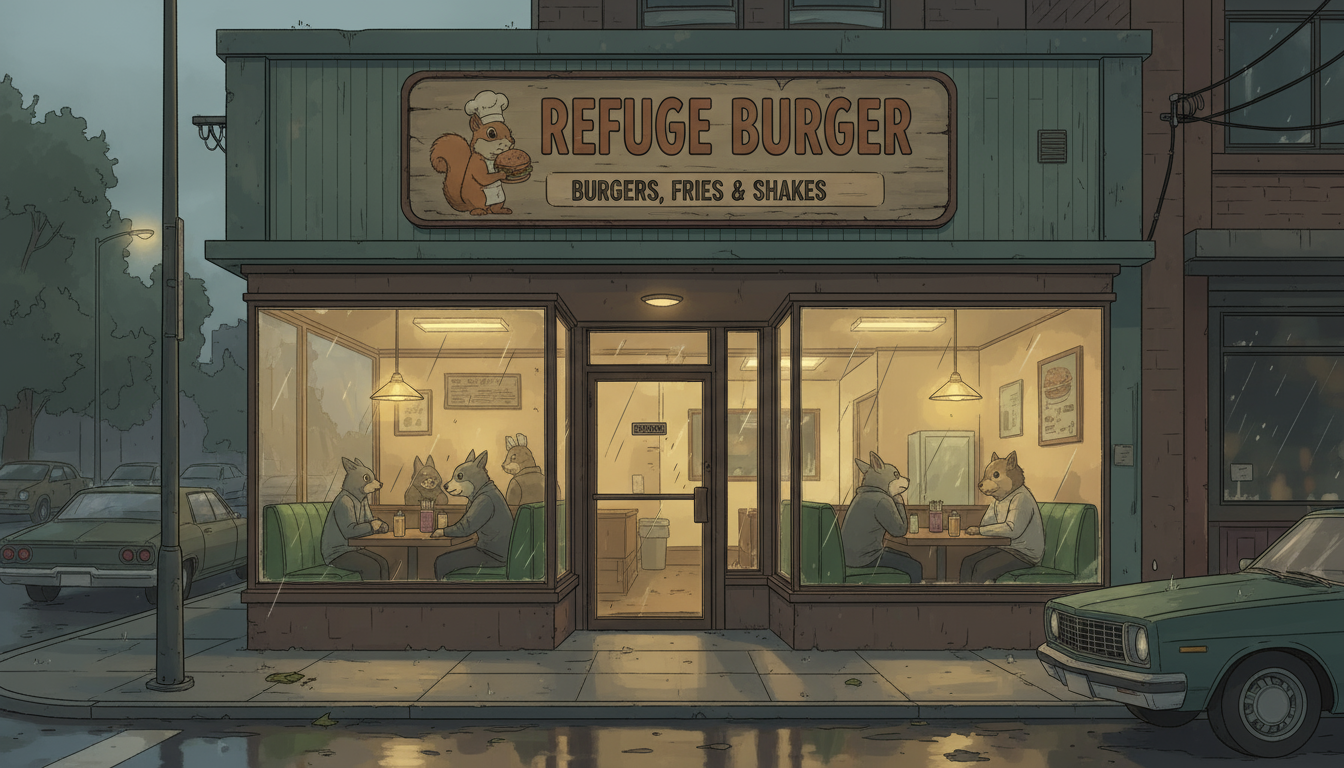

I created an animated story where a dog goes to a diner called the reuge diner to get something to eat. He finds out they only serve food with peanuts in all of the recipes. Unfortunately, he’s allergic to peanuts, but its been awhile so he gives it a shot. He eats the burger, then dies.
Super uplifting, I know.
2. Don’t Rely on “One-Click” Animation Tools
There has been a ton of hype recently surrounding Sora 2, with a lot of people saying its can create this whole film for you, just upload the script and images. Well, that’s what we did, and you can see the results below.
As to be expected, Sora 2 cannot do that and the tools is pretty overhyped.
Let’s keep going with the workflow that will actually work for you.
3. Design Your Main Character in Midjourney
There are a ton of tools for developing your characters and defining looks, but our favorite tool for getting started with this is Midjourney. Midjourney does a phenomenal job creating diverse options, and its prompt adherence is pretty strong.

The example above is the first character we utilized as our first one, and we leverage this image in the next step to help us create images of the other characters in the film as well.
4. Create Additional Characters and Locations Using Nano Banana
Once you have your main character, you can use that as a reference character in Nano Banana (we live using Freepik) to help create additional images for the film.
5. Record a Rough Audio Cut Before Animating
Unlike live-action, animation benefits from having the audio established first. Record a rough version of the dialogue using your voice actor (or temp audio if needed).
This early audio cut helps determine shot timing, pacing, and emotional beats. It also allows your animation tools to better match mouth movements during the animation stage.
6. Build a Shot List in a Simple Spreadsheet

Before generating more images, create a shot list. This can be something as simple as a spreadsheet with three columns: shot number, description, and status.
Describe what each shot needs to portray, like “exterior establishing shot of restaurant at night” or “close-up of squirrel realizing the burger has nuts.”
Here’s an image of my basic shot list.
There are lots of tools you can utilize for a shot list, but on most of the professional projects we have worked on, a lot of people keep it simple and stick with using a basic spreadsheet.
7. Generate All Images for Your Film
Using your shot list as a guide, start generating the images (style frames) you need for each shot.
Work systematically: import your character reference images into Nano Banana again, and prompt one shot at a time.


With each image that I felt comfortable with, I would then add it in as a reference image to just continue to help the generations remain consistent across the board.
8. Upscale Your Images to Improve Quality
Once you have generated images for each of your shots, they need to be upscaled. Our favorite tool to upscale images is Gigapixel by Topaz Labs.

Before Upscale

After Upscale
You can see in the example above, the image on the right has more clarity than the one on the left. This animated style can hide low-res images pretty well, but if you look closely the differentce in quality is still pretty clear.
Upscaling your images increases resolution and detail while keeping the aesthetic intact. This step is crucial because many AI-generated images start at relatively low resolutions.
After upscaling, you can bring the images into your video editing software to assemble a rough storyboard cut and confirm that the movie flows well.
9. Animate the Frames Using Google Veo
Now it’s time to animate. We are going to use Google’s Veo 3.1 because we wanted to utilize one of it’s features (start and end frame) for this project, but you can use whichever AI Video Generator you currently subscribe to or prefer.

First Frame

Last Frame
There are a ton, so if you want to see how they compare to one another, you can check out our AI tools page where we run each model through some tests in order to see which is the best and most consistent.
10. Edit the Film Together
Bring all your animated clips and the audio into your video editor. Match the footage to your audio track and trim or cut around any strange moments in the animation. Your job here is to preserve clarity, rhythm, and storytelling. If certain lip movements don’t match the dialogue, mark those spots for adjustments later.
Above is a cut of the animation without any audio.
11. Fix Lip Sync with ADR (Not Auto Sync Tools)
Instead of using auto lip-sync features (which are still hit-or-miss), send your animated shots to your voice actor and have them re-perform their lines while watching the animation.
This is a standard film industry practice called ADR (Automated Dialogue Replacement), and it produces much more believable lip-sync and emotional nuance. Once ADR is complete, re-sync the updated audio in your editor.
12. Final Upscale and Export
After your edit is locked and audio is finalized, upscale your animated shots using Topaz Video AI. This gives your footage clean detail and polished visual consistency.
Export your final video in the resolution you need, typically 1080p or 4K, depending on your end platform. And just like that, you’ve created a professional AI animated film.
Learn Professional AI Animation Workflows
Creating Animated films has always been an incredibly daunting and technical task that takes years of experience. With recent AI developments, you can actually create your very own animated film without needing a massive budget or extensive experience.
If this interests you, check out our AI Animation course, where we teach you the latest techniques for creating professional AI Animated films using the latest tools.