How To Create Cinematic AI Videos In SORA | FREE PDF Guide
In this article and video tutorial, I'll share tips that will help you create cinematic AI videos with SORA.
Well, the wait is over!
SORA is finally publicly available, after plenty of anticipation.
This video generator from OpenAI is getting tons of attention from AI filmmakers and the media. We’ve seen a lot of new video generation tools released over the last year, but SORA might be the GOAT.
So, does it really live up to the hype?
And what are some features that make SORA unique?
Below is a SORA video tutorial that shows you everything you need to know about using OpenAI’s new video generator.
We also created a FREE Cinematic Prompting Guide for you. Enjoy!
How To Create Cinematic AI Videos in SORA
Below we’ll walk you through how to use all the special features inside SORA, so you know exactly what to expect.
We even threw in a “bonus tip” at the end that shows you a secret feature that only SORA is capable of, right now.
1. Go to sora.com
To get started, head over to sora.com and log in with your ChatGPT account info.
You can check out the “Recent” and “Featured” sections on the left side of the homepage to watch generations made by other people.
You can even save videos and see the exact prompts that other people have used (similar to Midjourney’s “Explore” page).
2. Enter a prompt
But you’re probably eager to start creating your own videos, so here we go!
In the prompt box at the bottom of your screen, describe the scene you would like to create.
SORA defaults to a very cinematic, live action aesthetic, but feel free to make your prompt as detailed as you’d like. Use words like “animated” or “3D” or “illustration” if you’re aiming for non-realistic results.
3. Select your aspect ratio
Pick from 16:9, 1:1 or 9:16, for your aspect ratio.
We always recommend 16:9 for a cinematic look! 9:16 is the aspect ratio you’ll want to use if you’re creating vertical content for social media.
4. Choose your resolution
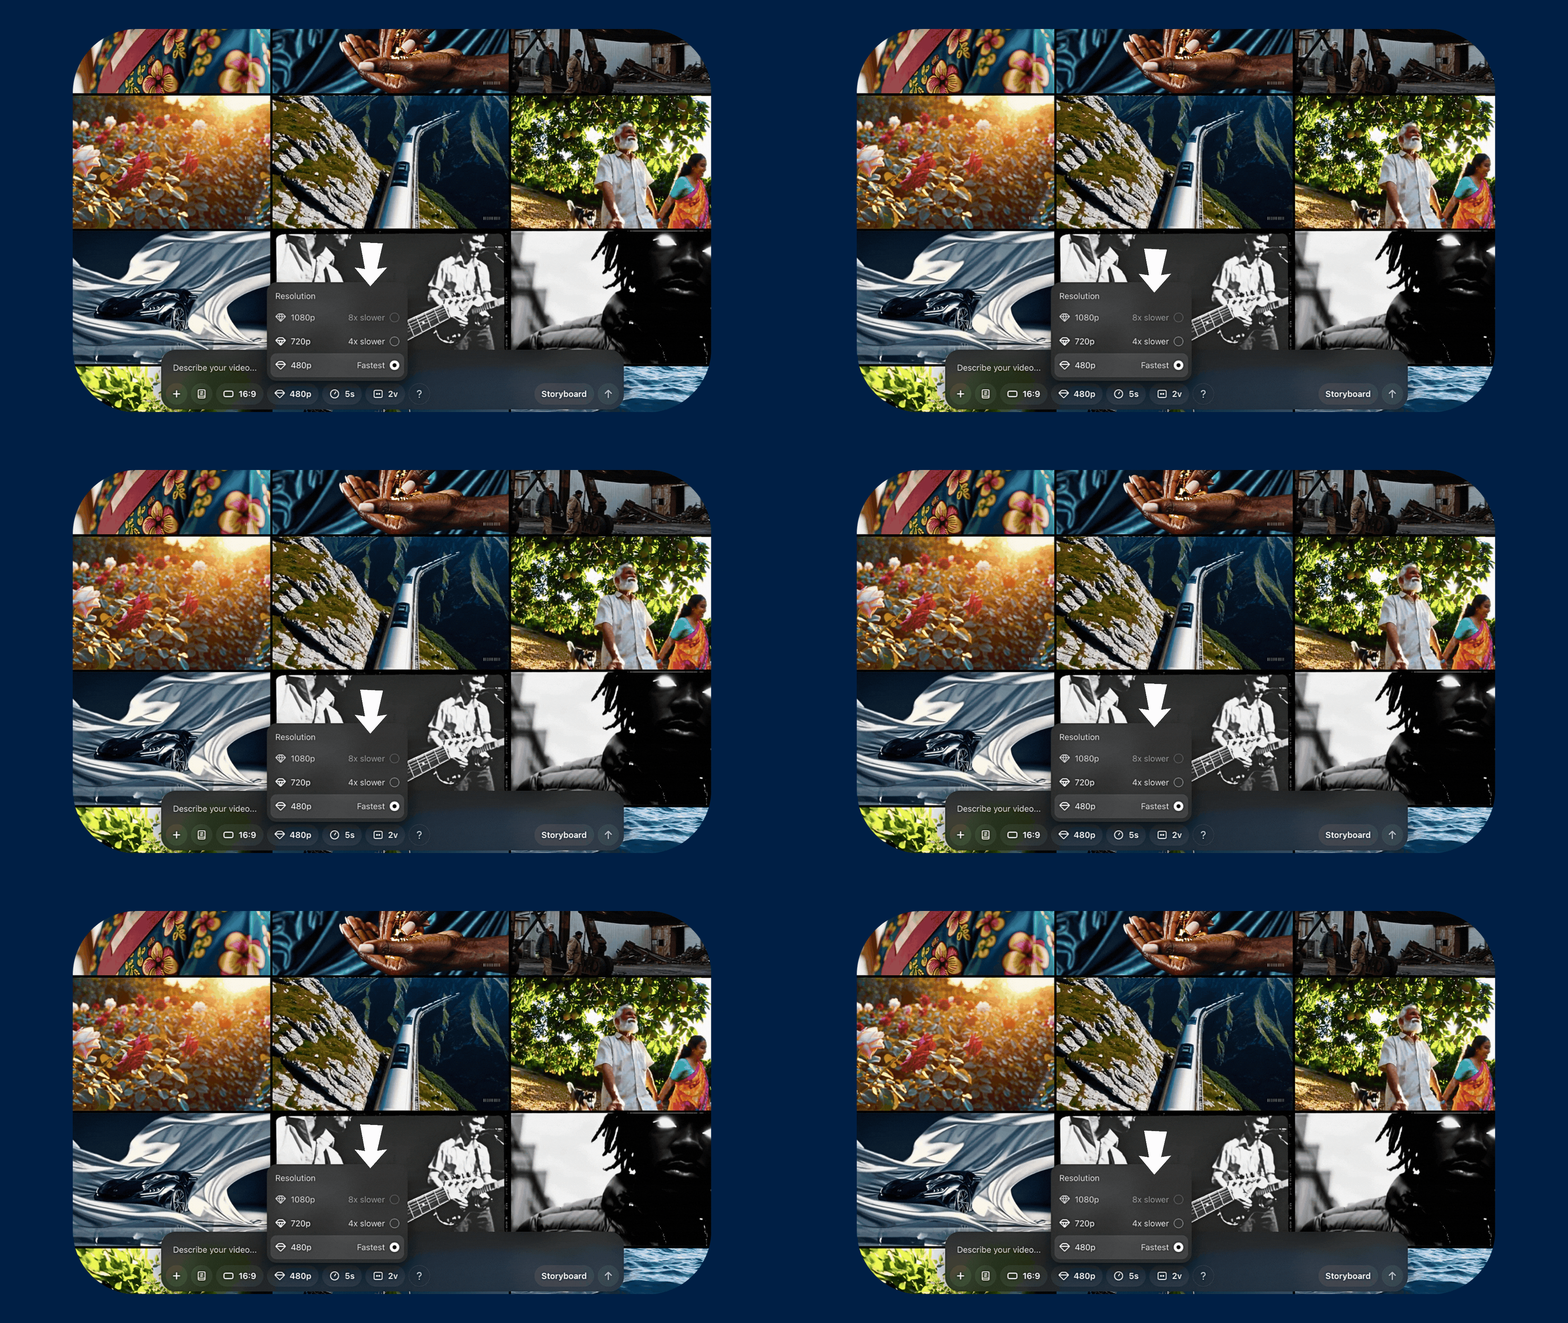
Next you can choose between 480P, 720P and 1080P resolution. This will determine the quality of your video output.
In the platform, SORA provides a warning that 720P and 1080P will take significantly longer to generate than 480P, but we tried it… and honestly, the wait isn’t too bad!
If you plan on creating a high quality, cinematic video we definitely recommend 1080P.
Video upscalers like Topaz Labs can help enhance the visual feel, but we always recommend exporting at the highest possible resolution, whenever you can.
5. Change video duration
Depending on the plan you chose, you’ll be able to choose a duration between 5-20 seconds long.
One cool feature is that when you select 480P, you’ll automatically have the ability to generate 4 videos at once. This is super helpful because it will most likely take between 4-12 generations to achieve the shot you really want!
6. Make image to video generations
Next, we’ll tell you how to use the image to video feature inside SORA, where you can upload a photo or picture you took or generated.
Simply go to the Plus icon in the prompt box.
Upload an image.
In the prompt box, feel free to describe the image and what type of shot you would like. Generate! Your results will show up in your Library on the left hand side of the platform.
Keep in mind your generations might be unexpected! SORA tends to add extra scenes and random reactions inside videos, even when you don’t ask for it.
7. Explore the Storyboard feature
One unique feature inside SORA is Storyboard.
When you click it, SORA will create a timeline using your uploaded image as the first frame. You’ll be able to prompt more videos directly into the timeline here.
Storyboard is worth exploring, but it definitely has a mind of its own!
We recommend playing around with it.
8. Edit with “Recut”
SORA tends to add in unnecessary shots, cutting away from your subject to an alternate angle. While this works occasionally, it might not be what you’re looking for.
Luckily, the “re-cut” option in SORA allows you to modify segments of your generations.
Just gab the slider in the timeline and adjust to see only the section of the generation you want more of. Then, hit “Create”.
Use recut to edit around SORA’s weird tendency to add alternate angles or mini scenes inside your generations.
9. Transform videos with “Remix”
You can also use any of your generations (or any from the public “featured” section) and remix it to change the contents of a video while keeping the original composition and movements.
Beneath the generated video, click on the “Remix” button.
Now you get to describe what you would like to replace.
You’ll be prompted to choose the strength of your remix. “Subtle” will be rather minimal, “Mild” will change some things and “Strong” will be the most drastic.
Hit “Remix” and in about 1 minute, your generation should be ready.
10. Create an infinite “Loop”
Loop is an awesome feature that allows you to seamlessly blend the beginning and end of a video to create… you guessed it, a loop!
Just take any video clip (upload one or grab an existing generation) and hit “Loop”.
A timeline will appear and you can select the precise segment you want to repeat.
Choose from “Short” “Normal” or “Long” to determine the length of the loop, and generate.
BONUS TIP: How to Extend Clips
Now we’re going to show you a lesser-known tip for using SORA that no other video generator is capable of, at the moment!
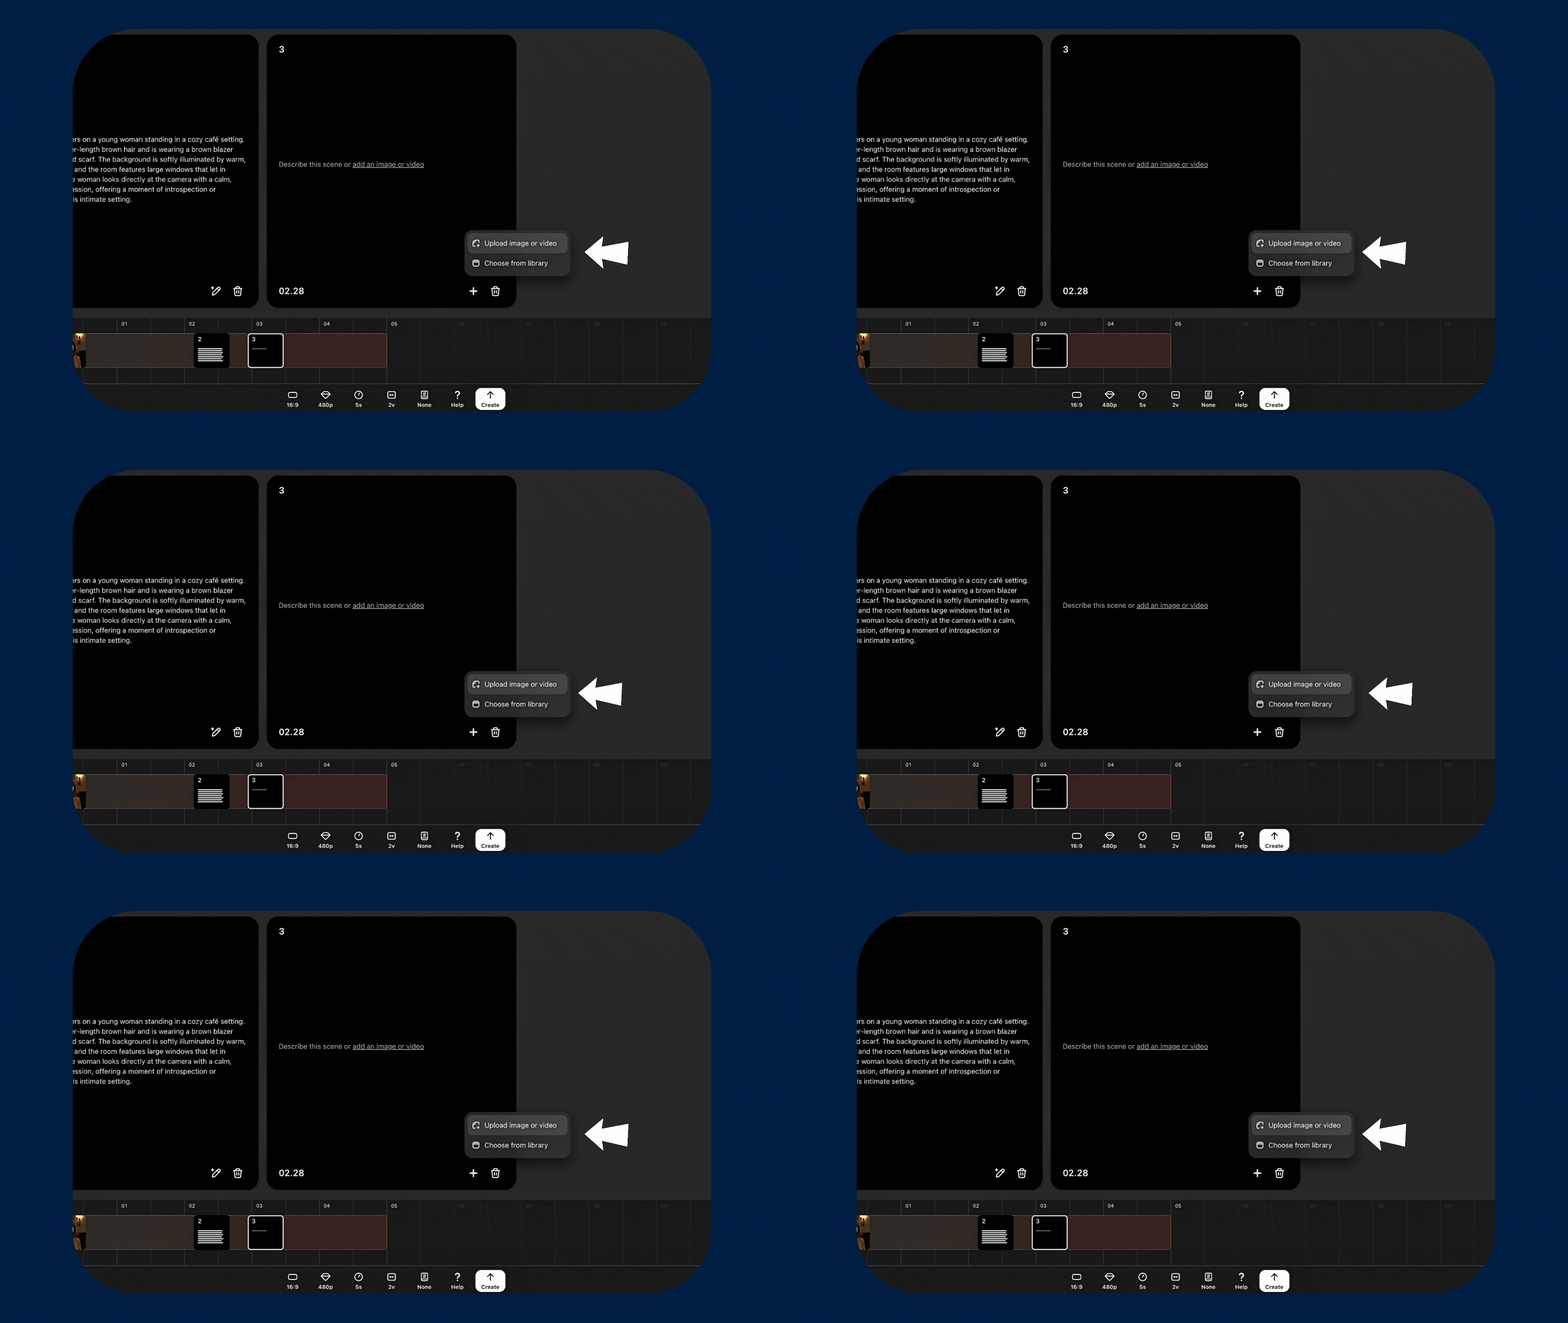
Here’s a trick you can use inside the Storyboard feature that lets you create a “generative extend” at the beginning or end of any video.
First, upload any image (it actually doesn’t matter what image you use — because this is a hack!). Then hit “Storyboard”
Inside Storyboard, create a new cell and hit the plus sign, which will pop up an “upload image or video” option.
Bring your footage into the timeline and delete any other unnecessary images in the timeline.
A text prompt will automatically appear, and you can edit this to include anything you want to add.
Click create and soon you’ll see a fresh clip, extending the beginning or end of your footage.
How much will SORA cost you?
How much SORA costs you will depend on how you want to use it!
If you’re looking to just experiment and test out SORA, the ChatGPT Plus plan for $20 per month will get you 50 videos at 480P.
But if you want to refine videos in SORA and generate enough content to create your own film or trailer, you will probably need the Pro Plan.
This costs a whopping $200 per month — but you’ll get unlimited videos, you can generate up to 5 videos at a time, and (most importantly) remove the watermark.
The pricing breakdown is basically 50 cents for a 5 second clip in 480P, $1.25 per generation at 720P and $4.00 per clip in 1080P.
Use this FREE Cinematic SORA Guide PDF
For even more specific prompting tips and helpful suggestions, check out this FREE Cinematic SORA Guide we created for you.
We’d love to see what you make with SORA. Tag us in your creations!
Will SORA change filmmaking forever?
SORA’s capabilities will definitely disrupt the filmmaking process!
Here are 3 big ways we predict SORA will change Hollywood:
Replacing VFX shots that previously required extensive knowledge
Abstract, non-realism high art concepts for music videos
Live-action inserts and establishing footage
What do you think?
We hope you have lots of fun testing out SORA on your own.
That’s all for our SORA Tutorial!
Thank you so much for taking the time to learn! One of my favorite things to do is help artists learn new tools and refine their skills.
We hope you enjoyed reading these tips and tricks.
If you want to learn how to create your own AI films, check out our Curious Refuge courses.
For more AI film news and tutorials like this one straight to your inbox, subscribe to our newsletter! We love bringing you the latest and best info for AI filmmaking. :)


