How to Create an Online Course and Make Millions (Step by Step)

In this video and article, I am going to show you how to create an online course from scratch.
Have you ever wanted to get paid to teach a skill you know? If so, this is the perfect resource if you’ve ever wanted to create an online course and make money along the way. I've helped clients literally make millions in online education and I'm excited to share the techniques and strategies that I've learned during my online education journey. I hope you enjoy this post.
How to Create an Online Course from Scratch | Online Course Creation Tutorial
Below is a video covering each one of my 25 step process to selling an online course. These are all tips that I’ve learned during my time developing strategies and processes for making serious money with education.
Download Our Course Creation Toolkit
We want to help you on your journey towards creating an online course. That’s why we developed a course creation toolkit to help equip you as you begin your education journey. You can click below to download the Lite version for limited access. However, you can also download the Full Course Creation Toolkit that has twice as many templates, tools, and other resources to help you out. The full version also has over 30 minutes of extra tips and tricks along with access to our private course creator group.
Course Creator Toolkit - Lite Version (Free)
A Course Creation Checklist
Audience Profile Document
Course Launch Goals Workbook
Sales Call Email Booking Template
Demo Course Page
Wait-List Subscriber Email Templates
Course Syllabus Outline Template
The Presale Playbook
Survey Questions Template
Business Name Generator
Course Breakdown Document Template (For Finding Investors)
Course Launch Playbook
Course Profit and Business Goals Calculator
Course Trailer Tips and Gallery
Course Website Launch Checklist
General Subscriber Email Breakdown and Templates
Course Completion Certificate Template
Celebrity Interview for Blog Checklist and Templates
Course Marketing Funnel Breakdown
PR and Competitor Research Document
Template for Creating a Checklist to Gain Subscribers
Webinar Checklist and Templates
Weekly Newsletter Template
Access to Private Course Creator Group
Bonus: 30+ Minutes of Exclusive Tips and Tricks from Our Experience Selling Millions in Online Courses
Note: You must have a Curious Refuge account to download the Course Creation Toolkit.
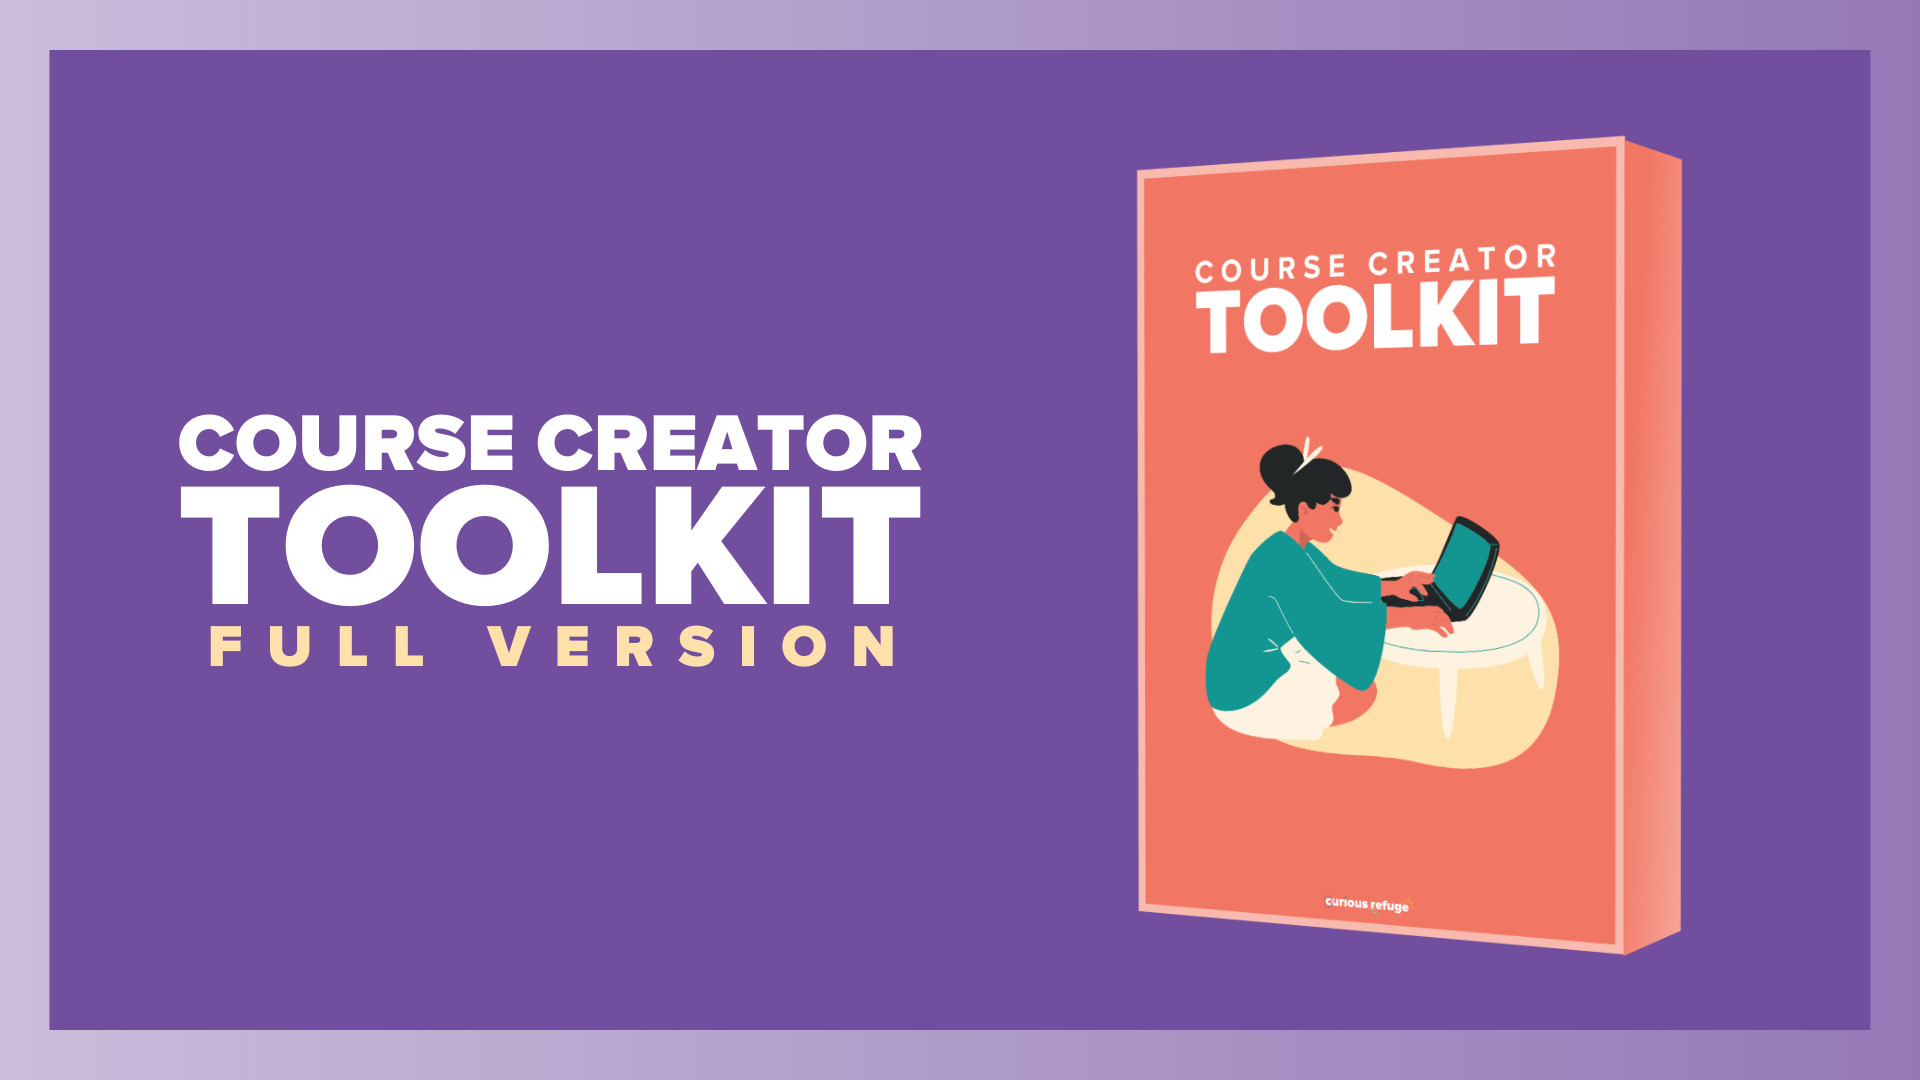
Course Creator Toolkit - Full Version ($39)
A Course Creation Checklist
Audience Profile Document
Course Launch Goals Workbook
Sales Call Email Booking Template
Demo Course Page
Wait-List Subscriber Email Templates
Course Syllabus Outline Template
The Presale Playbook
Survey Questions Template
Business Name Generator
Course Breakdown Document Template (For Finding Investors)
Course Launch Playbook
Course Profit and Business Goals Calculator
Course Trailer Tips and Gallery
Course Website Launch Checklist
General Subscriber Email Breakdown and Templates
Course Completion Certificate Template
Celebrity Interview for Blog Checklist and Templates
Course Marketing Funnel Breakdown
PR and Competitor Research Document
Template for Creating a Checklist to Gain Subscribers
Webinar Checklist and Templates
Weekly Newsletter Template
Access to Private Course Creator Group
Bonus: 30+ Minutes of Exclusive Tips and Tricks from Our Experience Selling Millions in Online Courses
How To Create an Online Course (Step-by-Step)
Here is a full list of steps towards creating an online course. Follow each of these steps to test and validate your course idea. This method that I’ve designed and outlined below will save you time and money as it reduces the risk of wasting too much time on a course that nobody wants to purchase.
Step 1: Figure Out A Course Topic
The best way to figure out a course topic is to simply do a little bit of mental time travel and ask yourself: what course would have been helpful for me to have 3-5 years ago? For example, perhaps you’re a waiter who learned techniques for increasing your tips. Well, in that case, you could create a course called 'Make x10 More Tips as a Waiter'.
Instead of learning and sharing something new, always try to help yourself in the past with your online course. It will make it easier for you to create the course lessons and free content in the future.
It will also make it easier for you to establish yourself as a figurehead and influencer in your community, but we'll talk about this in a bit. And no, I don't mean influencer in a latte art kind of way. Unless of course, you're teaching how to create latte art…

Step 2: Create an Audience Profile
Once you know your course topic, it's time to create an audience profile. It's important to define exactly who you will be serving with your course. This will help you in everything from pulling photos for your website to targeting specific audiences with advertisements.
An audience profile should have information like age, gender, location, interests, favorite websites, social media, and more.
A course that's for everybody will be bought by nobody, so don't be afraid to get specific.
We have an audience profile document in both versions of our Course Creator Toolkit which you can download above.

Step 3: Create a Survey with Course Ideas
When you're creating a course, it's usually not a great idea to just trust your gut. Because your gut can be a dingus. Instead, we're going to do things the smart way.
First, create a survey to ask members of your target audience what problems they have as it relates to your course topic. I recommend using Google forms since it's fast and easy to set up. This will help you decide on content, features, and judge potential interest in your course.
For example, if you were going to create a small business marketing course, you might ask which areas of marketing they want to improve in. You should also ask what problems they face as it relates to the subject of your course.
I also recommend asking what types of features they would want to see in a course. This could include PDFs, Interviews, group coaching, and more.
You should also ask them if they would be willing to purchase a course if they found the perfect solution to their problem. This will help you identify who is a potential lead to purchasing your course once it is available for purchase.
If you feel overwhelmed, don't worry, I've included some examples of these survey questions in the course toolkits above.

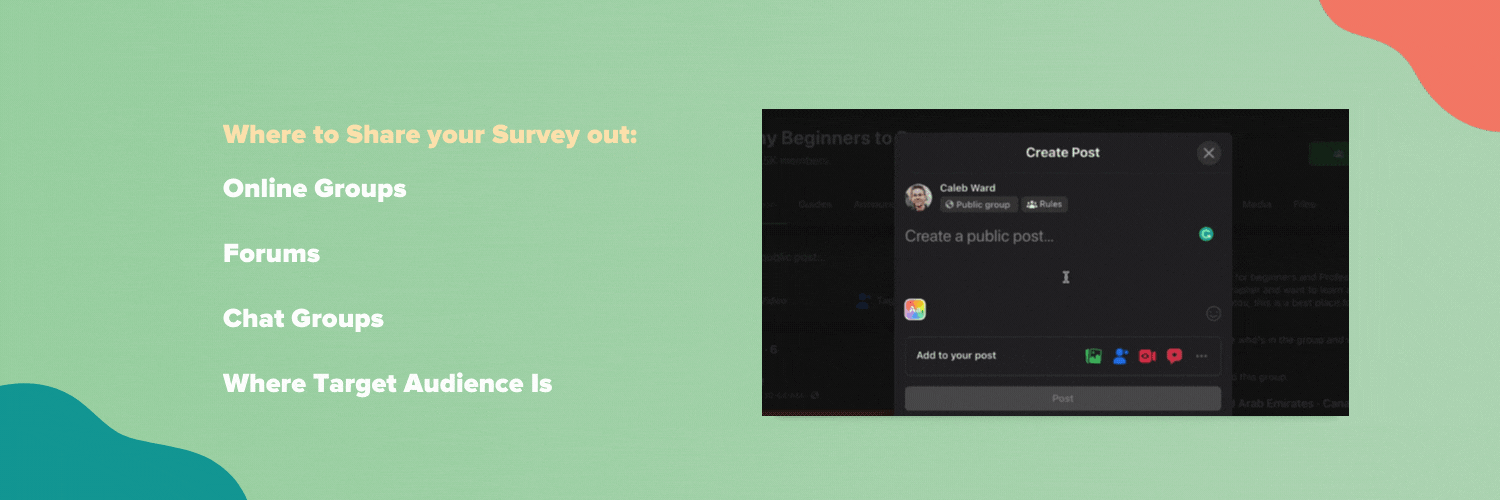
Step 4: Send the Survey Out
Now it's time to share that survey with the world. Remember your audience profile? It will help you know where you should share out the survey. Share your survey in online groups, forums, chat groups, and anywhere else where your target audience hangs out. Hopefully, you are already members of these communities. If not, you should absolutely join all of the groups you can to get a pulse on what your industry is all about.
In the groups, simply say that you want to help people in the group and are looking for their feedback to help with an upcoming project. People are usually really good about being willing to answer a few questions. Especially if you say pretty please…
Step 5: Review the Survey
Once you get a few responses back on your survey, review the information.
What topics are the most inspiring to your audience?
What features are they looking for?
What problems do they face?
Did anyone say they would be interested in purchasing your course?
Review the answers to get a good idea of what your audience is looking for. The answers might shock you more than when I got electrocuted in a Guatemalan shower. But that's another story for another day.
Step 6: Create an Outline Based on the Feedback
With your survey data reviewed, it's now time to create an outline of what your course will look like. Make sure you create a course that is released over the course of a few weeks. Perhaps it could be a 6-week course with 2 lessons per week and a bonus PDF.
Think of this as a syllabus of what your overall course experience will be like. Keep it easy and just jot this down in a tool like Google Docs or Notion. Just don't overthink it.

Step 7: Create a Video Trailer
You don't have to create the course to create a course trailer. Pretend like you already have the course content together and create a simple video trailer that explains what your course is all about. This is your opportunity to channel your inner influencer.
It doesn't have to be world-class quality, but it does need to speak the same language as your target audience. I'm not just talking about the words you say. I'm also talking about the design, music, tone, and professionalism of the video. It needs to feel like it belongs to the same community as your target audience.
For example, if you are teaching yoga, you might want to have a video that is very 'zen' in tone. You'd want to dress like a yoga influencer and use music and wording that would make sense for yogis.
You can shoot a video very easily using a phone or camera, but one pro tip I have for you is to prioritize audio. Audio quality is more important than video quality.
You'll probably need to create a rough outline or script for your video. Try to talk about the specific pain points that you will be solving, the features of your course, and your credentials as an instructor.
Also, be sure to show your humanity. Humor and personality will go a long way to developing trust. I've linked to a few fantastic course trailer videos in our Course Creator Toolkit.
Here’s the trailer we made promoting our online course, The Curious Millionaire.
Step 8: Create a Simple Website
Now it's time to create a simple website that you can use to capture email addresses. Now, I know that building a website can be scary, but in reality, it’s actually not that difficult to create an online course website.
The truth is, there are a ton of website options out there for course creators, but my favorite website creation tool recommendation is Squarespace. I don't have time to go into the reasons why I use Squarespace, but just know that it's the best website development tool for small businesses and incredibly easy to use. Squarespace will also allow you to scale your site as you add more features like blogs, contact pages, and more in the future.
Our website is going to be incredibly simple. We will design a simple singular landing page with a waitlist signup box. However, we will add other pages in the future as it makes sense.

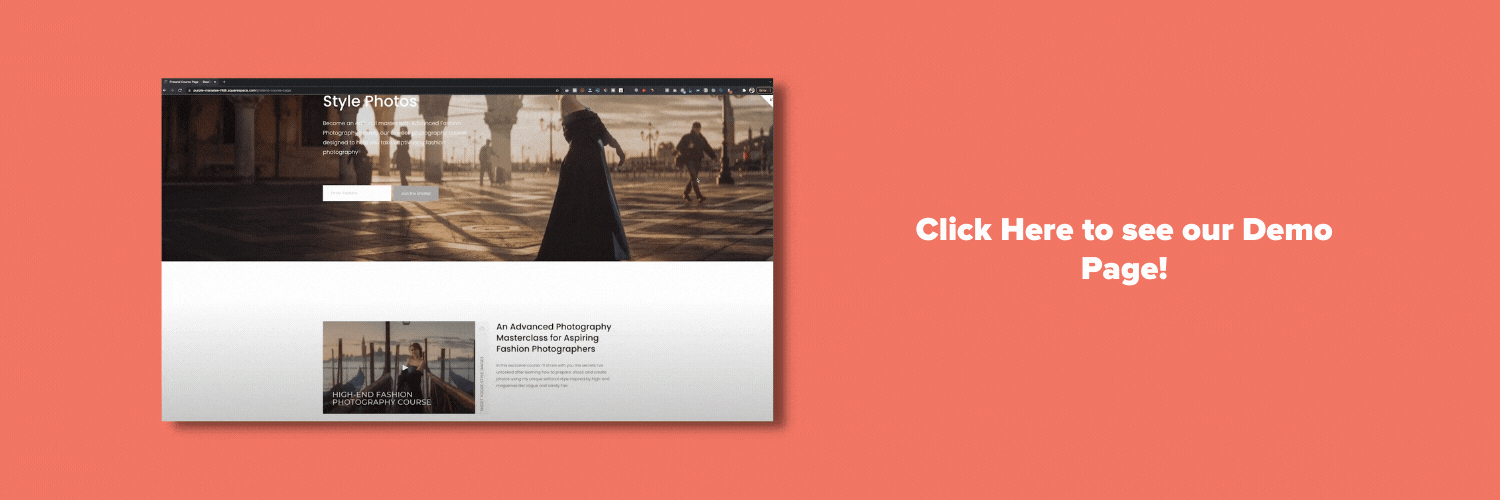
Now, I'm about to break down the specific things to include on this page, but if you get lost, have a brain fart, or want some help, this page is a great example of a course page using Squarespace.
How to Create a Squarespace Course Page
Once inside, go to Marketing and Email Campaigns, Select Mailing Lists, and create two email lists: One for General Subscribers and one for Waitlist Subscribers.
Now go back to the pages menu and create a new page.
Create a header section. This section will include the primary benefit of your course, along with the course title. Add a newsletter signup box as a waitlist. Now, add in an email signup box with information about how to join your waitlist. Connect the box to both a waitlist email audience and a Google Sheets file.
Below that create a video section that shares who your course is for and embed your trailer. Keep in mind that you will need to upload your video trailer to YouTube in order to share it here.
Next, create a benefit cascade where you share the specific benefits of your course.
Now, create a quick about section that includes why you are passionate and qualified to teach this course.
Below that include quotes or testimonials about why you are going to be great at teaching this course.
In a new section, list out all of the features included in your course and add in a waitlist signup box connected to both a Google Sheet and a Waitlist audience. Once your course is officially live you'll change the newsletter box to a checkout button that links to check out in Teachable.
Below that add in a guarantee section where you let people know that your courses include a 30-day money back guarantee.
At the very bottom, I like to include an FAQ section that can answer questions that your audience may have about the program. Try to anticipate and address your audience's questions and concerns in this section.
In the footer, add in a contact email and links to your social profiles.
That's all of the major content you need on your site for now.
If you want some extra brownie points, you can go ahead and create an about page or contact page. However, you don't need these pages for now.
Go ahead and set your website live. I recommend getting the business plan and paying for a yearly subscription as it will give you some perks like a free domain and a free custom email address from Google. I recommend the same subscription for all of my clients. So it will be totally fine for you at this point.
You've done great work so far and I know you're feeling antsy, but don't share out your landing page just yet. We have a few other things to do first.
Step 9: Create Your Waitlist Survey
Now it's time to create a second survey that can help you find out more about the people who express interest in your course. This survey is for people on your waitlist and it will help you refine your messaging, update your syllabus, and ensure your course makes sense to your target audience.
Like before, create a survey using Google Forms.
You should use this survey to answer the following questions:
What do people hope to achieve with this course?
What features or lessons are drawing people into the course?
Do you need to add anything to the course?
What areas need to be more clear?
Will people buy the course?
What are they willing to pay?
Are they willing to book a sales call?
In the Course Creation Toolkits above I’ve included questions that you can include for these surveys. Like I said, the goal of this survey is to refine your messaging and figure out who is truly interested in the course.

Step 10: Waitlist Email Automation
Let's hop back over to Squarespace. You'll now need to set up emails to welcome new people to your waitlist and welcome new people to your mailing list.
How to Set Up a Waitlist Email Automation:
To send an automated email just go to Marketing and Select Email Campaigns.
Click the create button and select automation.
Select 'Welcome New Subscribers'.
From here you'll find tons of great templates from the Squarespace team. I recommend picking a design that feels connected to your brand. For our example, we will create an email for people who join your waitlist.
Under automation select 'Waitlist Subscribers' from the Mailing List menu, make sure the timing is set to immediately.
Add a short subject line with an emoji.
Add a short sentence welcoming people to your list along with a link to your waitlist survey.
If this is your first time sending an email with Squarespace you will need to set up a sender profile and add in a legal address.
Now you can edit the rest of your email. Just like a normal Squarespace page, Squarespace emails use a block format that makes it very easy to update and edit your content.
Once you're ready to set your email live, send a test email to your address and test all of the links.
Once you are sure everything looks good, select 'Activate Automation'. This will activate the email robots...
I've included a template for this email that you can find in both versions of our Course Creation Toolkit.
Note: It's very important to link to your Waitlist survey in this email.
Pro Email Tip
I have a simple technique for making your email signup process even better. It's a little technical but bear with me for a few moments…
The default Squarespace email signup process will force your users to confirm their subscription via a confirmation email. Unsurprisingly, this will result in a smaller email list. So, to get around this you need to turn on ReCaptcha via Google. To create a Recaptcha account with Google:
Create an account via Google
Go through the process of verifying the ReCaptcha.
Once you have your codes, paste them into the Site Key and Secret Key section.
Turn on reCAPTCHA
Turn off the 'Send Confirmation Email'.
Now people can easily subscribe to your site without verifying! Ok, that's enough nerdy stuff for now.

Step 11: Share Your Course Landing Page Out for Feedback
Now things are getting real. It's time to share out your course page with the world to start getting feedback from the community. If you've already set everything up correctly, you should now have a system where someone can do the following:
Visit your course page
Sign up for the waitlist
Get a confirmation email
Gill out an informational survey.
Start by sharing both the course page and the waitlist survey with any contacts you have in the industry. Ask them to do you a favor by filling out the survey.
You should also share out the course page and survey in online chat groups. Most industries have active chat groups using Slack, Discord, and other chats. Just search 'Chat Groups' in your industry to find them.
You should also share your course page in online forums, private groups, and industry hang out spots. Facebook groups are usually a really great place to get feedback from folks in your niche.
Just be sure to avoid your Facebook timeline, or you might get sad... Which brings us to a sanity tip: Use News Feed Eradicator to hide your facebook timeline from your computer.
It's also important to reach out to blogs, online magazines, and any other industry sites to ask if they would be willing to share your new site with their community. Simply say that you are a fan of their site and you are looking for feedback on a project that could help their community.
If you have an email list, this is the time to send out your survey as well.
And of course, you should share out your new course page on your social media channels. Obviously...

Step 12: Review Feedback and Update the Course Outline
After you've had enough time to get feedback from at least 10 targeted individuals (but more is better) it's time to review your results. Just because one person has a suggestion, doesn't mean you need to update the course pages or curriculum, but if more than one person has the same feedback, you'll definitely want to consider updating or improving your course outline.
The beauty of using this strategy to update your course is simply you don't have to create the whole course to get feedback.
This is also a good time to update your sales video if the scope of your course has changed significantly.
Step 13: Pick a Presale Date
Now that you've updated your course page, you are ready to pick a date to officially presale your course. A presale is simply the process of selling something before it exists. It may sound weird, but most online digital products are actually sold before they are created.
By pre-selling your course you will learn if people will actually want to buy the course. If they don't buy, or if you don't hit your target sales numbers, you have three options:
Resurvey, Refine, and Relaunch
Try a Different Idea
Create the Course Anyways - Trust is a big reason why people buy courses, so if you don't have an online presence or fan base, you may not have enough trust with your audience to justify a purchase. Which totally makes sense.
To create a pre-sale you should pick a date that is at least three weeks from the present day. Why? Well, simply put, you have some work to do to ensure your launch is as successful as possible, which we'll talk about in just a little bit.
Pick a date that is good for your schedule and not around any major holidays. I recommend launching your presale on a Wednesday as it will allow you to prep your materials on Monday and Tuesday and fix any bugs on Thursday and Friday. Avoid launching a course on Friday, Saturday, or Sunday because as much as people enjoy learning, they will always love the weekend more.
We'll cover the specific steps for launching a presale in a little bit, but for now, just figure out a date.

Step 14: Create a Teachable Curriculum
Now it's time to create your course. There are a ton of online course platforms out there, but my favorite is Teachable. Like Squarespace, Teachable is easy-to-use and their support network is extensive. It also has 'Dripping' features which give you the ability to release content at specific intervals, which will makes it incredibly easy to release new content week by week.
Drip fed courses have higher perceived value, so you usually can make more money with them.
Create a new Teachable account using this link. There are different tiers that offer different features based on your course type. However, you should be fine with the basic plan, but you can upgrade at any time if you outgrow the features.
In Teachable, create a new course. Name your course and give it a subtitle with the primary benefit, and start outlining your curriculum.
Teachable is broken up into sections and lectures. Sections house individual lectures. I recommend naming your section 'Week 1' and then typing in the topic of that week's lectures.
Every course should also have a Welcome Section where you welcome your students to the course and get them acquainted with you as a teacher. In the welcome section, you should also introduce the curriculum and what you will be covering. If you have extra time, a PDF of your course outline could also be embedded in this section.
Go ahead and outline your course using sections as weeks.
For now, the only section that needs content is just the welcome section. You can simply upload your trailer for now and type in some text about how your course will work. Let students know that the content will be released every week for the duration of the course. This is also a great time to add in bonus content, links, or resources.
Teachable allows you to upload PDFs, but be sure to make them downloadable as well.

Step 15: Update Your Teachable Pages and Settings
Now we need to decide on a price for your course. Review your survey data to figure out what the best price should be. If you can't decide, go check out pricing for similar courses in your niche. It's usually not a great idea to be the cheapest option, but you may also struggle to generate sales if you are a luxury option without having an audience first.
My recommendation is to try to price your course around $200-$250 as that can create an impulse buy, anything more, and your course may fall into the 'I'll have to talk to my significant other' category which can slow down sales. But if you have generated enough trust with your audience it's entirely possible to sell courses for $900 or more. Also, higher-end courses do tend to generate more customer support, so keep that in mind if you have a busy schedule.
To set a price, go to Add a Pricing Plan. You can select a One-Time Purchase, Payment Plan, or Subscription. I recommend a Payment Plan as it will significantly reduce the perceived cost of your course. A course that is 3 Payments of $79 feels cheaper than a course that is $249, even though it isn't.
While we will be using our Squarespace sales page as our primary product page, sometimes students may accidentally find your Teachable sales page. So what you need to do is simply recreate your Squarespace Sales page in Teachable. This shouldn't take too much time at all. Just go to pages and edit your Sales Page. Teachable's page builder uses blocks. So simply recreate your Squarespace page. However, instead of waitlist boxes, simply replace them with buttons to purchase your course.
You should also go to your Information Tab and update your bio and course branding. If you don't have branding don't worry. Just use a Canva template to create something quick and easy. I've been using Photoshop and InDesign for over a decade and I still prefer to use Canva for quick designs because it is so easy to use.
By clicking on ‘Site & Theme’ you can also update your site Logo and the favicon for your course. From here, you can also edit your course's colors.
Preview your pages to see how everything looks.
You can also change the navigation at the top of your Teachable header. I like to add navigation that mirrors my Squarespace website so people can easily navigate back and forth. But for now, you can skip this step.
Once you're as happy, set your course live by 'Publishing' the course. Double-check that your sales page, checkout page, and thank you pages are all published. You can also take the time to update each page if you'd prefer.
The last step is to simply create a coupon code for 50% off, 20% off, and 10% off. The 50% off coupon will go to everyone who agrees to purchase the beta version of your course. 20% off will be for everyone who joins your webinar. And 10% off will go to everyone who subscribes to your email list in the future.

Step 16: Decide on a Course Start Date
Now it's time to decide on a start date for your course. Pick a date that is at least 30 days in the future because you want to give yourself plenty of time to prepare.
Once you have a course start date, be sure to write down the start date on your course pages and update your pages in teachable.
You should now have two dates, one for the presale and one for the course start date. Be sure to update your sales pages with both dates.
So for example, we might have a presale that starts on October 1st and an official course start date of November 1st.
Step 17: Book a Sales Call with People Who Gave Feedback
Now it's time to book a sales call with everyone who expressed interest in your course. This is the group of people who joined your waitlist and people who originally expressed interest in your course's topic.
Send a friendly email asking if they would be willing to hop on a call to clarify some of their comments.
I've included a template that you can use to book this call inside our course creation toolkit. You may also prefer to use a tool like calend.ly to book meetings automatically into your schedule.

Step 18: Do Your Sales Calls
Almost every aspiring entrepreneur that I talk to is fearful of sales calls, but I find it helpful to rewire our thinking around sales. Sales calls aren't about tricking someone into buying something, they’re about helping to solve an individual's problem. If you treat your call like a problem-solving call, and not as a sales pitch, it will be much easier to have the conversation.
There are a ton of resources out there for doing great sales calls, but at the end of the day, asking good questions and listening is your superpower. Ask questions that validate your idea to your interviewee. For example, if you sold an online marketing course you might say, if your marketing was bringing in the right number of ideal customers, how much money would that bring to your business? A question like that will create perceived value for your course.
Spend 80% of the call listening and taking notes. Give value in return, but don't monologue. Your clients need to feel heard.
At the very end of the call, mention that you are currently offering 50% off to the beta version of your course. The enrollment is limited to 10 people, but if they'd like to be the first person to go through the program you'd be happy to send over a code.
Send over the code and a link to the checkout window in your chat. Also, send a follow-up email with the discount code and notes about your talk.
It will take some practice, but in general, you should convert about 50% of the folks in these sales calls to sign up for your program.
Hopefully, by the end of this process, you will have a few sales under your belt. Be sure to let everyone know when your course will officially start.

Step 19: Create and Share a Webinar Page
If a stranger came up to you and asked to give you a ride in their car, it'd be weird and sketchy right? Well, the same is true if you try to sell a course without generating trust first. People don't know you, so you need to give them a reason to trust you.
One of the best ways to generate trust and spread the word about your course is to simply create a free webinar for the community.
To create a great webinar, pick the primary benefit of your course and create an entire presentation around the subject. For example, if your course is about home finances, you might host a webinar titled, 7 Tricks for Getting Out of Debt.
I like to use Canva to create my webinar presentations.
To host the webinar, I like to use Zoom as it will allow up to 50 attendees to a single link. If you think you'll have more than 50 attendees you can upgrade your account. I recommend paying for zoom so you don't have a 40-minute limit.
To host a webinar, simply create an unlisted page in Squarespace that includes the webinar date, details, and a newsletter box to signup for the webinar.
I like my webinars to happen on Tuesday or Wednesday at 10 AM PT. I recommend the same for you.

Make sure the newsletter box is connected to your general audience list and the two-step verification is turned off with a reCAPTCHA. You should also connect your signups on this page to a Google sheet so you can know how many people sign up for your webinar. Make sure your confirmation text includes your presentation Zoom link and text letting them know that they are confirmed. You should also include any fun imagery or videos on this page as well. Feel free to get as creative as you want with the page.
Just like before, share your webinar signup page on industry forums, groups, chats, and with any industry publications who may be interested in sharing your webinar. Like a destination wedding to North Dakota, expect less than 50% of the people who RSVP for your webinar to actually attend.
You can also do paid ads on channels like Instagram and Facebook to get people to sign up for your webinar.
You will also send out an email to your general subscriber list at the exact time when your webinar goes live. Be sure to include a link to your webinar in the email.
A great webinar isn't about selling your product, it's all about storytelling and adding value. In essence, a great story involves a hero who starts out in a lowly state, goes on an adventure, and then returns with an improved life.
Your audience is the hero, your course is the adventure, and the results of your course are the improved life.
Before your webinar begins, be sure to record the session.
Start your webinar by asking people where they are from, then move on to sharing a little bit about yourself.
Then share the bulk of the value of your webinar. This is the main reason why people signed up. Be sure to tease that you have Q&A time and a gift for everyone that you will give away at the end.
Do not hoard secrets in your webinar. Give tons of value and people will take notice. Even if most of the information you share will be covered in the course, the truth is, people will still be excited to go through your course and learn even more.
Once you've shared the bulk of your presentation, tell people a simple story about how you used to be in their shoes, but you learned some secrets as an expert and now you've packaged those secrets up in a course. Because everybody wants to know a good secret.
Share the benefits of your course, the features, and then reveal the price. But then reveal that for everyone on the call today you will offer a 20% off coupon for 48 hours. Then give away the coupon code and a link to the checkout page.
At the end, you can open the webinar for questions and answers.
After the webinar is over, send a thank you email with information about how to claim the discount on the course.

Step 20: Upload Your Webinar to Your Website
Once your webinar is complete, give yourself a big high-five, edit the video, and upload it as an unlisted video on YouTube. This will hide it from the outside world, but allow you to embed it on your site.
Create a new page that includes the webinar as a YouTube embed. You can also include more information about the webinar, any free downloads, and a link to your course page.
Change the webinar signup page from a countdown to a simple page that says people must signup to your newsletter list to watch the webinar. Be sure to update the box to redirect to the watch page after they fill it out.
After the webinar is done, place it on your website and make it to where people must subscribe to watch. You should also make the webinar signup page be the button at the top right of your website. Change the button title to the primary benefit of the webinar. For example, 'Lose 7 Pounds' or 'Get More Clients'.
You can also update the confirmation email for your general subscriber list to include a link to the webinar watch page. I'd also recommend adding a 2nd automated email to your waitlist subscribers for day 2 that encourages them to watch the webinar as well.

Step 21: Launch the Presale
With your marketing automation set up, it's time to officially launch your presale. A full presale launch should be about a 7-10 day process. You should already know when your presale starts by this point.
Change out the waitlist boxes on your website to be buttons that link to the checkout page in Teachable.
You'll want to share your presale with online groups, forums, websites, and industry contacts. Go out of your way to ask to be in newsletters and shared on social. Make it easy for people to share out your presale news by giving them images and/or videos that are cropped to landscape, square, and video size.
Try to get on industry podcasts and live streams. Pitch yourself as a guest and for a topic use the topic of the webinar that you previously recorded. Being an expert guest on a podcast or live stream is a great way to get in front of your target audience.

At this point you should have a few folks on your email list. Email is going to be your most powerful marketing tool going forward.
I've included some email templates from our Curious Millionaire program that can help you know what types of emails to send.
Essentially you want to send the following messaging via email and social media:
Tease the presale launch date 2 days before it goes live
Share a testimonial of someone who has benefitted from your expertise
Launch the presale
Share an FAQ where you answer common questions that people may have about your course.
Share another testimonial
Mention the Cart Closing Tomorrow
Close the Cart
Ask why they didn't join?
Allow for Late Registration
Officially Close the Cart
Each one of these emails should go to your waitlist subscribers and your general email list. I've included some templates for these emails in the Course Creator Toolkit.
Bonus Tip: One of my favorite free tools for creating action in emails is a free tool called SendTric. It's completely free and allows you to add countdown timers to your emails. These timers are great for counting down to specific times and dates like presale start and close dates.
Step 22: Review Your Presale Results
After your presale is complete you should have some data about how well your presale performed. If you're happy with these initial sales, move forward. You will only grow your audience in the future and any sale is a sign that people are interested in what you have to say.
If you aren't happy with your sales, simply survey your audience and start again. Or you could simply create your course regardless. You may have simply not generated enough trust to justify someone purchasing your course just yet.
The rest of this article will assume that you achieved your goal or that you are going to create your course regardless.

Step 23: Create the First Week's Materials
Now it's time to create your course content. You don't need to finish all of your course content before people start to learn. At the very least, record your first week's content. Each week you will record the next week's content. I personally recommend trying to get as much done as you can. I had a friend who got sick halfway through doing their course and because they didn't have a buffer they had to record the training anyways. Don't let that happen to you.
You can tell Teachable to drip certain sections at certain dates. So I recommend releasing content on the same day each week as your course is created.
You don't need to have a super fancy set up to record a decent course. Obviously, each course is different, but my best advice is to prioritize audio over video. Get an easy-to-use microphone. If you are recording on a computer use a Blue Yeti and if you are recording to a camera use a Senhiezer Lav mic. Always monitor your audio yourself or have someone monitor it behind the camera.
For lighting, a simple ring light or window lighting should work perfectly.
In most instances, a webcam or iPhone camera will be enough for a course. But if you must, you can use a higher-end camera to record. Just know that when you shoot with higher-end equipment you are going to add a lot more work and more resistance to recording.
For PDFs I like to use Canva. They have tons of great templates.

Step 24: Finishing the Course
Once your course is nearing completion, create a survey in Google Forms where you can get feedback about the course experience. Include a link to the survey towards the end of your course. It will be helpful to send an email to everyone who joined asking them to take the survey, as some of them may have fallen off.
Ask people questions about the content and quality of the course. Be sure to include this specific question: On a scale of 1-10, how likely are you to recommend this course to a friend or family member? If anyone answers 9 or 10 they are known as an advocate for your brand. They will be the best resource for you going forward to promote your course. Reach out to these people personally and thank them for their time. You can also send extra goodies like hand-written notes or t-shirts. If anyone answers 6 or below, they are known as detractors. Try to figure out why their experience was so bad, and ask them to hop in a call to learn more.

Bonus Tip: Offer Coaching
As your course is nearing completion, I recommend offering coaching services to those who finished your course as it relates to the topic of your course. For example, if you created a marketing course, you might offer 3-months of marketing coaching for a discounted rate to those who finished the course. Coaching is a premium service that can be upwards of $1000+ dollars a month per client. Depending on what your course is about, you may want to offer such services.

Step 25: Moving Forward
So with your course now recorded, you can refine, re-record, and prep everything for an official launch. Update the buttons on your sales page to be linked to the checkout page in Teachable.
Similar to the presale, launch your course with an email sequence and get the word out to the world via your email, social channels, and connections from around your industry. Instead of setting up your course as always available, set specific signup and start dates. Limit the number of people who can enroll to a specific number. After your first launch, it will become easier and easier to do this every 3 months.
Never fully meet demand, it's best to only allow around 90% of the folks who want to take the course. This will make your course even more desirable as it creates scarcity.
As you go forward, it's essential to find your voice by creating content on a specific platform. That can be anything from YouTube to Instagram to podcasts. Find your communication superpower and stick with it! By growing an engaged audience it will become easier and easier to sell courses, products, and sponsorships in the future.
If you're unsure what type of content to create, simply ask yourself, what type of content resonates with my target audience? and, where does my target audience hang out? There are tons of online tutorials about how to create great content on any platform.
I also recommend creating a weekly newsletter for your audience and creating a blog. By anchoring your content to your website you will ensure that people see your site, webinar, and ultimately, your course.
We want to help you on your journey to create your online course. That’s why we created this course creation toolkit to help equip you as you begin. For limited access, you can click below to download the Lite version. However, we also have the Full toolkit that has twice as many templates, tools, and other resources to help you out. It even comes loaded with 30+ minutes of bonus tutorials and private group chat access for course creators. Click below to get access!
Create Your Own Thriving Business
If you've ever wanted to launch an online business from scratch using easy-to-use tools, check out The Curious Millionaire. Our online adventure course shows you how to test and launch a thriving modern business using the latest tools and techniques.
Thank you so much for joining us on this journey into creating and selling an online course. If you have any questions about launching an online course, please feel free to ask us below.
Best of luck as you create your very own online course!