
How to Save Money on AI Video Generation | Easy Tutorial
In this article and tutorial, we'll show you how to save money on AI video generation by testing different draft-to-final workflows.
AI filmmaking can get expensive fast, especially when you're generating the same shot over and over to get the composition, performance, and timing just right.
But what if you could work through those creative decisions in a cheaper draft mode before spending money on a full-resolution render?
We recently tested three approaches using MiniMax H3 and Seedance 2.5 to see how much money we could save without sacrificing the final result.
Our tests included:
Generating a complete scene with a single prompt.
Using MiniMax H3 to develop shots before rendering them in Seedance 2.5.
Using Seedance 2.5's built-in draft mode to refine and render the same scene.
With the right workflow, we were able to reduce our estimated AI generation costs by roughly 66%.
Let's break it down!
How to Save Money on AI Video Generation | Video Tutorial
Below is a video tutorial showing exactly how to create a depth map using AI.

How to Save Money on AI Video Generation | Easy Tutorial
Below is our full breakdown of what we tested, how much each approach cost, and which workflow we'd actually recommend.
Establishing a Baseline: Generating an Entire Scene With One Prompt
For this experiment, we wanted to recreate a specific three-shot action scene featuring two characters having a conversation at a bar.
We already had our character references, location, dialogue, and sound effects ready to go. We also knew exactly how we wanted each shot to look and play out.
Here's the sequence we were trying to recreate.
Original Video
Before exploring more complicated workflows, we wanted to see how close we could get by simply uploading our references and generating the entire 14-second scene with one detailed prompt.
We tested three models:
MiniMax H3 Max: 480p, approximately $1.50.
MiniMax H3 Standard: 2K.
Seedance 2.5 Draft: Approximately $2.80.
We ran these tests inside Magnific, although you can use another platform that supports these models.
Here's how they compared.
MiniMax H3 Baseline Result
MiniMax H3 Standard Result
Seedance 2.5 Draft Result
Neither MiniMax model gave us a particularly good result. Seedance 2.5 performed noticeably better, but the timing, composition, and audio performances still weren't quite what we wanted.
The biggest issue was that none of the models could reliably recreate our specific three-shot sequence from a single prompt.
Our takeaway: If we wanted more creative control, we'd need to break the scene into smaller shots and refine them individually.
But how could we do that without spending a fortune on generations?
Using MiniMax H3 to Draft and Seedance 2.5 to Render
One workflow we've seen gaining traction involves using MiniMax H3 to develop your shots at a lower cost, then switching to Seedance 2.5 for the final high-quality render.
The idea is pretty simple: instead of spending money on expensive generations while you're still figuring out your scene, you refine your prompts using a cheaper model.
Once you're happy with the composition, you take that same prompt into Seedance for the final render.
We wanted to see whether this approach actually worked.
Step 1: Break the Scene Into Smaller Sequences
Rather than generating all three shots at once, we divided our scene into two sections:
The first two shots, generated together as a 10-second sequence.
The third shot, generated separately.
For the first sequence, we uploaded our character sheets and location reference, then wrote a prompt describing the exact action and composition we wanted.
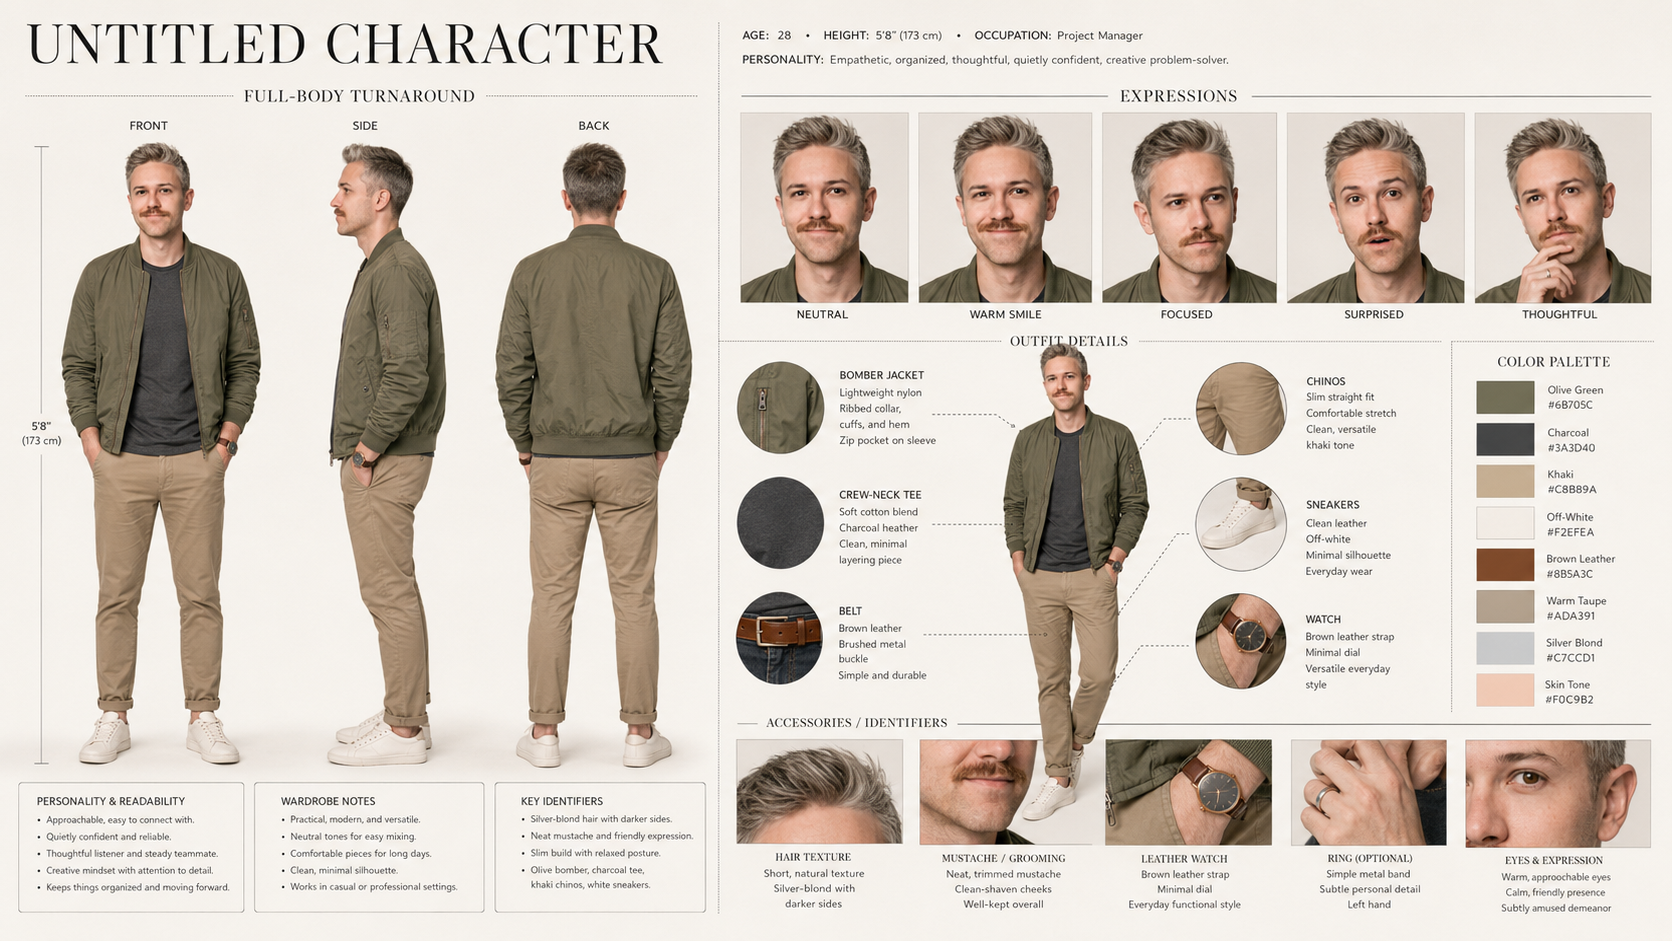
Character Sheet
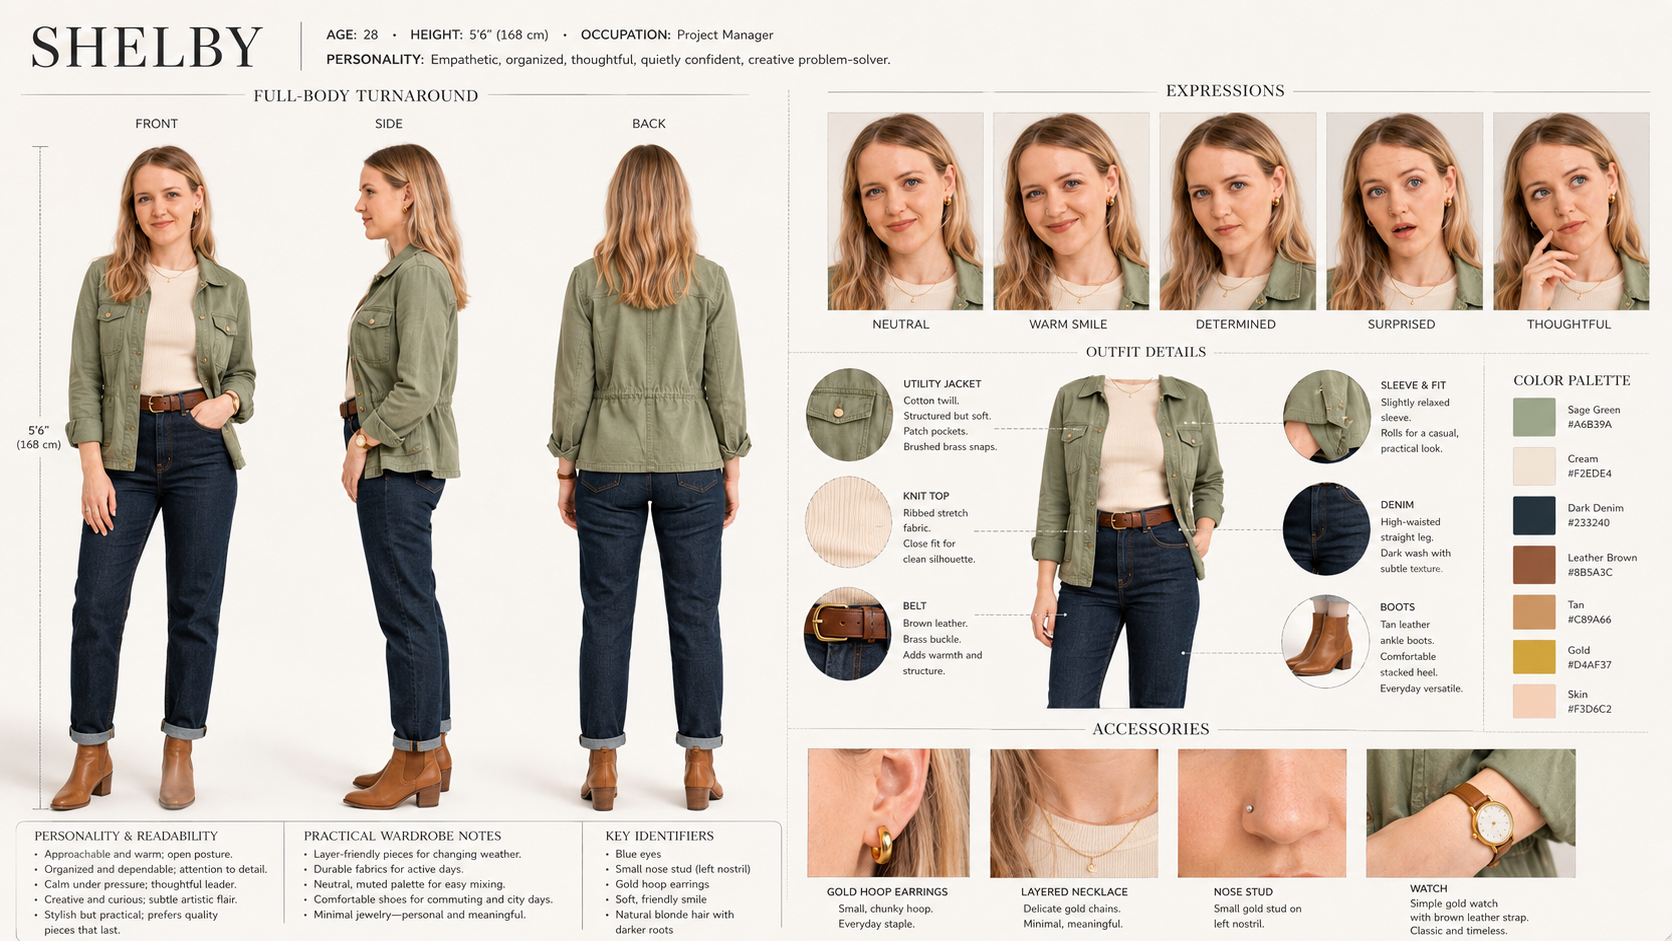
Character Sheet
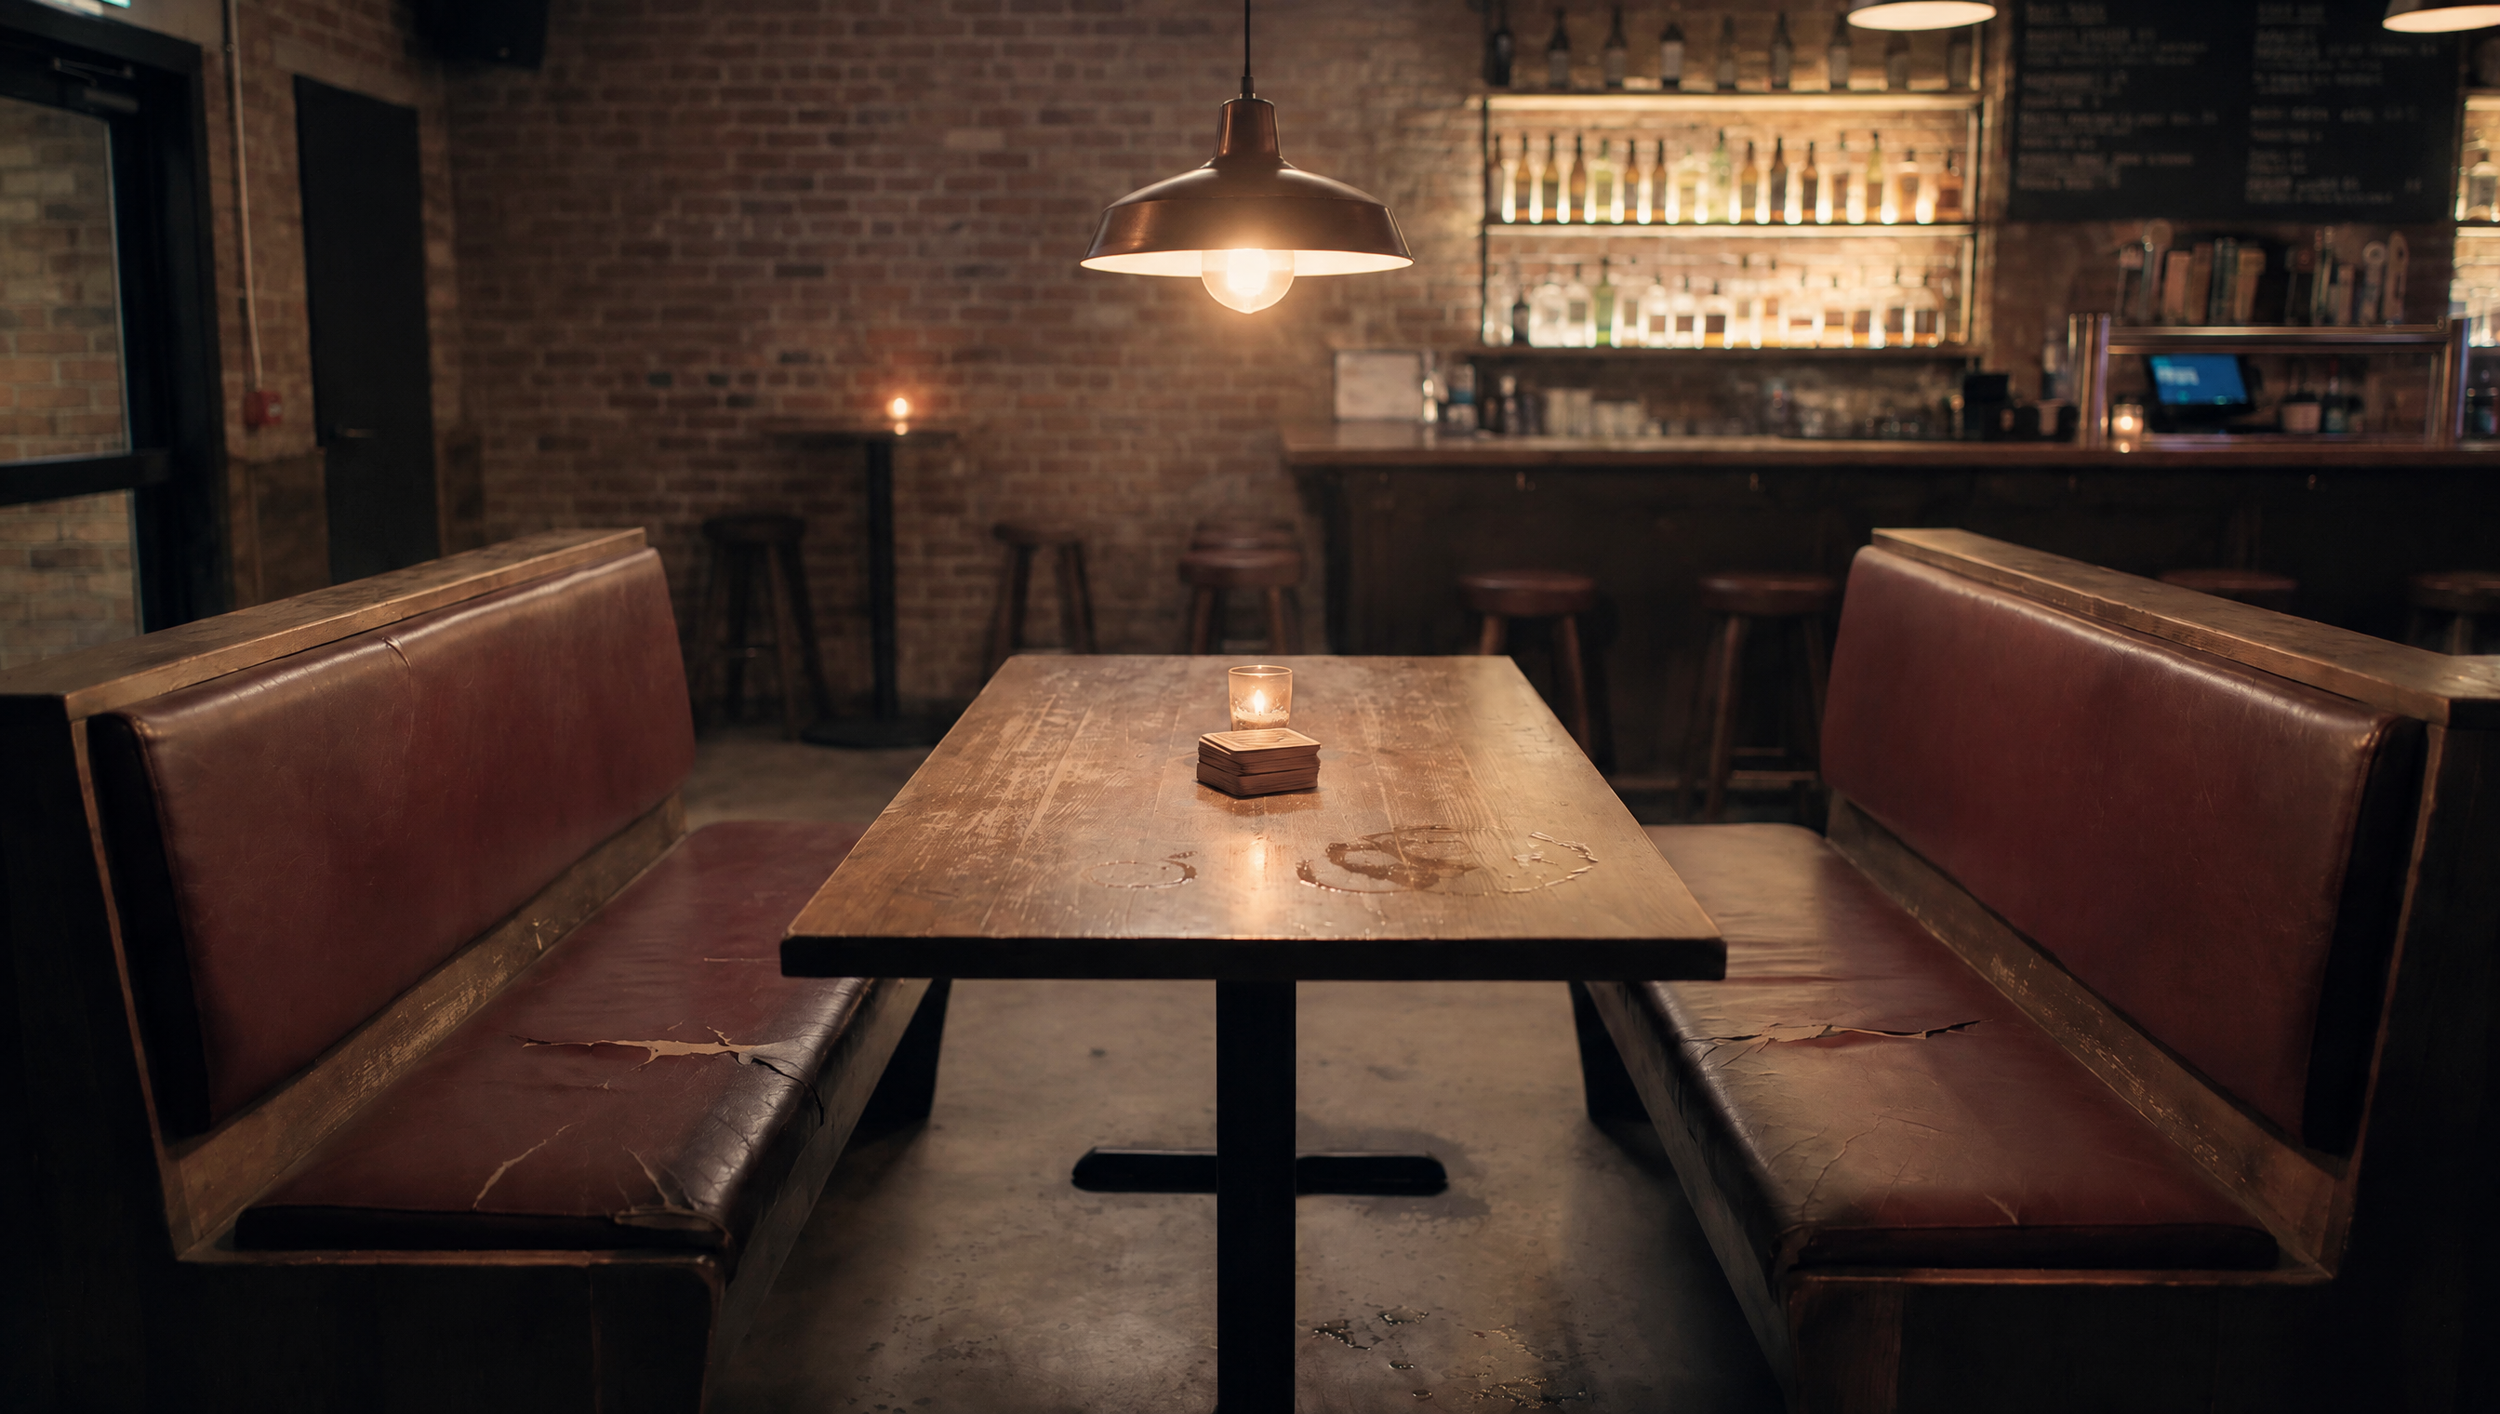
Location Reference
We used MiniMax H3 Max at 480p, which cost approximately $1 for each 10-second generation.
Step 2: Refine the Composition in MiniMax H3
Our first generation wasn't quite right. The opening composition was close, but the second shot missed the mark.
So we adjusted the prompt and tried again.
The second generation improved the second shot, but the first shot was now further from what we wanted.
After another round of prompting, we finally got something that was reasonably close to our intended blocking.
Here's how those iterations compared.
MiniMax first generation
MiniMax second generation
MiniMax third generation
The overall video quality still wasn't great, but that wasn't necessarily the point.
We were using MiniMax to figure out the composition and refine our prompt before committing to a more expensive render.
Step 3: Generate the Final Video in Seedance 2.5
Once we were happy with the general composition, we switched our video model to Seedance 2.5 in standard mode.
We kept the same prompt we'd developed inside MiniMax and generated a higher-quality version.
This render cost approximately $8 for the first two shots.
Seedance 2.5 standard result
That's much closer to what we were looking for!
We repeated the same process for our third shot, going through approximately five MiniMax iterations to refine the composition.
For that final shot, we also uploaded the previously generated 10-second sequence alongside our character and location references. This gave Seedance additional context for the scene we'd already established.
Once we had our refined prompt, we generated the final shot in Seedance 2.5.
Putting everything together gave us this result.
That's pretty close to the original three-shot sequence we were trying to recreate.
How Much Did This Workflow Cost?
For the entire 15-second sequence, we spent:
Total generation cost: Approximately $27.
Total human time: Approximately 60 minutes, including reviewing and refining the generations.
To put that into perspective, generating five versions of a 15-second sequence directly in Seedance 2.5 at approximately $1 per second would cost around $75.
So using MiniMax to work through our drafts before rendering in Seedance could save us a significant amount of money.
But there's another workflow that might be even better.
Using Seedance 2.5 Draft Mode for Everything
Seedance 2.5 recently introduced its own draft mode, which means we can now refine our shots without switching between different video models.
And the pricing is pretty interesting.
For our first sequence, generating in Seedance 2.5 Draft Mode cost approximately $2, compared with $8 in standard mode.
That's about four times cheaper!
So we wanted to see whether using Seedance for both drafting and final rendering could give us better results.
Step 1: Generate and Refine Your Drafts
We started from scratch using the same character references, location, and detailed prompt.
This time, we selected Seedance 2.5 in draft mode.
Just like our previous test, we worked on the first two shots together before moving on to the third.
Our first generation was decent, but there were a few things we wanted to refine.
We adjusted the prompt and generated another version, then made one more adjustment.
Here's how those three drafts compared.
Seedance draft iteration 1
Seedance draft iteration 2
Seedance draft iteration 3
By the third iteration, we had something that was pretty close to the composition and action we wanted.
And the quality was noticeably better than what we'd been getting from MiniMax H3.
That made it much easier to judge whether the scene was working before moving on to the final render.
Step 2: Generate the HD Version
Here's where things get really interesting.
Inside Magnific, we selected our preferred draft and clicked Generate in HD.
Unlike using an external AI upscaler like Topaz, this feature generates a higher-resolution version of the video using a locked seed.
That means it should preserve much of the composition and action from the draft while producing a higher-quality render.
Here's the difference.
Seedance Draft Iteration 3
Seedance HD Generation
The result looked fantastic.
We were able to keep the creative direction we'd established in the draft while getting a much higher-quality final video.
Step 3: Repeat the Workflow for the Final Shot
For our third shot, we followed the same approach.
We generated approximately five drafts, refining the composition until we were happy with the result.
Then we used the HD generation feature to create the final version.
Here's what the completed three-shot sequence looked like.
Completed Seedance-only Sequence
That's very close to the original vision we were trying to recreate!
And we managed to do the entire thing without switching to another video model.
MiniMax H3 vs. Seedance 2.5 Draft: Which Workflow Is Better?
Now that we've tested both approaches, let's compare the final results.
Completed Seedance Sequence
Both workflows produced results close to our original vision, with nearly identical costs.
MiniMax H3 was faster, generating drafts in about 40 seconds compared to Seedance 2.5's two minutes. However, Seedance delivered noticeably better-quality drafts, making it easier to evaluate our shots before the final render.
Final Verdict: Draft First, Render Later
After testing both workflows, we're convinced that drafting before rendering is one of the easiest ways to save money on AI filmmaking.
Using Seedance 2.5's draft-to-HD workflow, we spent just $26 instead of an estimated $75 for our 15-second sequence. That's roughly 65% in savings!
But beyond cost, draft mode gives us more creative control. We can refine our shots, compositions, and performances before committing to expensive final renders.
It's not perfect, but for filmmakers looking to save money while getting closer to their creative vision, this is definitely a workflow worth trying.
Learn AI Filmmaking | Free Training
If you enjoyed this tutorial, we would love for you to check out our free training, where we share some industry updates and our favorite workflows. You also get free access to our online community full of Filmmakers and creatives from all over the world.
Fill out the form to begin learning. We would love to see you there, but not pressure of course.
