
Here’s the Best AI Workflow for a 2D + Live Action Film
In this article and tutorial, we’ll show you how to combine 2D animated characters, props, and effects with live-action footage using AI.
From Mary Poppins to Who Framed Roger Rabbit and Space Jam, combining 2D animation with live-action footage has created some pretty iconic moments in filmmaking.
The problem is that it’s traditionally a ton of work. Every shot essentially needs to be created twice: once in live action and again in animation.
But AI is making this workflow much more accessible. In this tutorial, we’ll show you how to use Seedance 2.5, AI image models, and traditional post-production tools to add 2D animated characters and effects to live-action footage.
Let’s get into it!
The Best AI Workflow for a 2D + Live Action Film | Tutorial
Check out the full tutorial below to see the entire workflow in action.

The Best AI Workflow for a 2D + Live Action Film | Tutorial
Below, we’ll break down how we planned the live-action shoot, created consistent 2D references, generated the animated elements, and cleaned everything up in post.
How the 2D Animation + Live-Action Workflow Works
For a project like this, a little planning goes a long way. You’re essentially creating each scene twice: first in live action and then again with the animated elements.
For this short, Albert planned out where the animated characters and props would appear before shooting, then used the live-action edit as the foundation for everything that came next.
Here’s the full workflow:
Step 1: Finish your live-action edit
Step 2: Create your character references
Step 3: Create your prop references
Step 4: Organize your video prompt with Crumpet
Step 5: Generate your 2D character
Step 6: Add 2D effects to live-action footage
Step 7: Create an AI stunt double
Step 8: Generate the 2D cartoon fight
Final cleanup: Fix any remaining issues in After Effects
Step 1: Finish and Export Your Live-Action Edit
Before generating anything with AI, get your live-action edit as close to finished as possible.
We cut the entire short, organized the audio, and completed the basic color grade before adding any AI elements.
This is important because AI video generation can get expensive. You don’t want to generate a six-second animated shot only to realize later that you only needed two seconds of it.
Organization also makes the workflow much easier. Keep the live-action footage and AI-generated footage on separate layers so you can immediately tell the difference.
The same goes for audio. Keep dialogue, ambience, sound effects, and music separated onto different tracks.
When you’re ready to work on a shot, set your in and out points and export only the section you need. Give yourself a little extra footage on either side so you have handles to work with in the final edit.
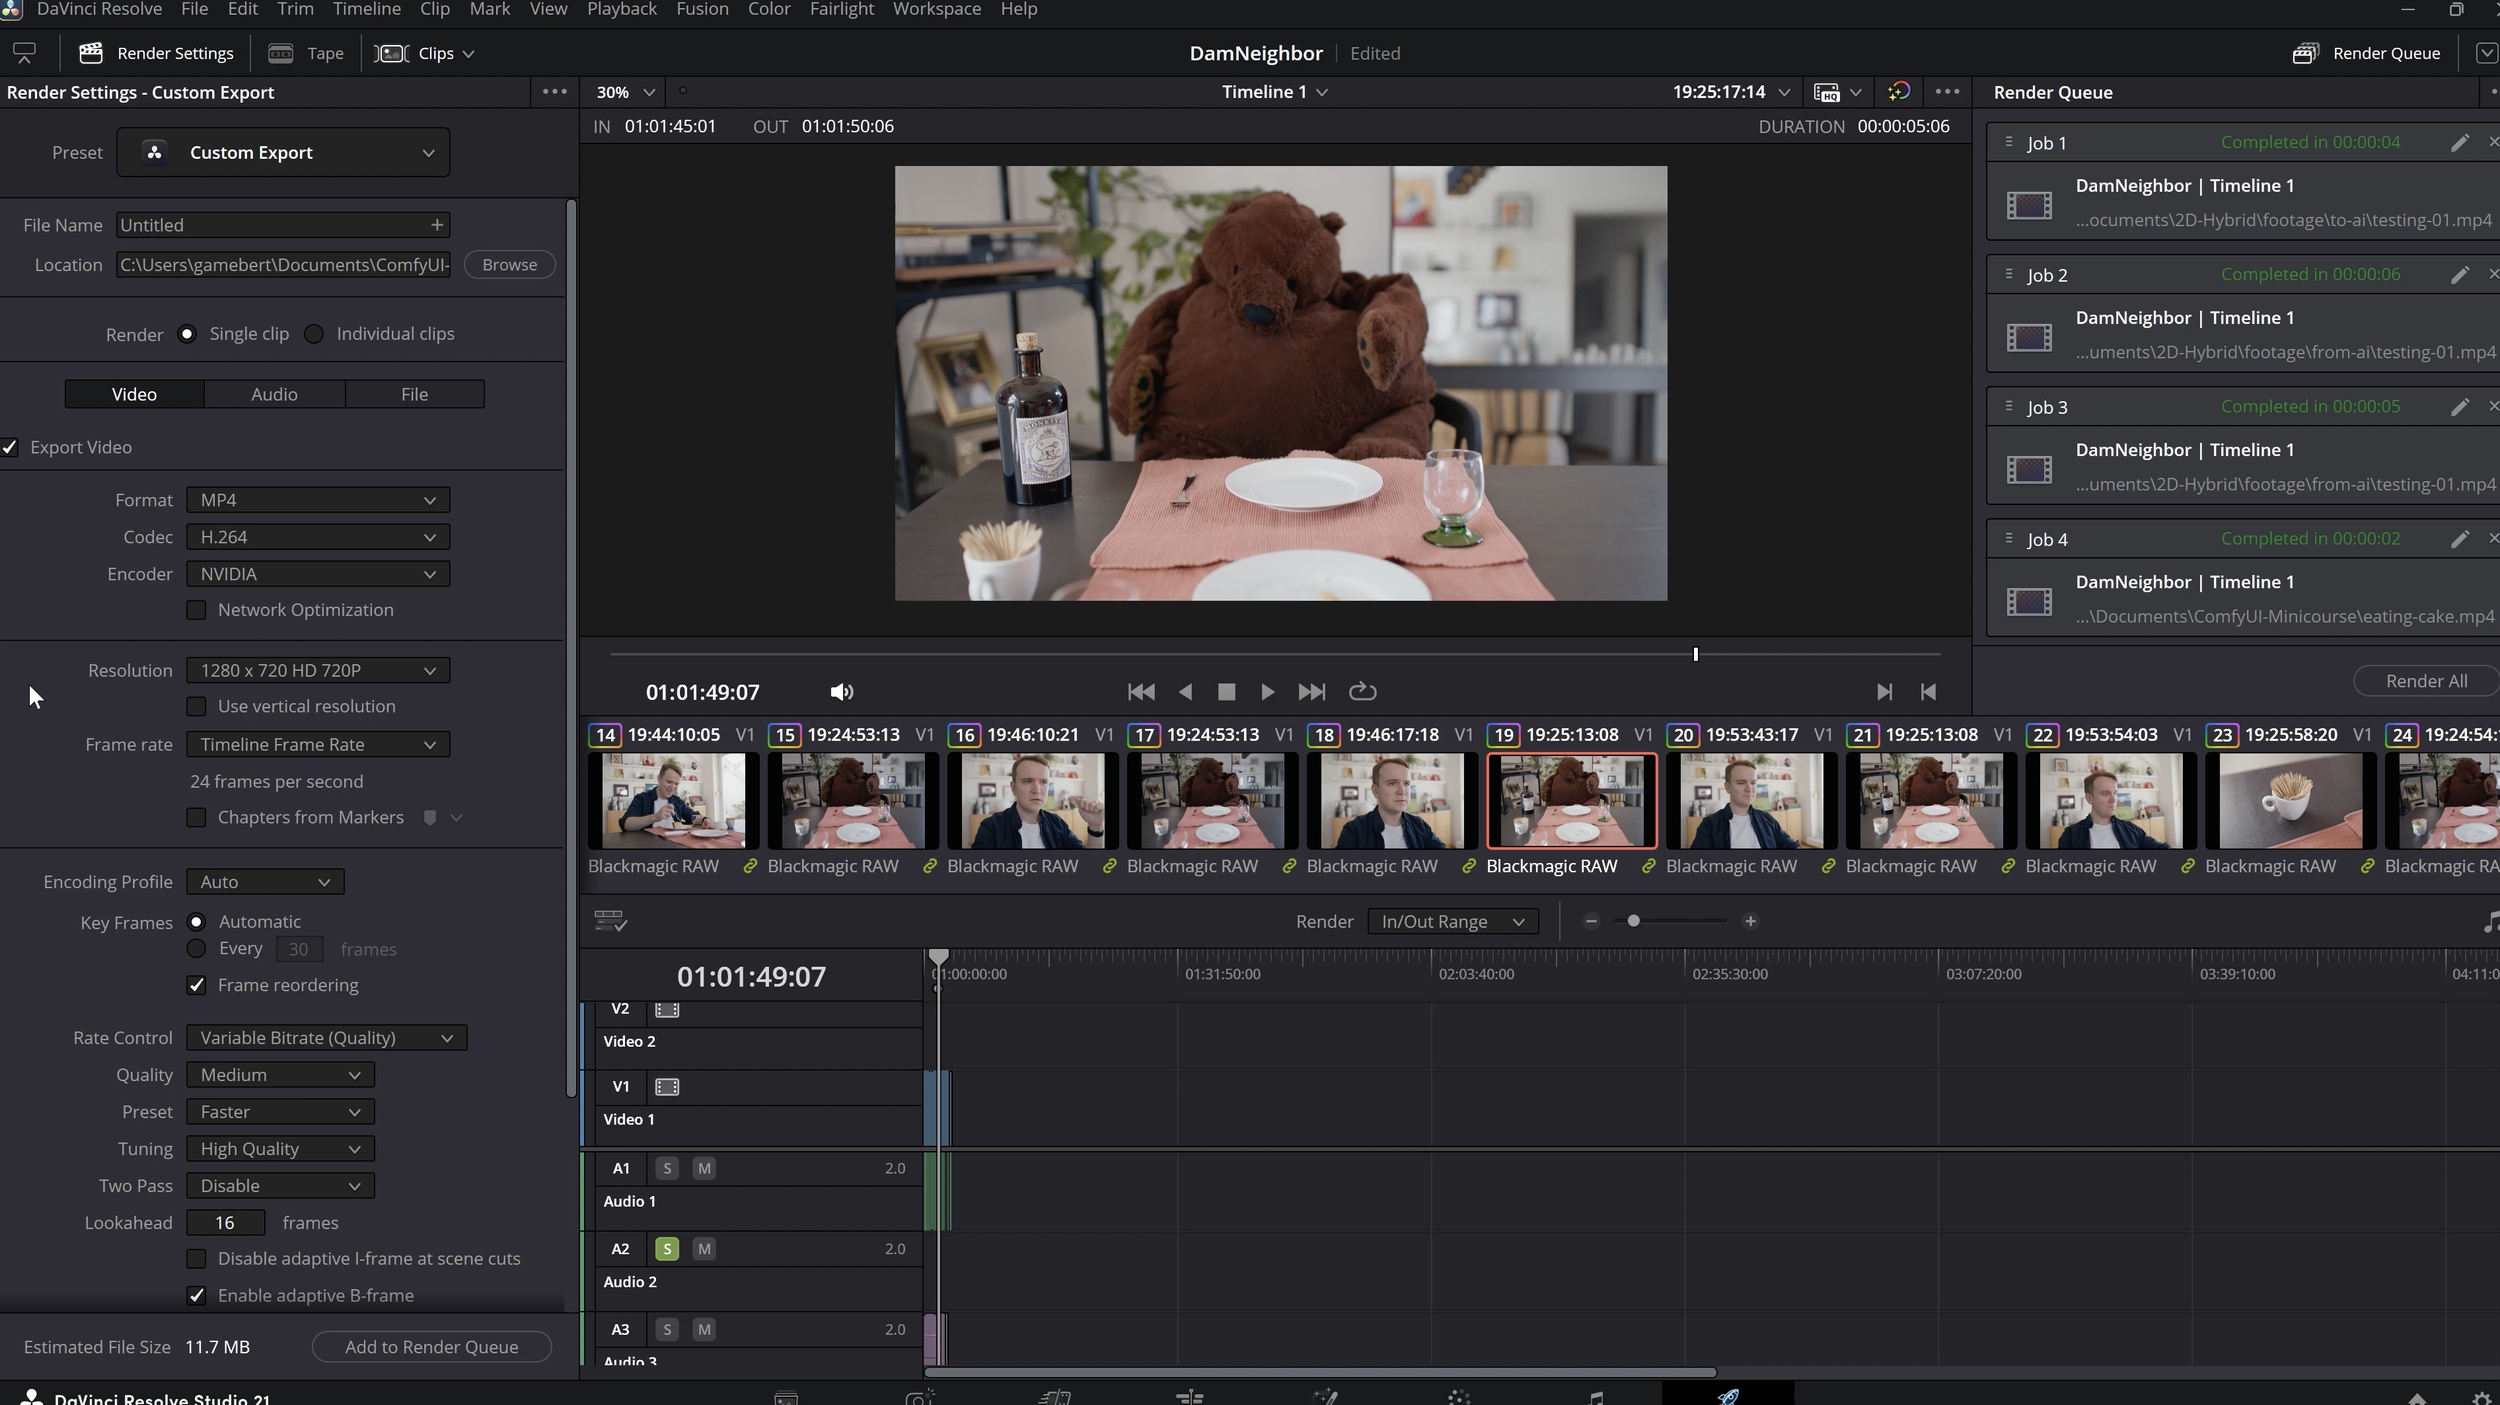
For this workflow, we exported the footage as an MP4 at 720p and removed any music or unnecessary audio so Seedance only received the information we actually wanted it to work with.
And whenever possible, preserve the original camera movement.
Even subtle handheld camera shake can help sell the final effect because the AI-generated elements inherit the movement of the footage around them.
Step 2: Build Your Character and Prop References
Next, you’ll want to give the AI clear visual references for any animated characters you plan to add.
For the 2D beaver, Albert started with a full character turnaround showing the front, side, and back views, plus a close-up of the face.
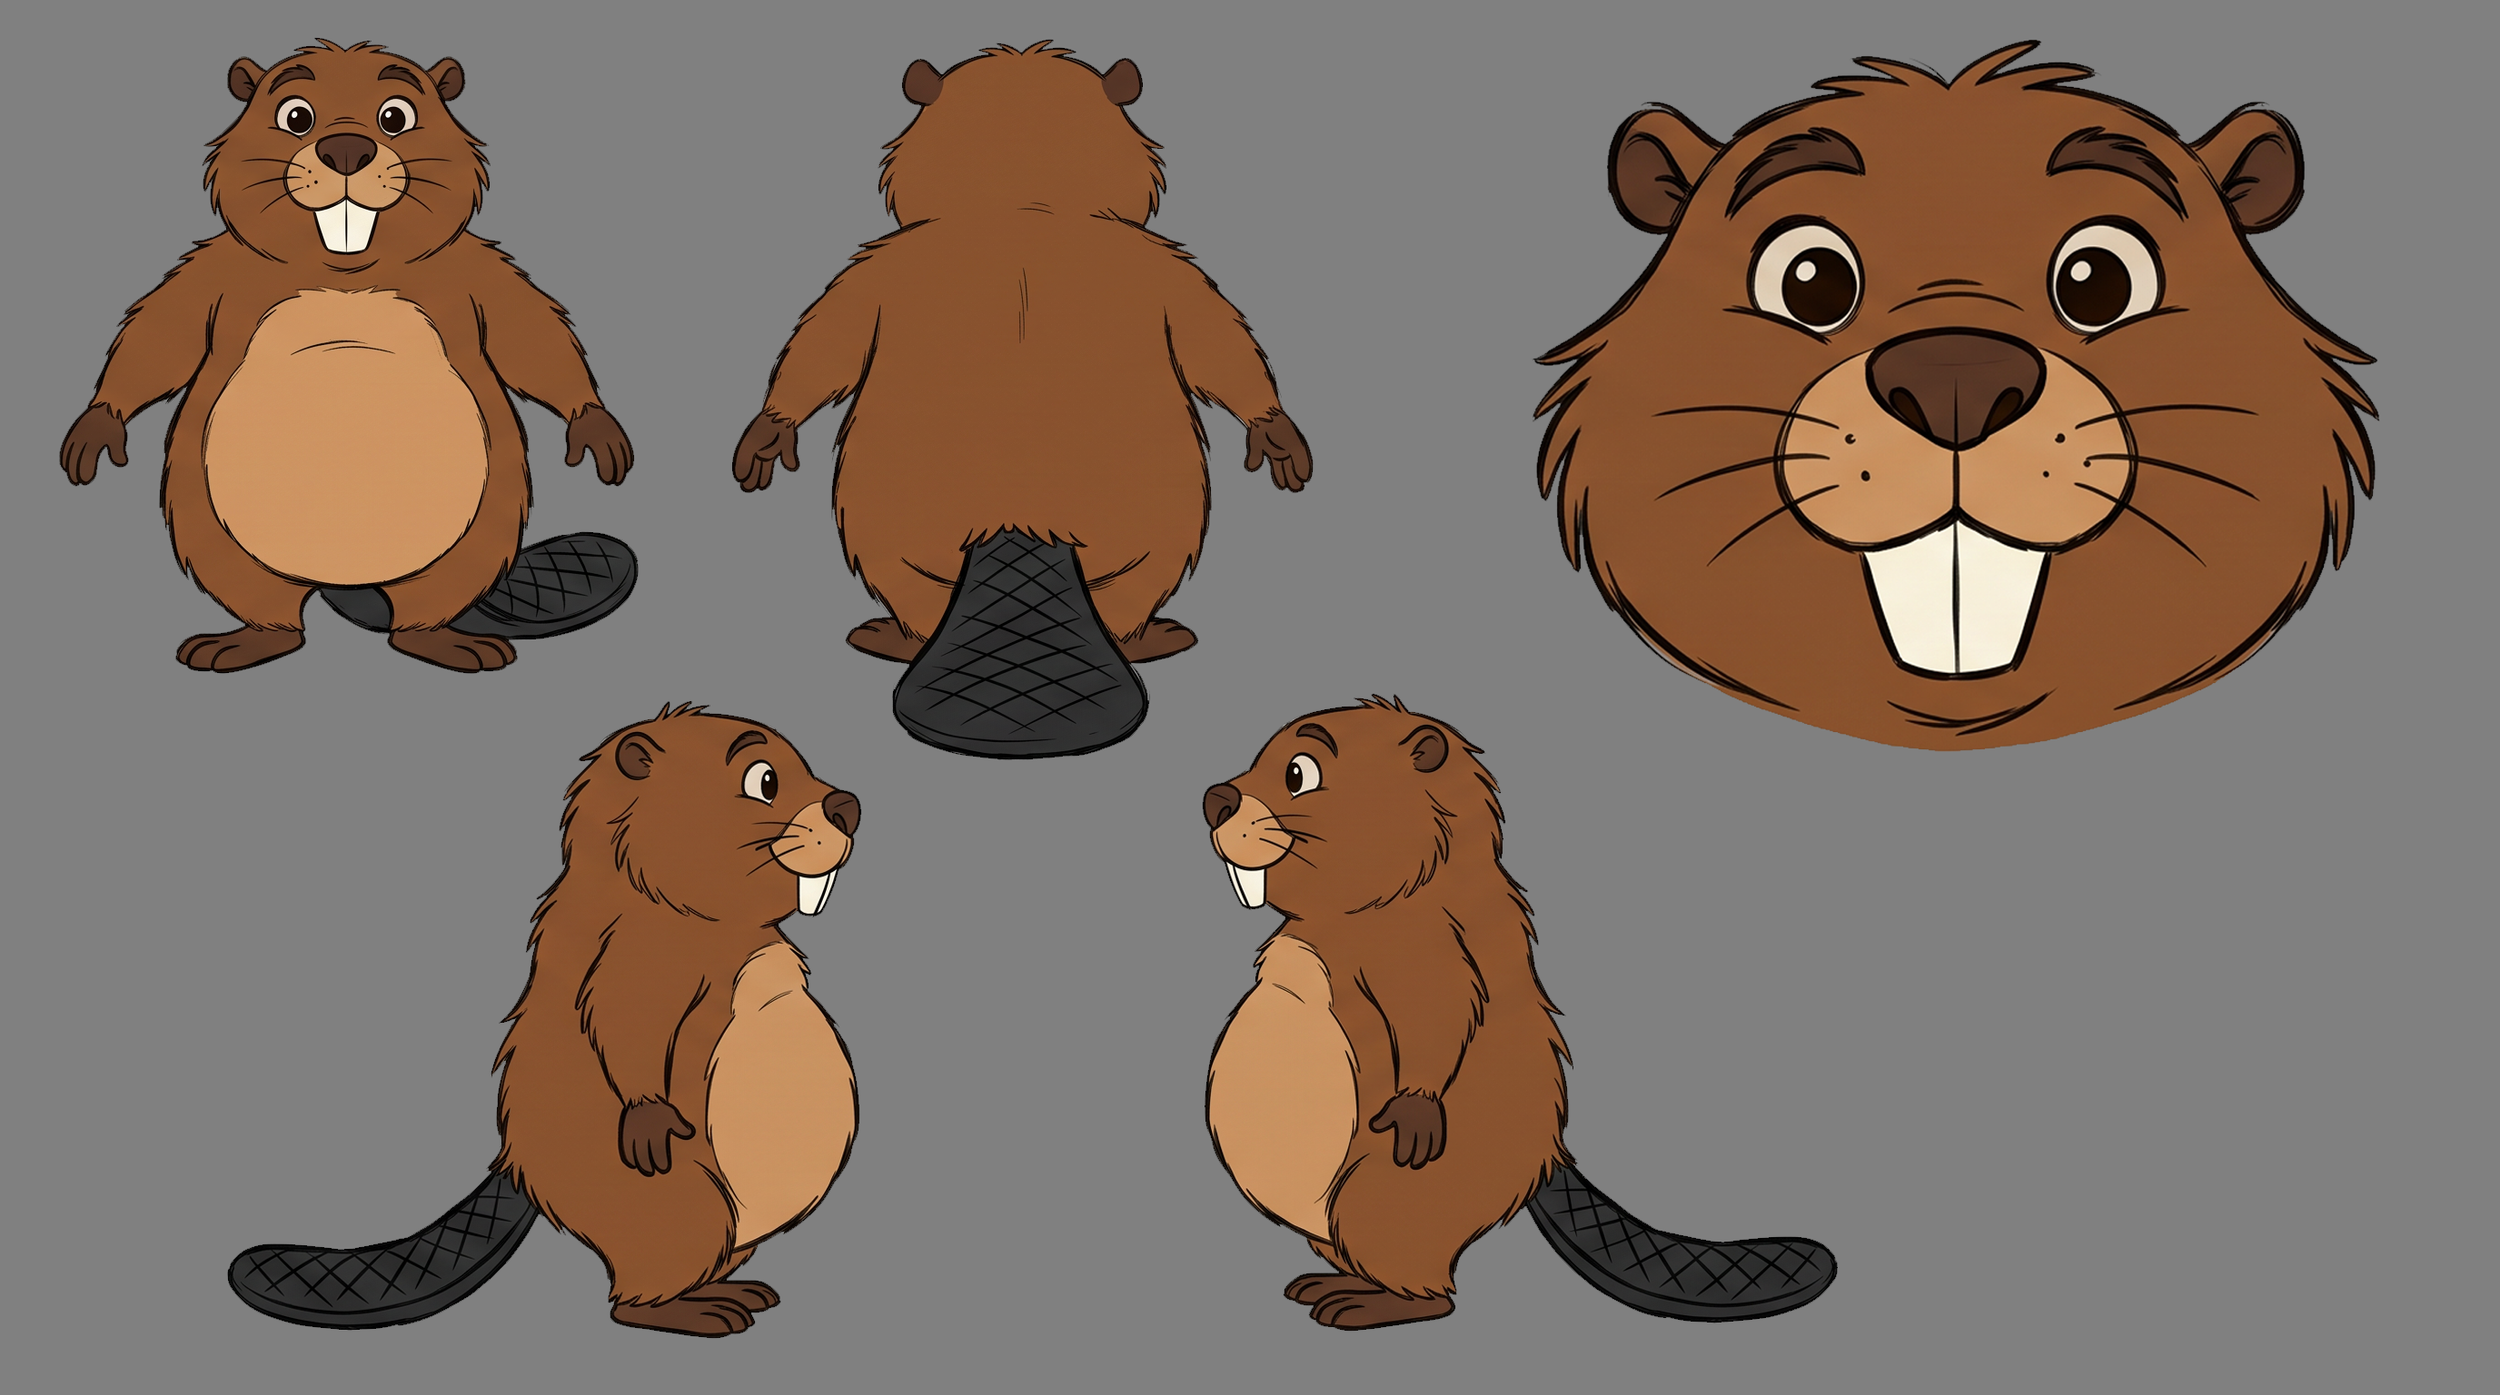
He recommends using a neutral grey background and an A-pose instead of a T-pose. The arms take up less space while still giving the model a clear understanding of the character’s proportions.
Once he had a design he liked, Albert cleaned up the turnaround in Photoshop and used the same character to create an expression sheet.
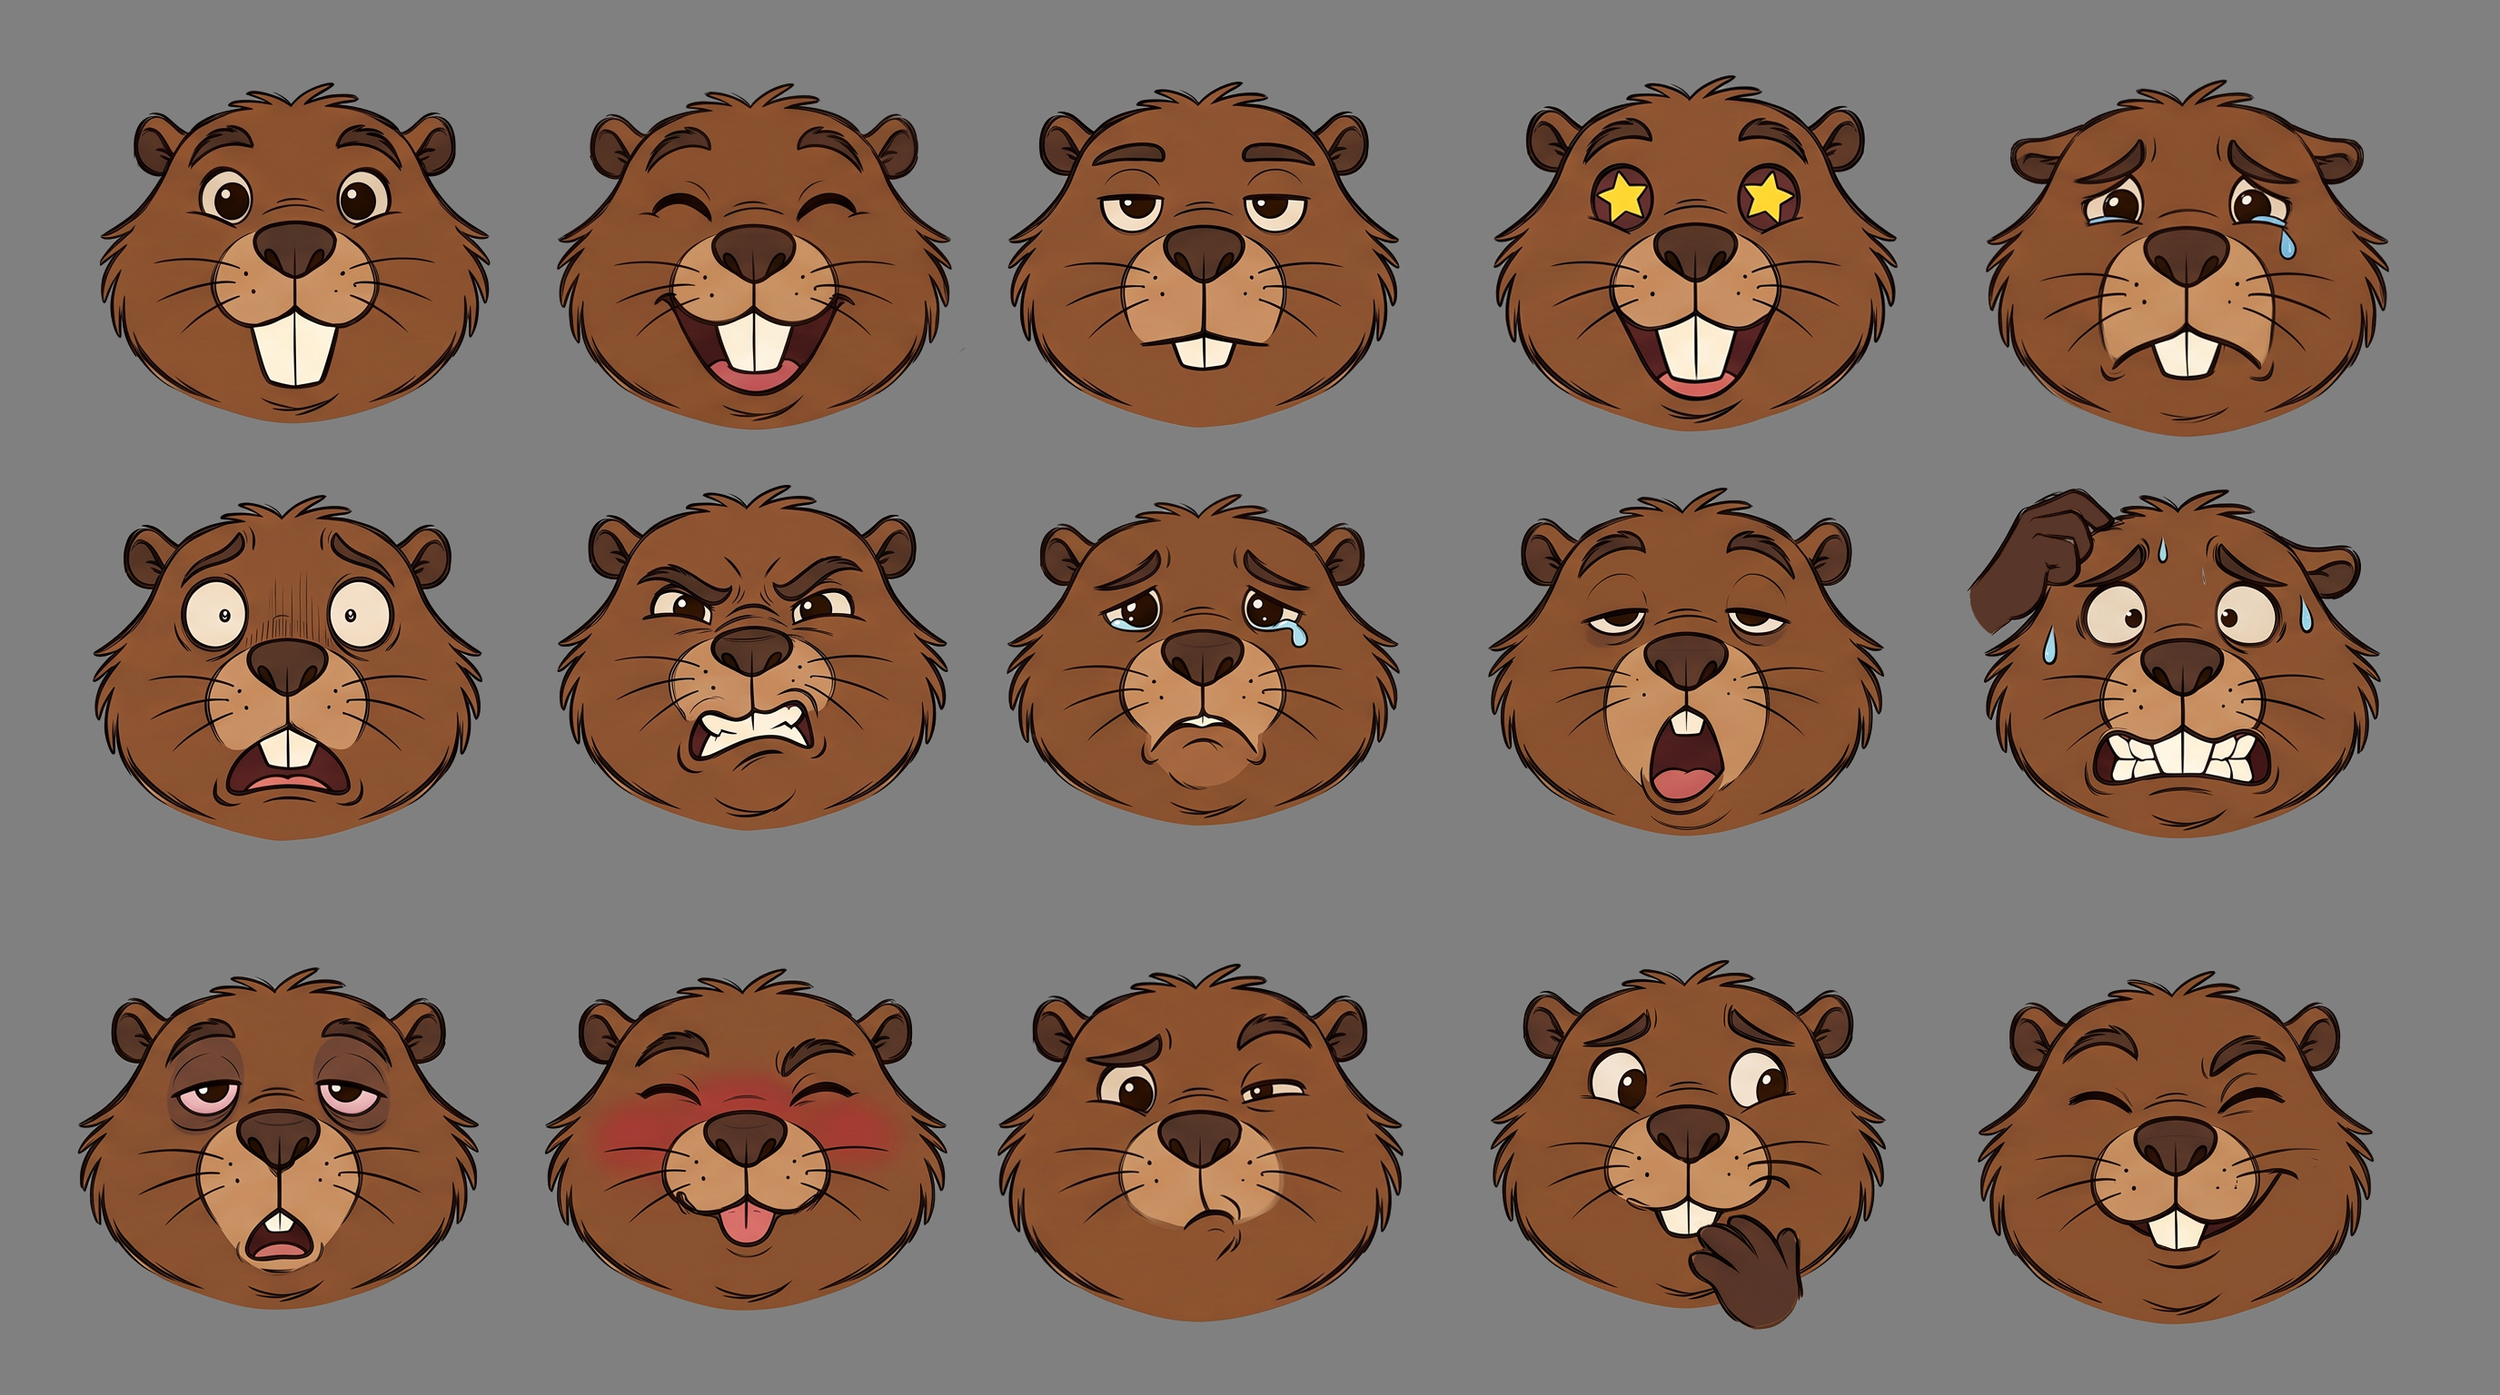
The expression sheet gives the video model more information about how the character should look across different emotions.
Albert generated several versions and combined his favorite expressions into one final reference sheet.
Together, the turnaround and expression sheet give Seedance a much stronger understanding of the character before you start generating video.
Step 3: Create Your Prop References
You can use the same process for any animated props your character needs to interact with.
For this short, that included a cartoon bottle of whiskey and a pie.
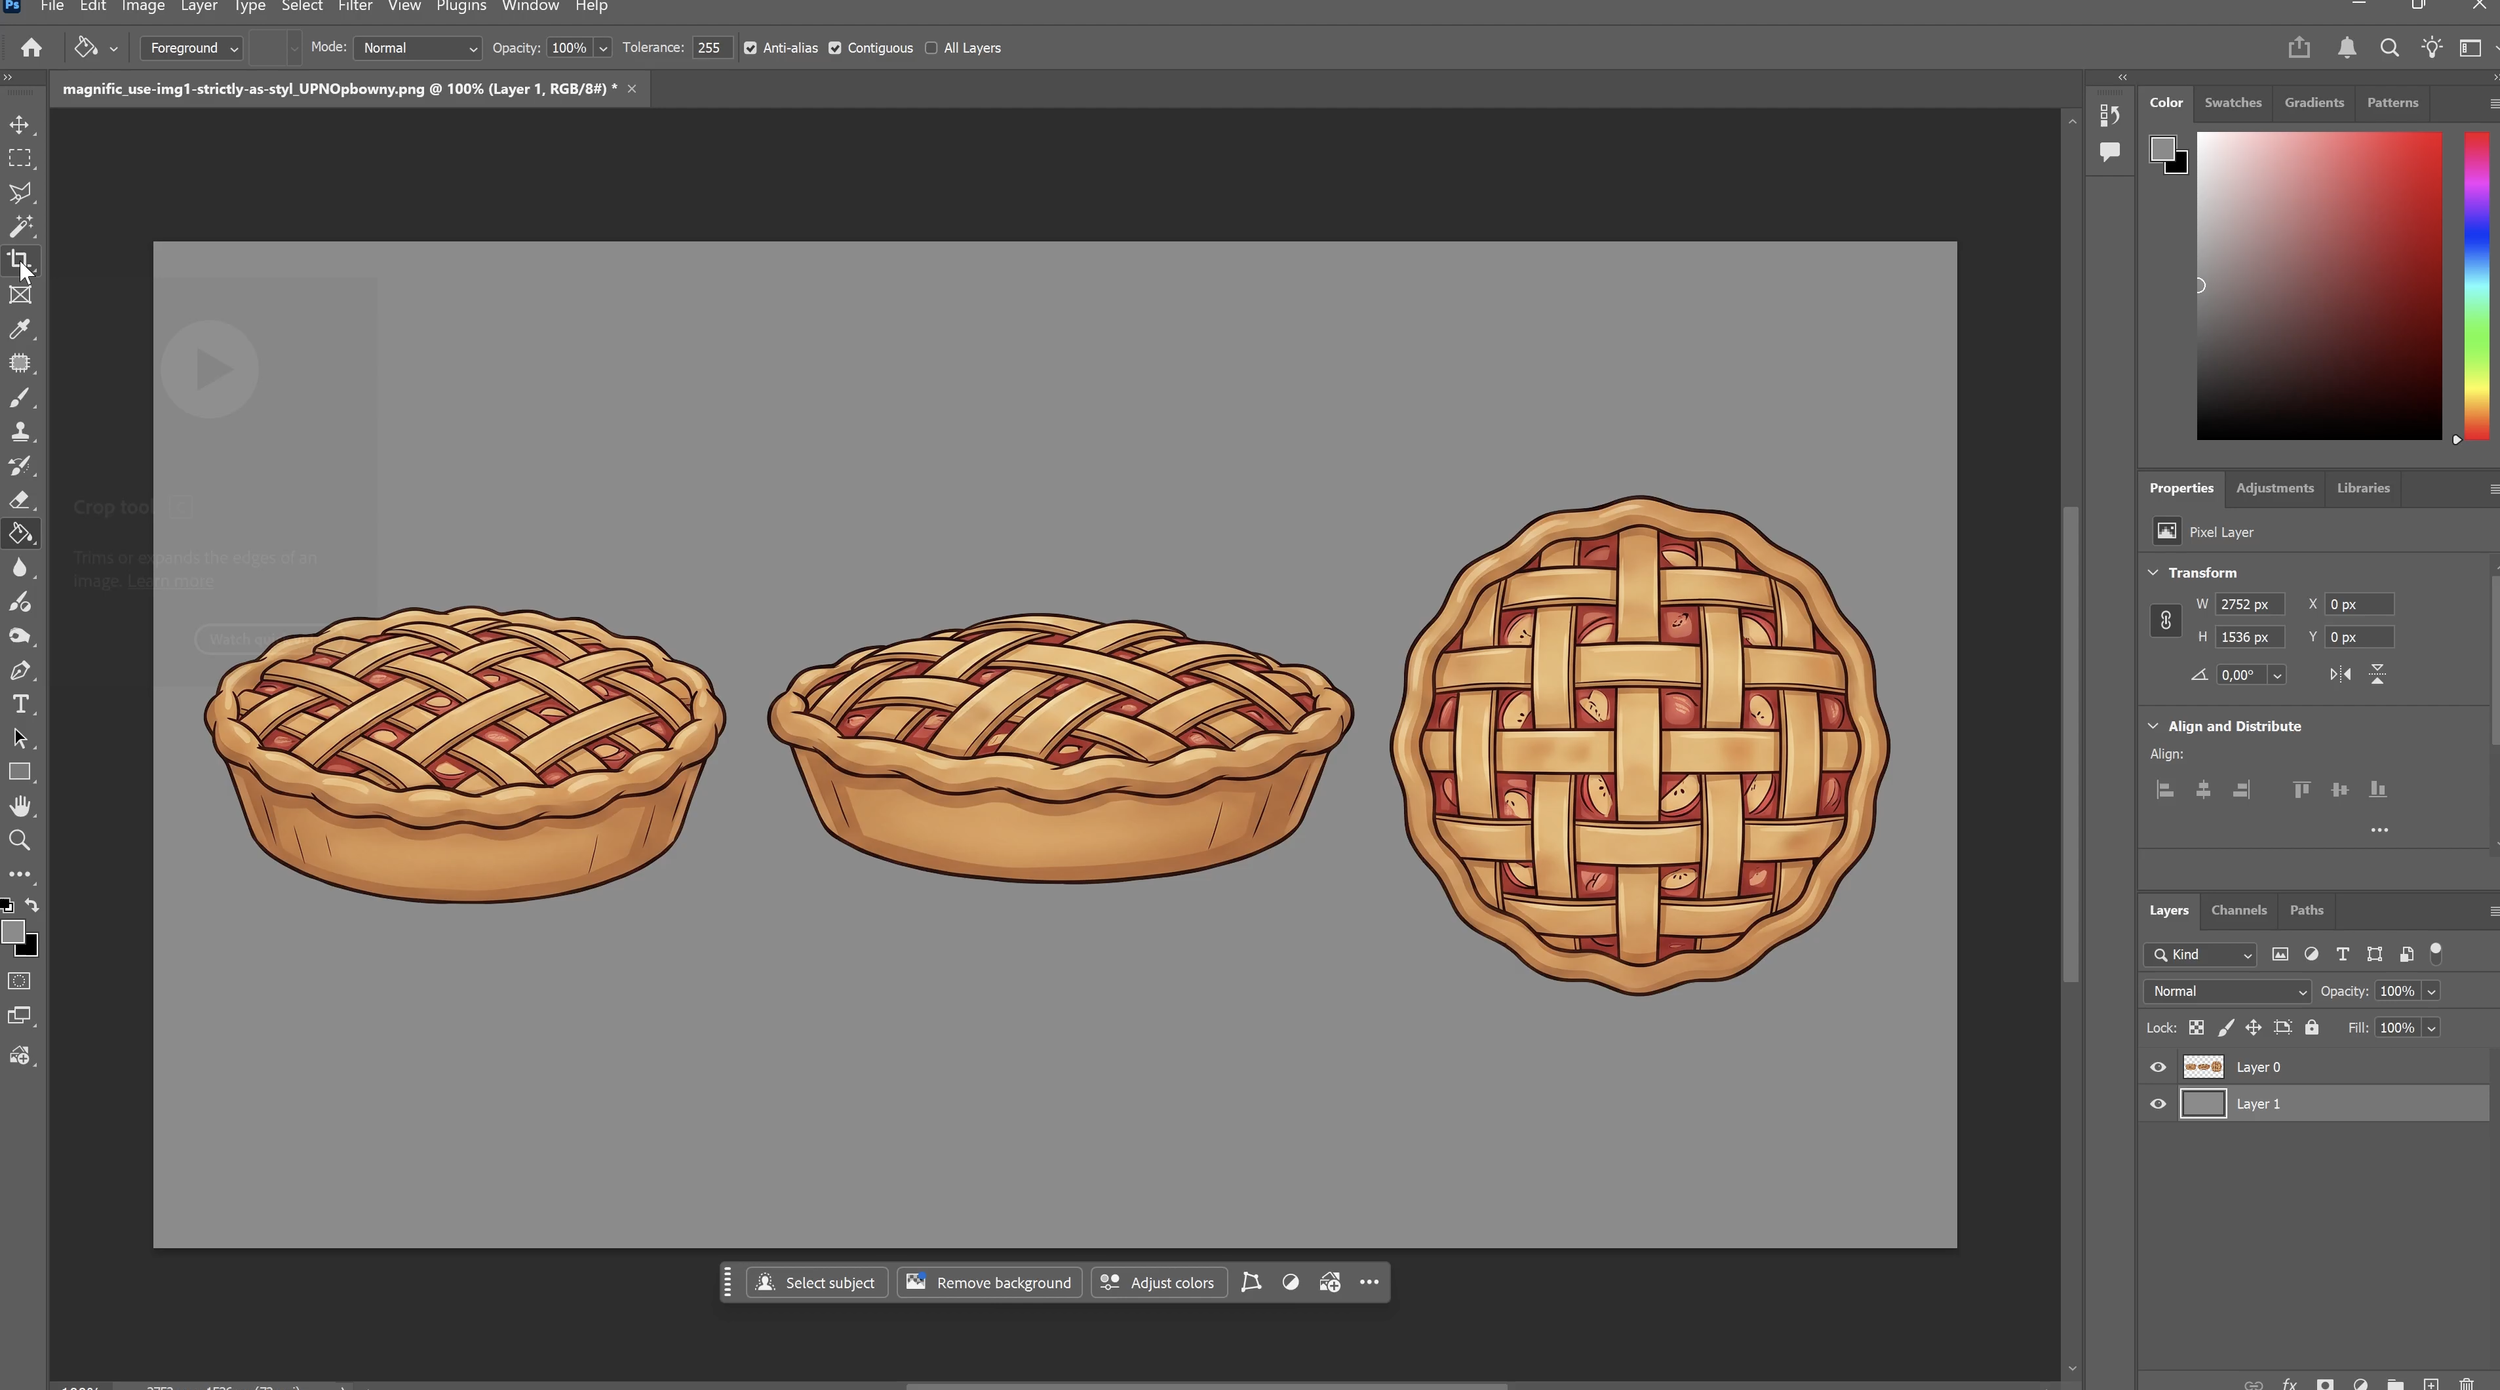
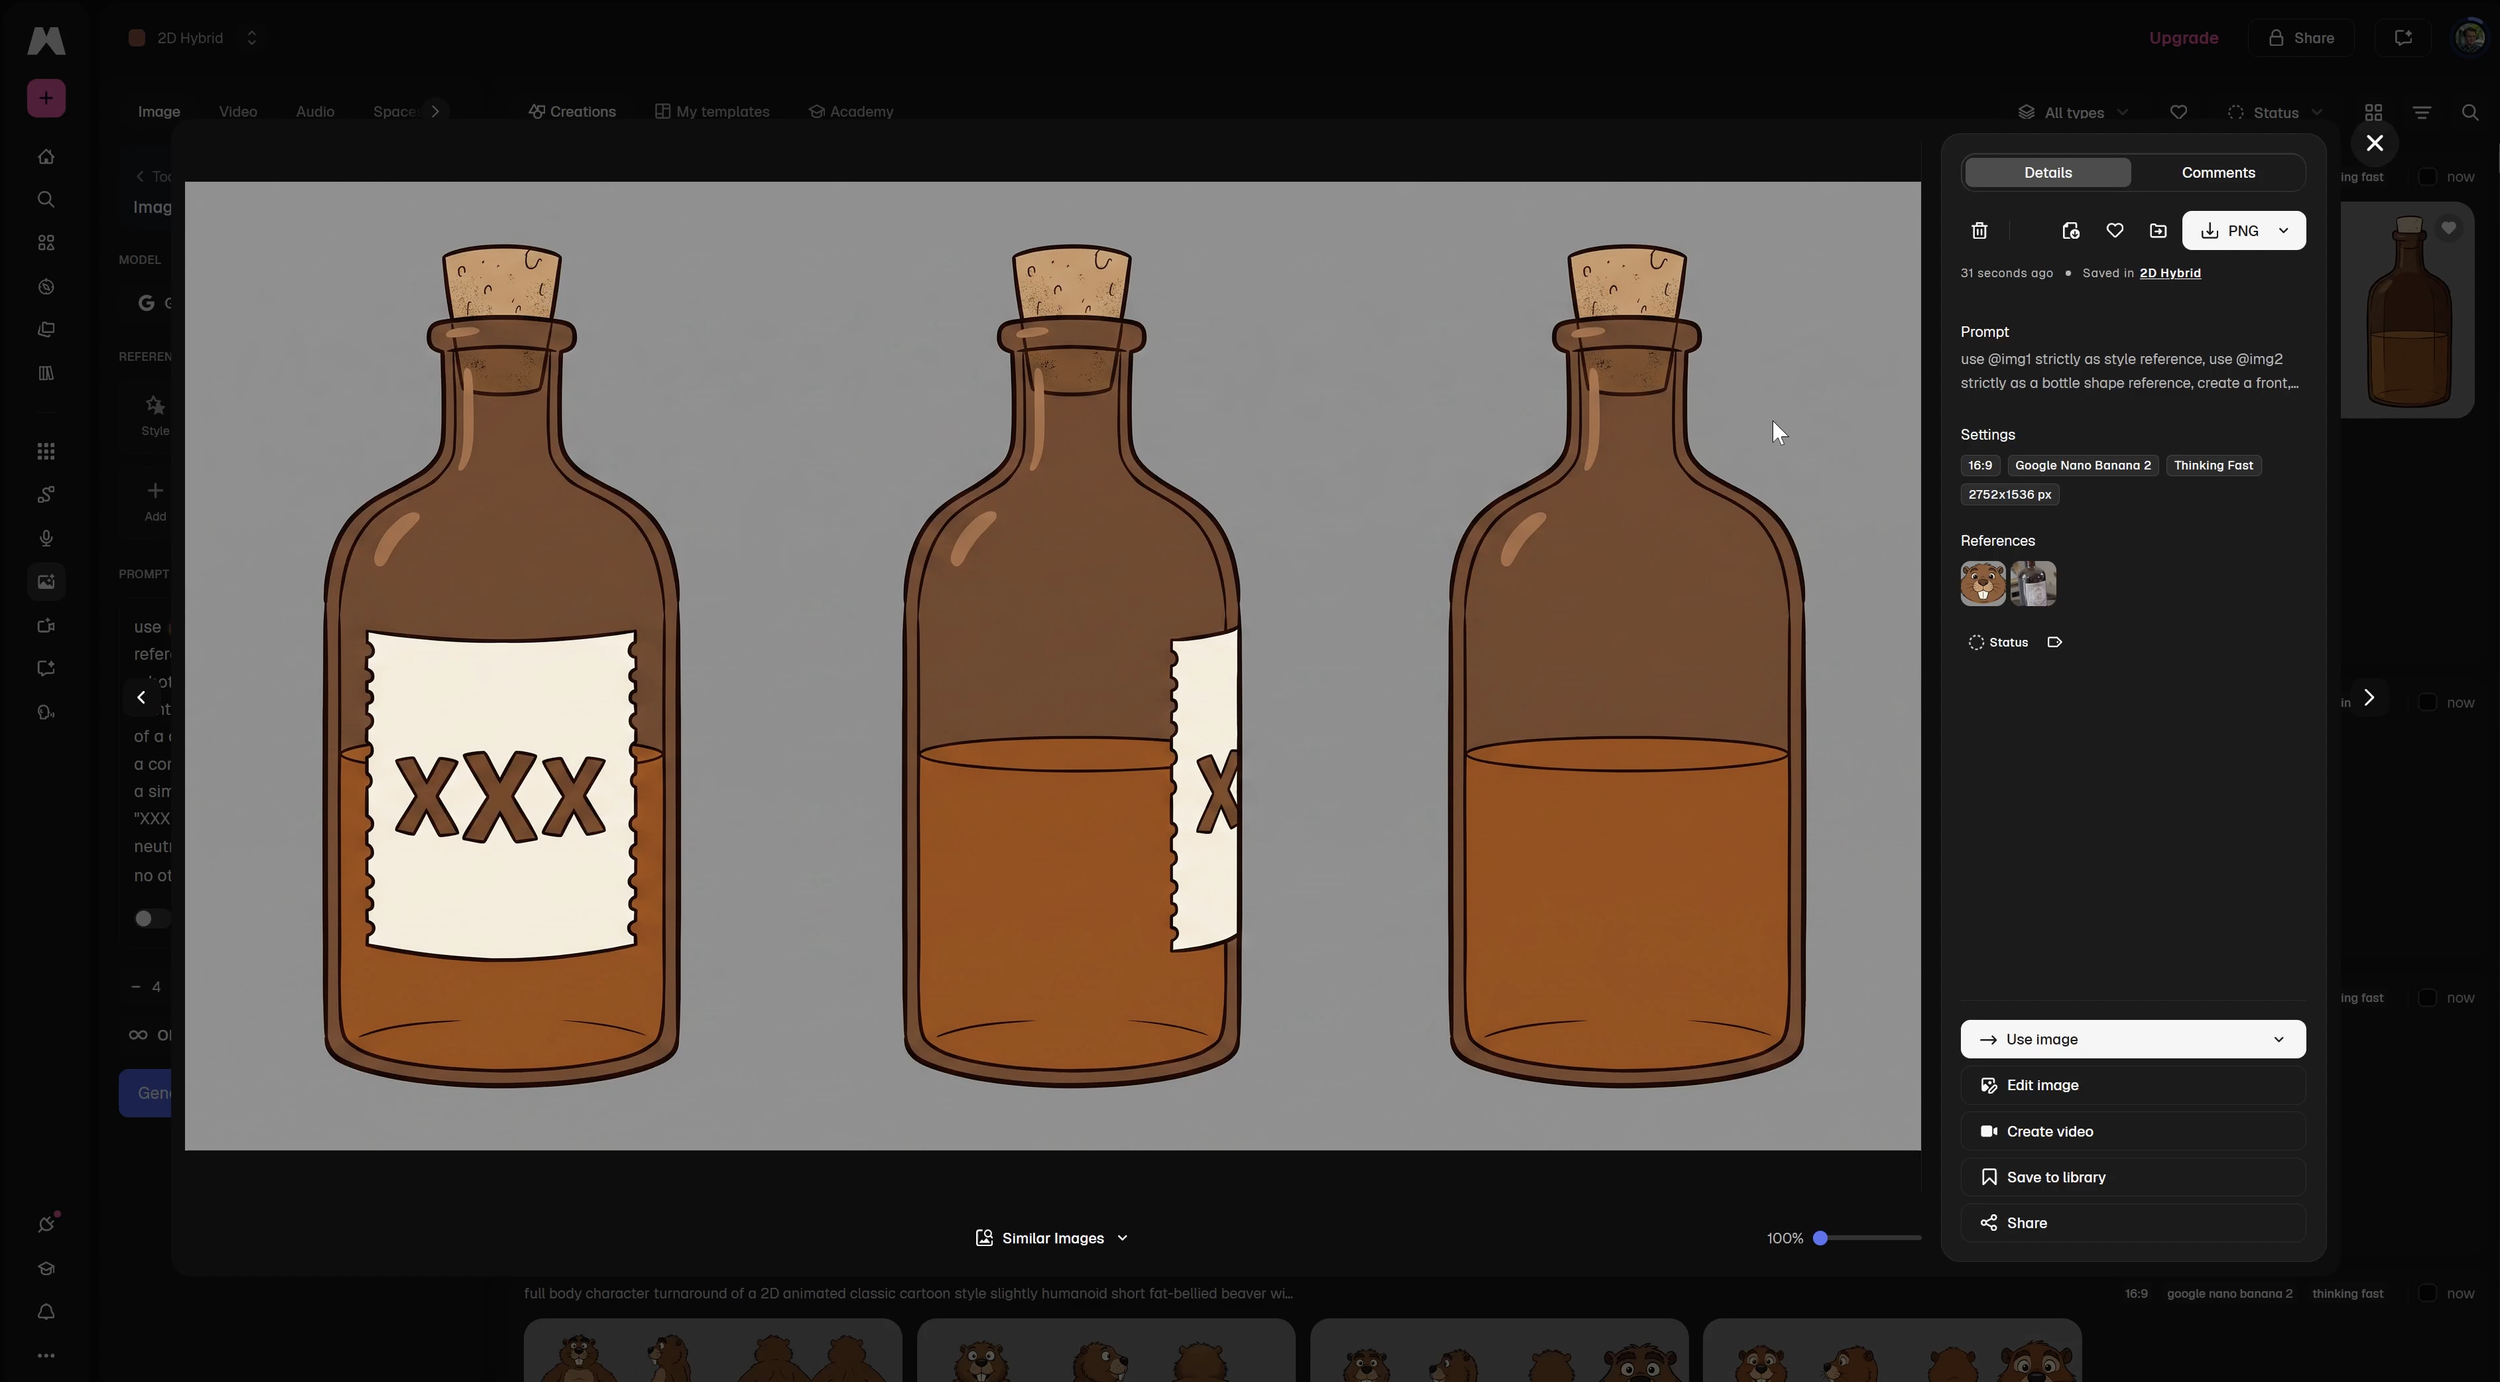
For the bottle, Albert grabbed a frame of the real bottle used on set and asked the image model to use it strictly as a shape reference while recreating it in the same 2D style as the beaver.
The important thing here is to be specific about how you want the model to interpret each reference.
If you only want it to reference an object’s shape, say that. You don’t necessarily want it copying the original image’s background or visual style.
And keep things simple. If a prop only appears briefly or from one angle, you probably don’t need an elaborate turnaround.
Step 4: Organize Your Video Prompt With Crumpet
Once the footage and references are ready, you can start building the video prompt.
For this project, Albert used Crumpet, a free tool he built to organize reusable prompt elements and map specific actions to different moments in a shot.
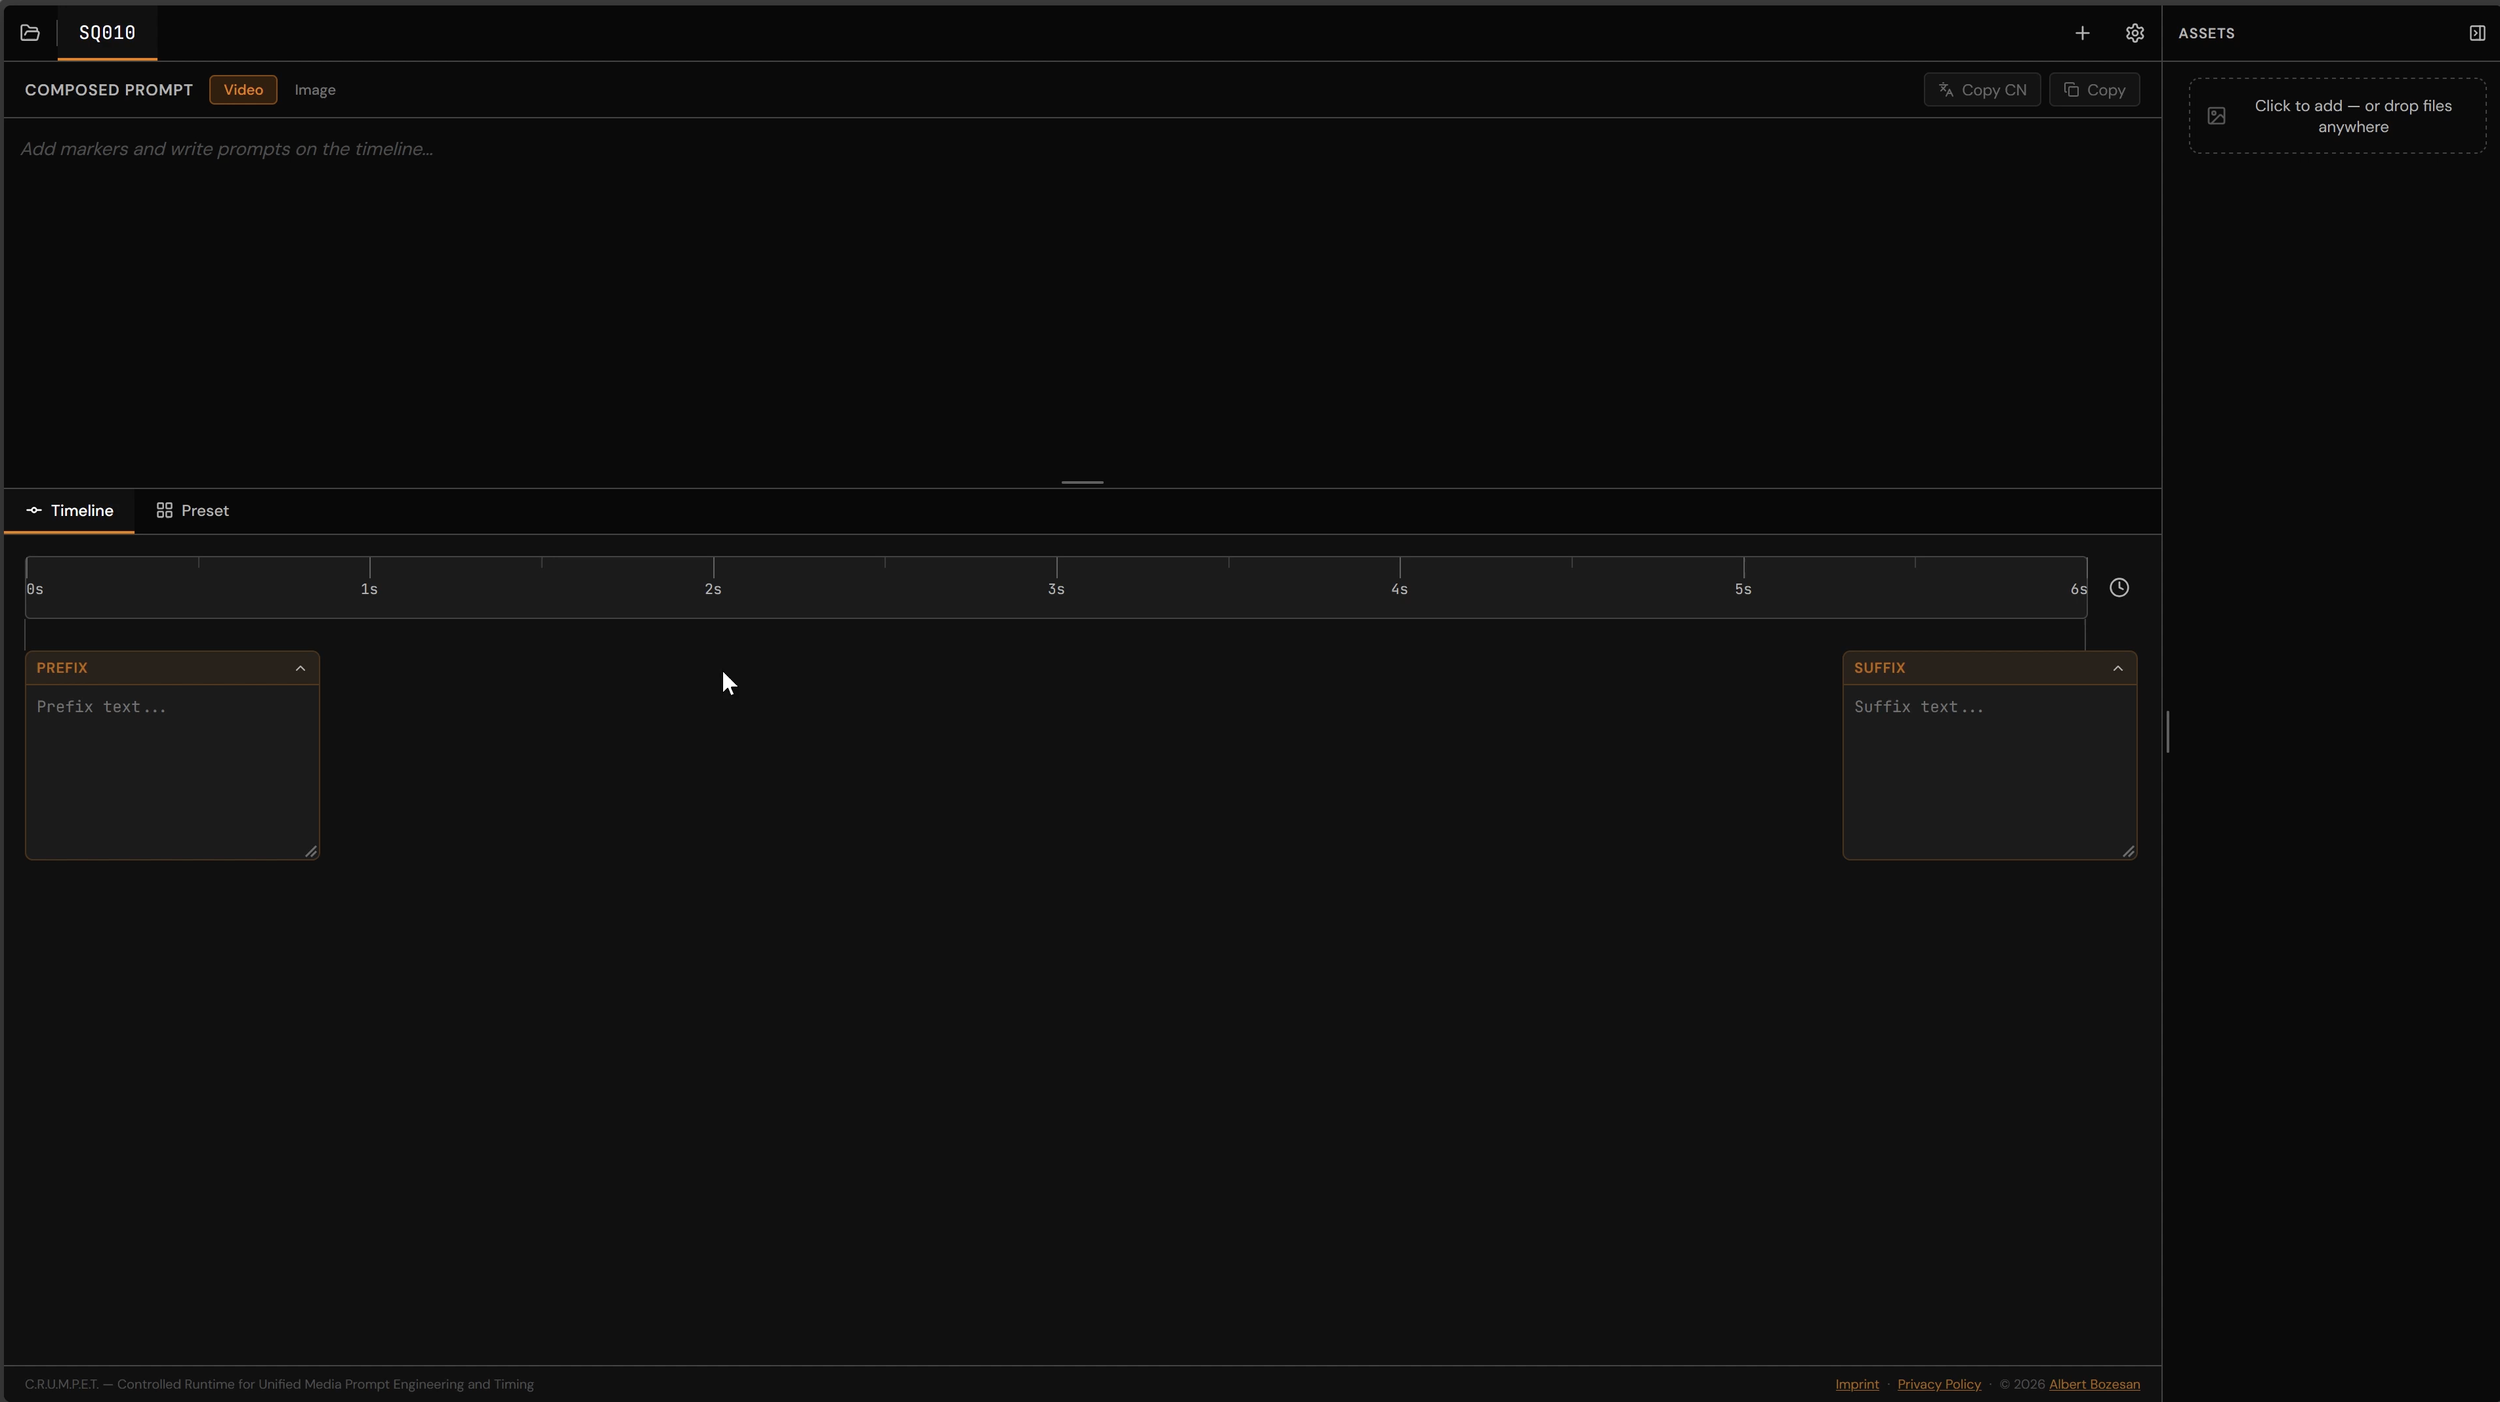
This is especially useful when several actions need to happen in a specific order.
For the first shot, the beaver needs to raise his finger like he has an idea, reach behind his back, pull out the bottle, pour a drink, and offer the glass forward.
Instead of trying to communicate all of that in one giant paragraph, Crumpet lets Albert map those actions along a timeline so Seedance has a clearer idea of when each action should happen.
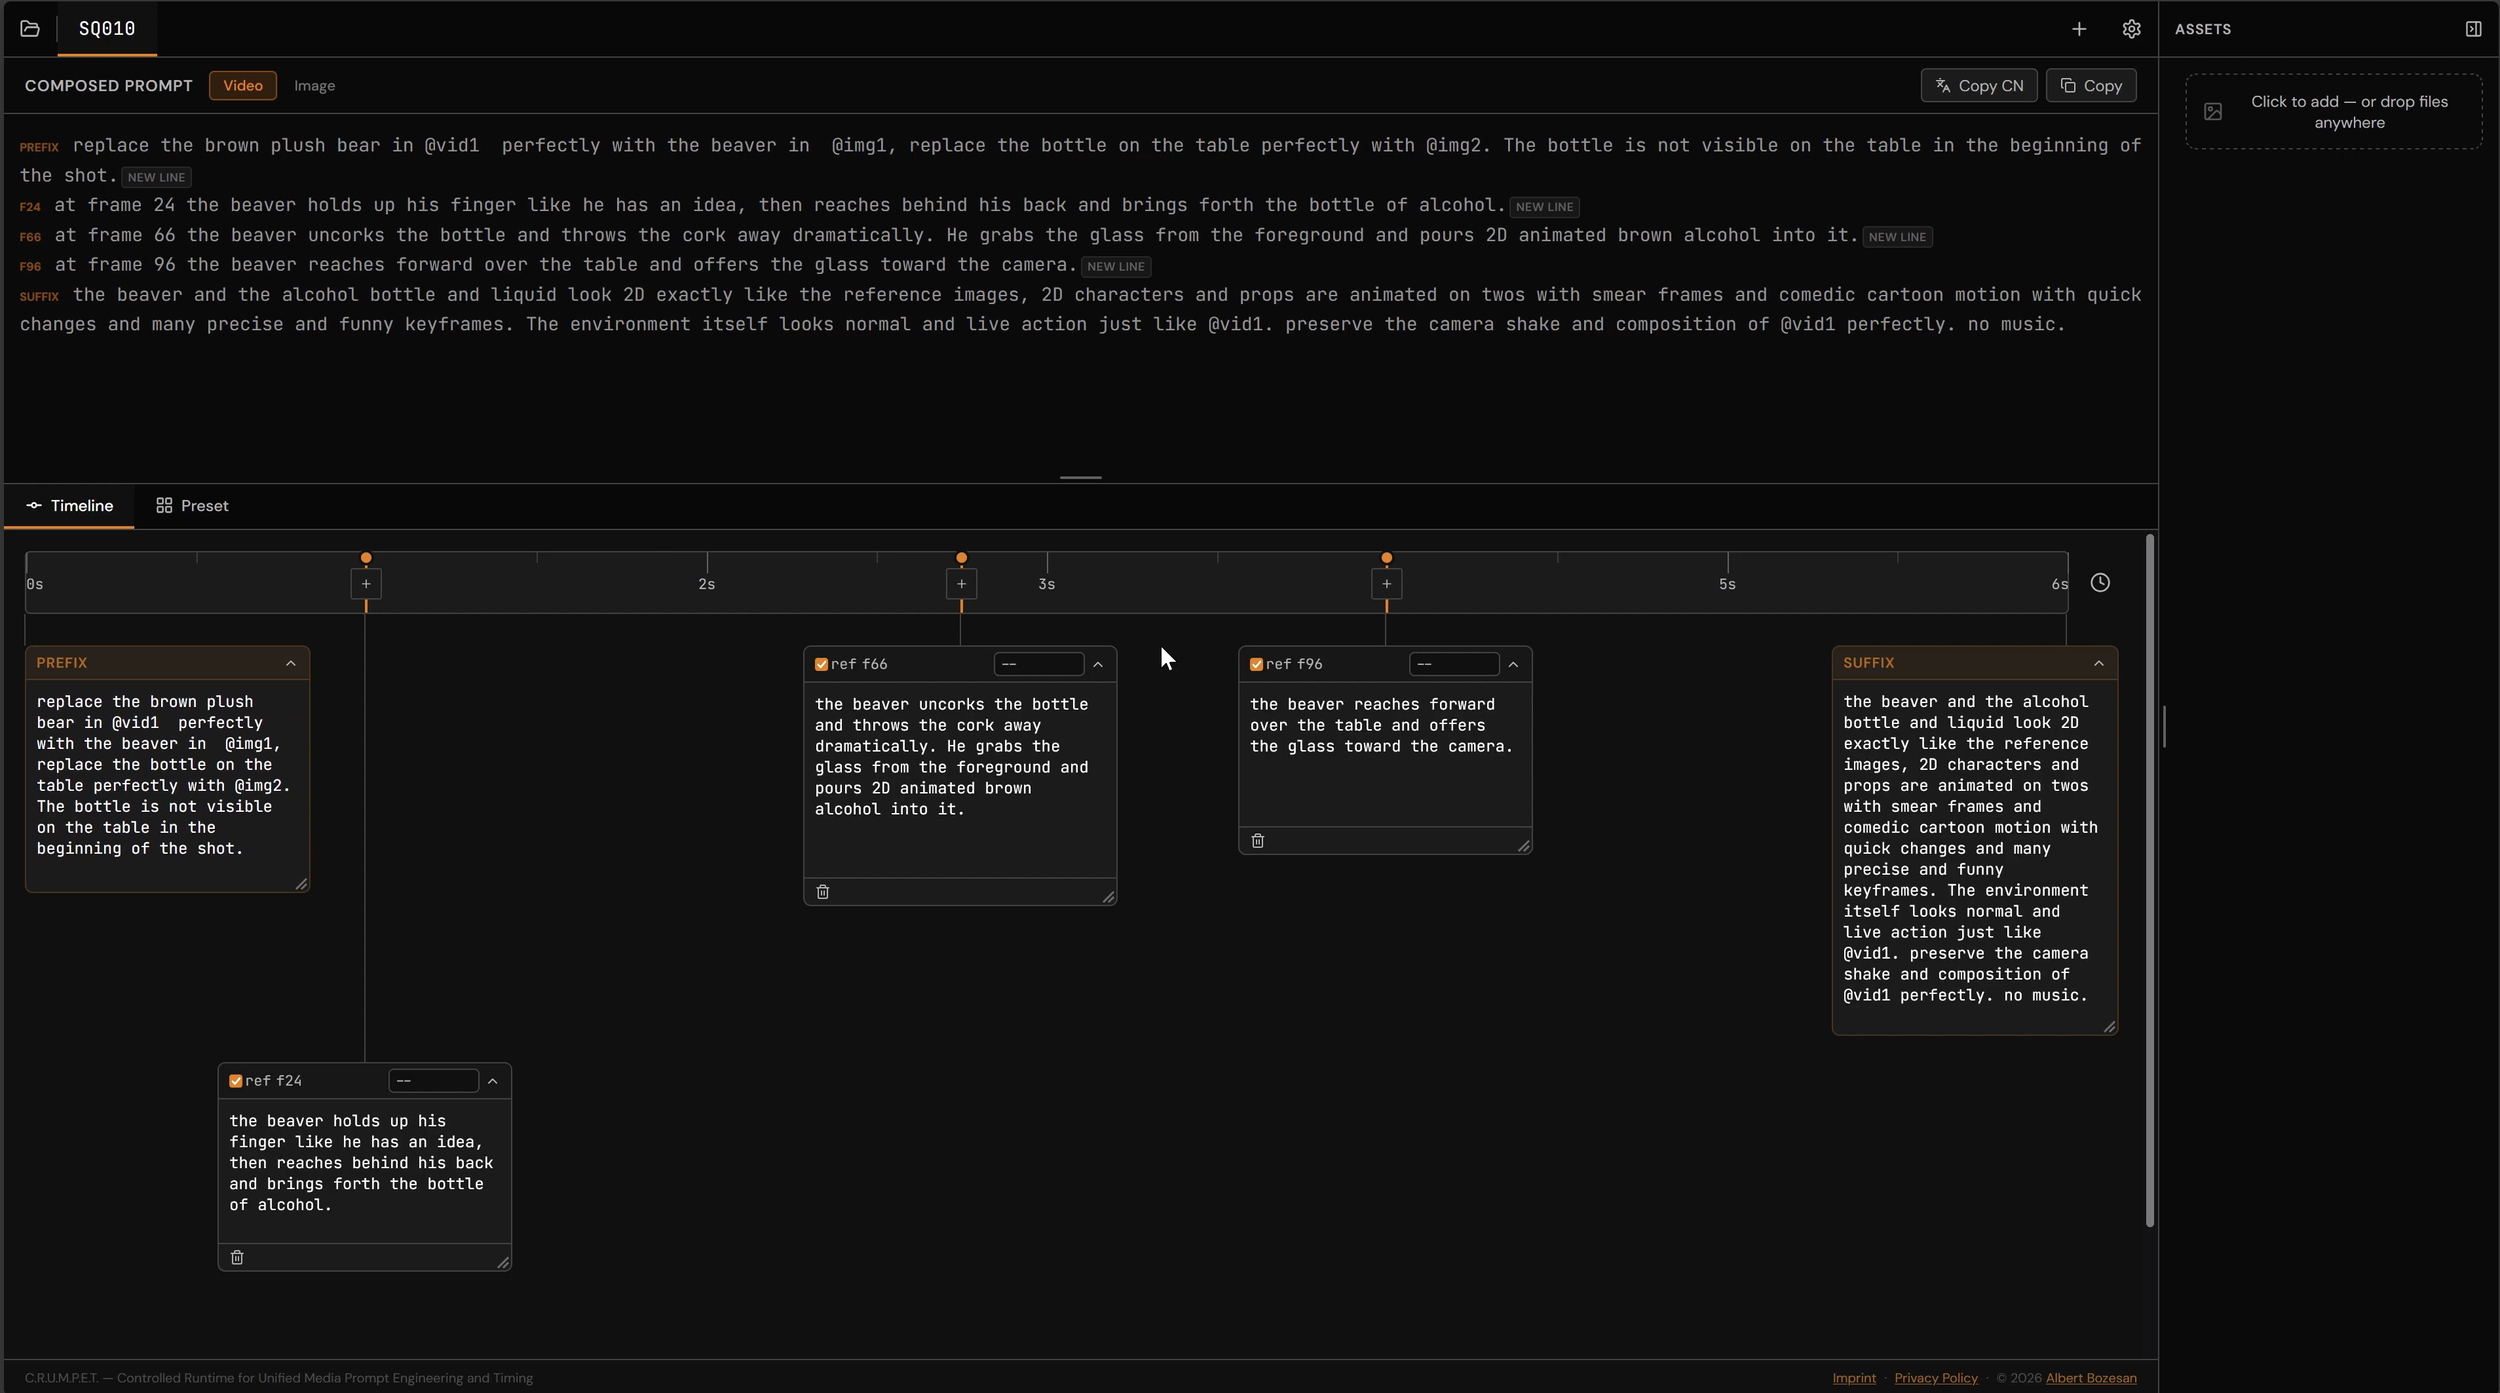
You can also save reusable instructions that need to stay consistent across multiple shots.
For example, Albert wanted the 2D characters and props to retain their animated look rather than slowly becoming photorealistic. So he reused instructions telling Seedance to preserve the 2D style, use cartoon motion and smear frames, keep the environment live action, and preserve the original camera shake and composition.
That gives you a repeatable prompt structure instead of starting from scratch with every shot.
Generate the 2D Animation With Seedance 2.5
Now that the live-action footage, character references, props, and prompts are ready, we can start generating the actual animated shots.
And this is where the workflow gets pretty fun.
Step 5: Generate Your 2D Character
For the first shot, Albert uploaded the following into Magnific:
The live-action reference video
The beaver character turnaround
The beaver expression sheet
The animated bottle reference
The live-action footage gives Seedance the composition, camera movement, depth, and timing. The reference sheets tell it what the character and props should look like. And the prompt organized in Crumpet tells it what should happen throughout the shot.
For this generation, Albert used 720p, 16:9, and a six-second duration.
One detail Albert particularly wanted to preserve was the shallow depth of field.
When the beaver reaches toward the foreground, parts of his animated body become blurry just like a real subject occupying that space.
It’s a small detail, but things like depth of field, camera shake, and object scale go a long way toward making a flat 2D character feel integrated into a three-dimensional environment.
Albert also intentionally kept the real bottle in the original footage so Seedance had a clear size reference for the animated replacement.
This is a good example of why these workflows aren’t just about what happens after the shoot. The decisions you make while filming can give the AI much better information to work with later.
Step 6: Add 2D Effects to Live-Action Footage
Next, Albert wanted to push the workflow beyond simply adding a character.
After drinking the cartoon whiskey, his head needed to explode into a completely 2D animated effect.
Naturally.
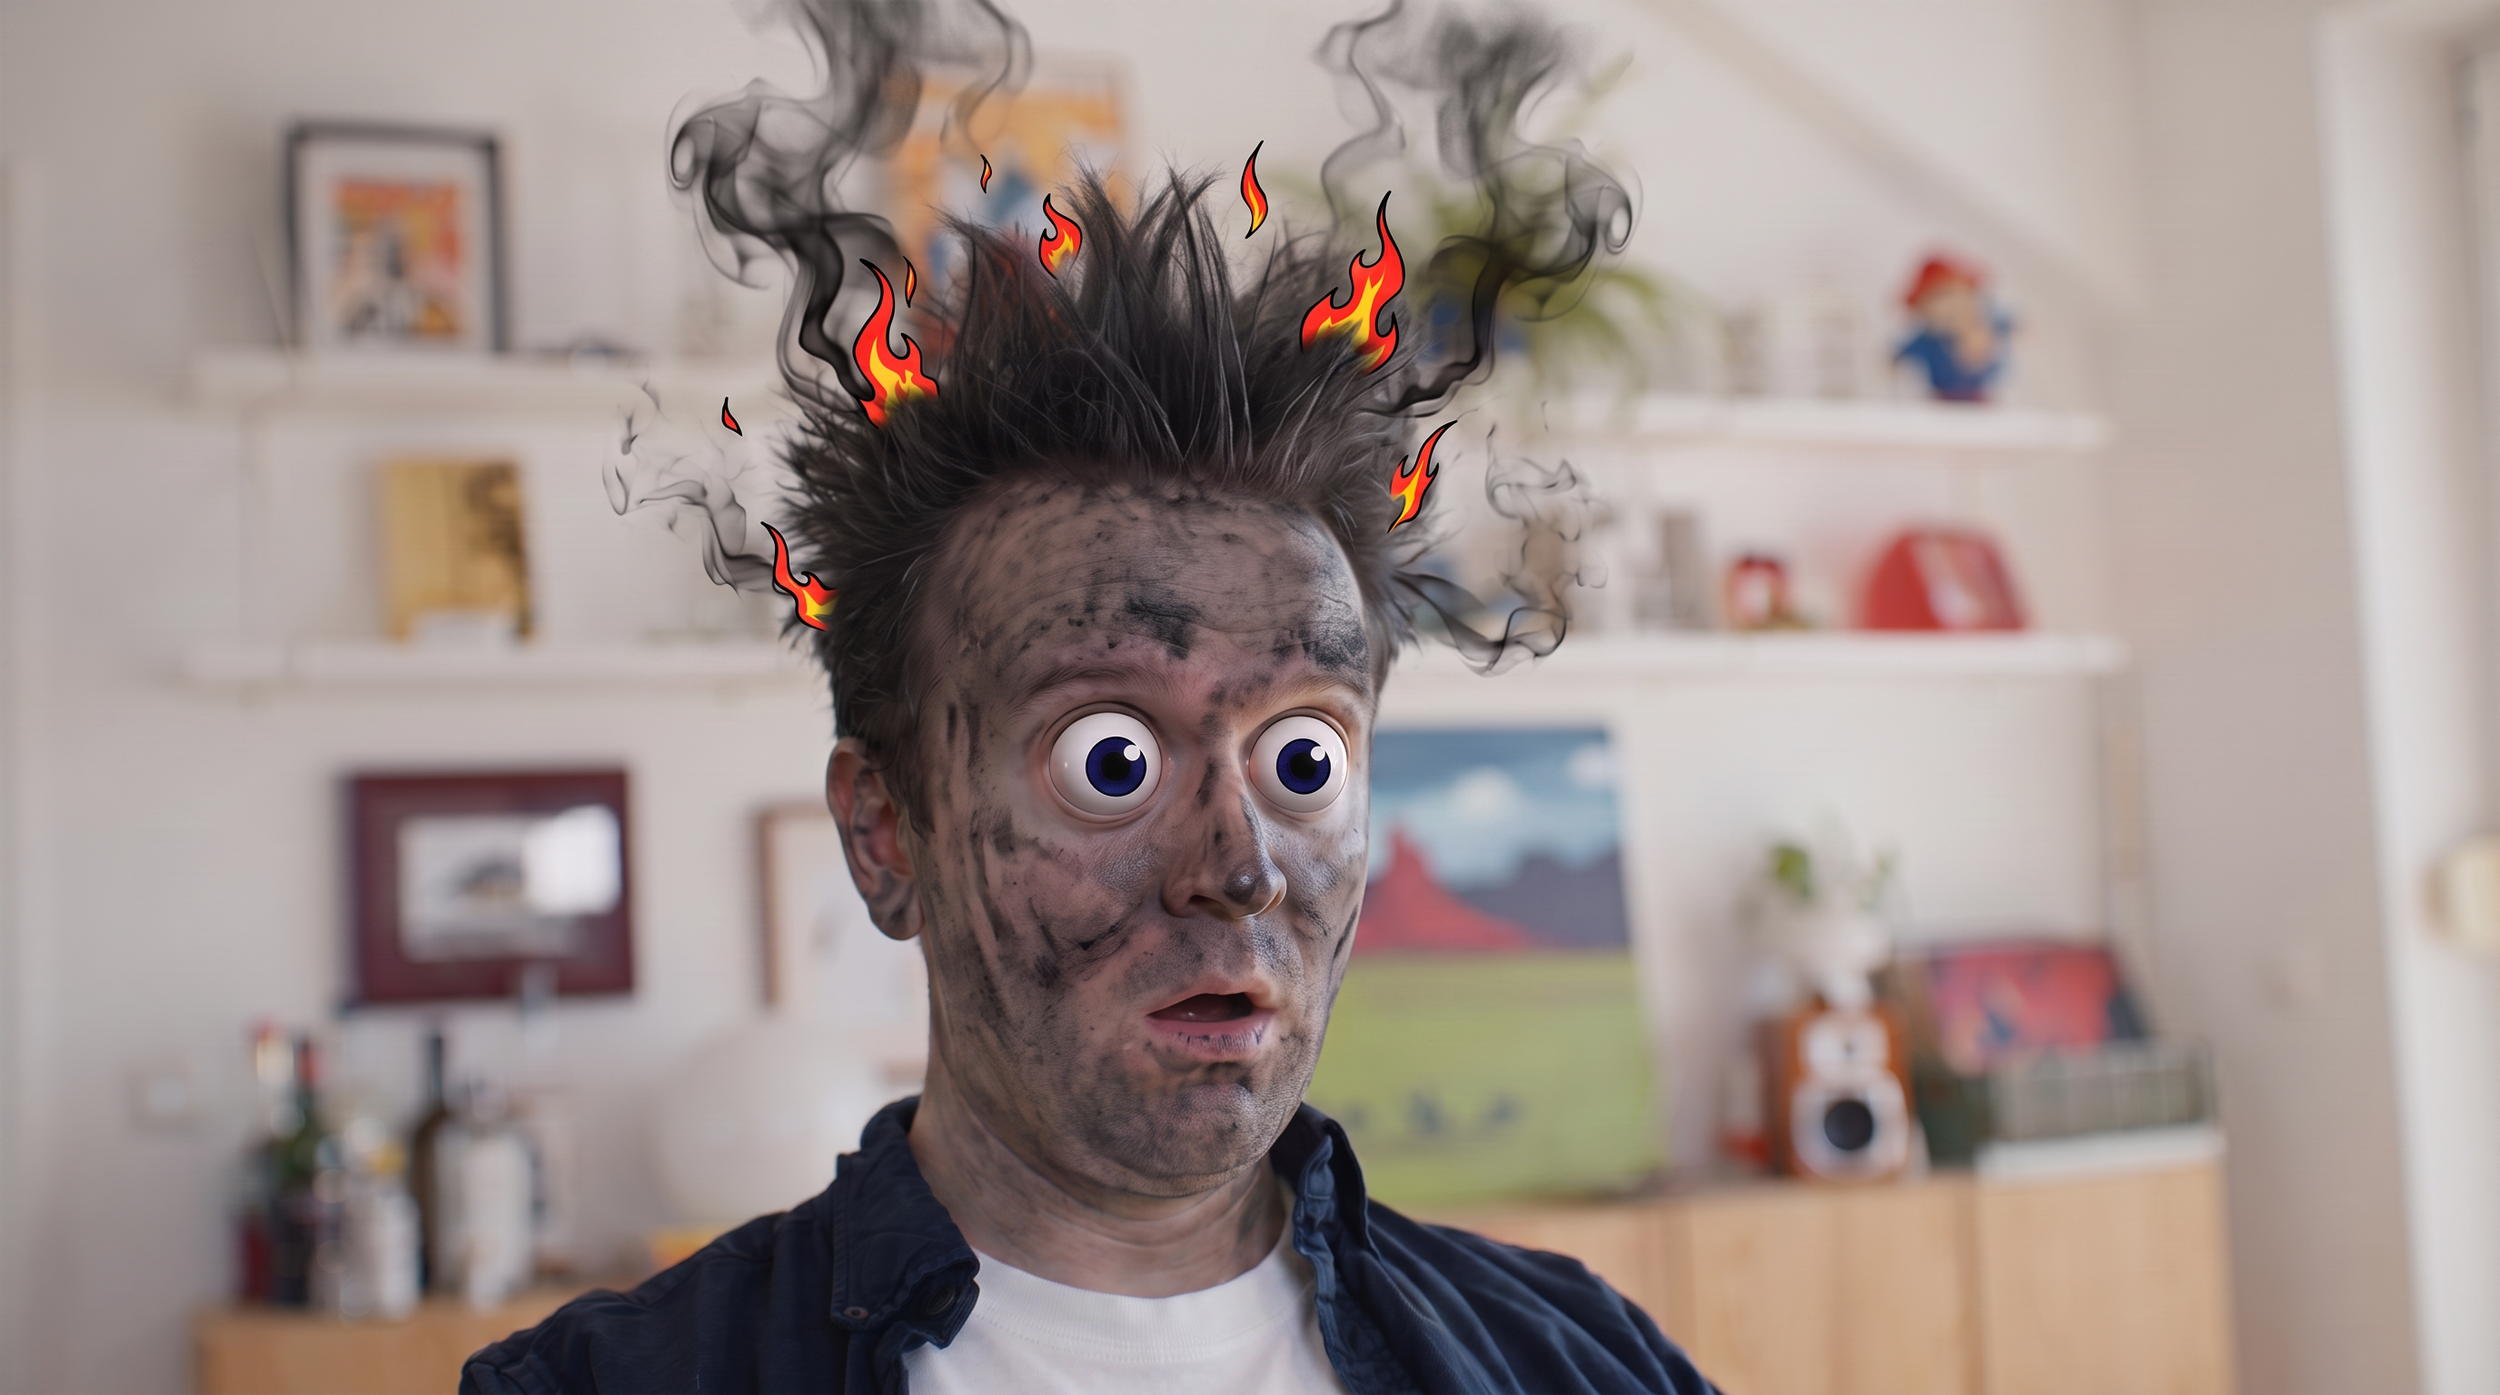
For this shot, Albert created a still image that established the 2D explosion style and used it as an additional reference alongside the original footage.
He then mapped the action in Crumpet so his hair begins smoking, his head explodes into cartoon smoke and flames, and eventually his face returns to live action.
Seedance got most of the way there, but not everything worked perfectly.
Despite several prompting attempts, the model kept adding dirt to Albert’s face after the explosion.
Rather than endlessly regenerating the entire shot, Albert simply cut around the problem in the edit.
Sometimes the best solution isn’t another generation. It’s an edit.
Step 7: Create an AI Stunt Double
For the final sequence, Albert needed his live-action cat to fight the animated beaver.
Rather than asking his actual cat to perform a cartoon fight scene, he created an AI stunt double.
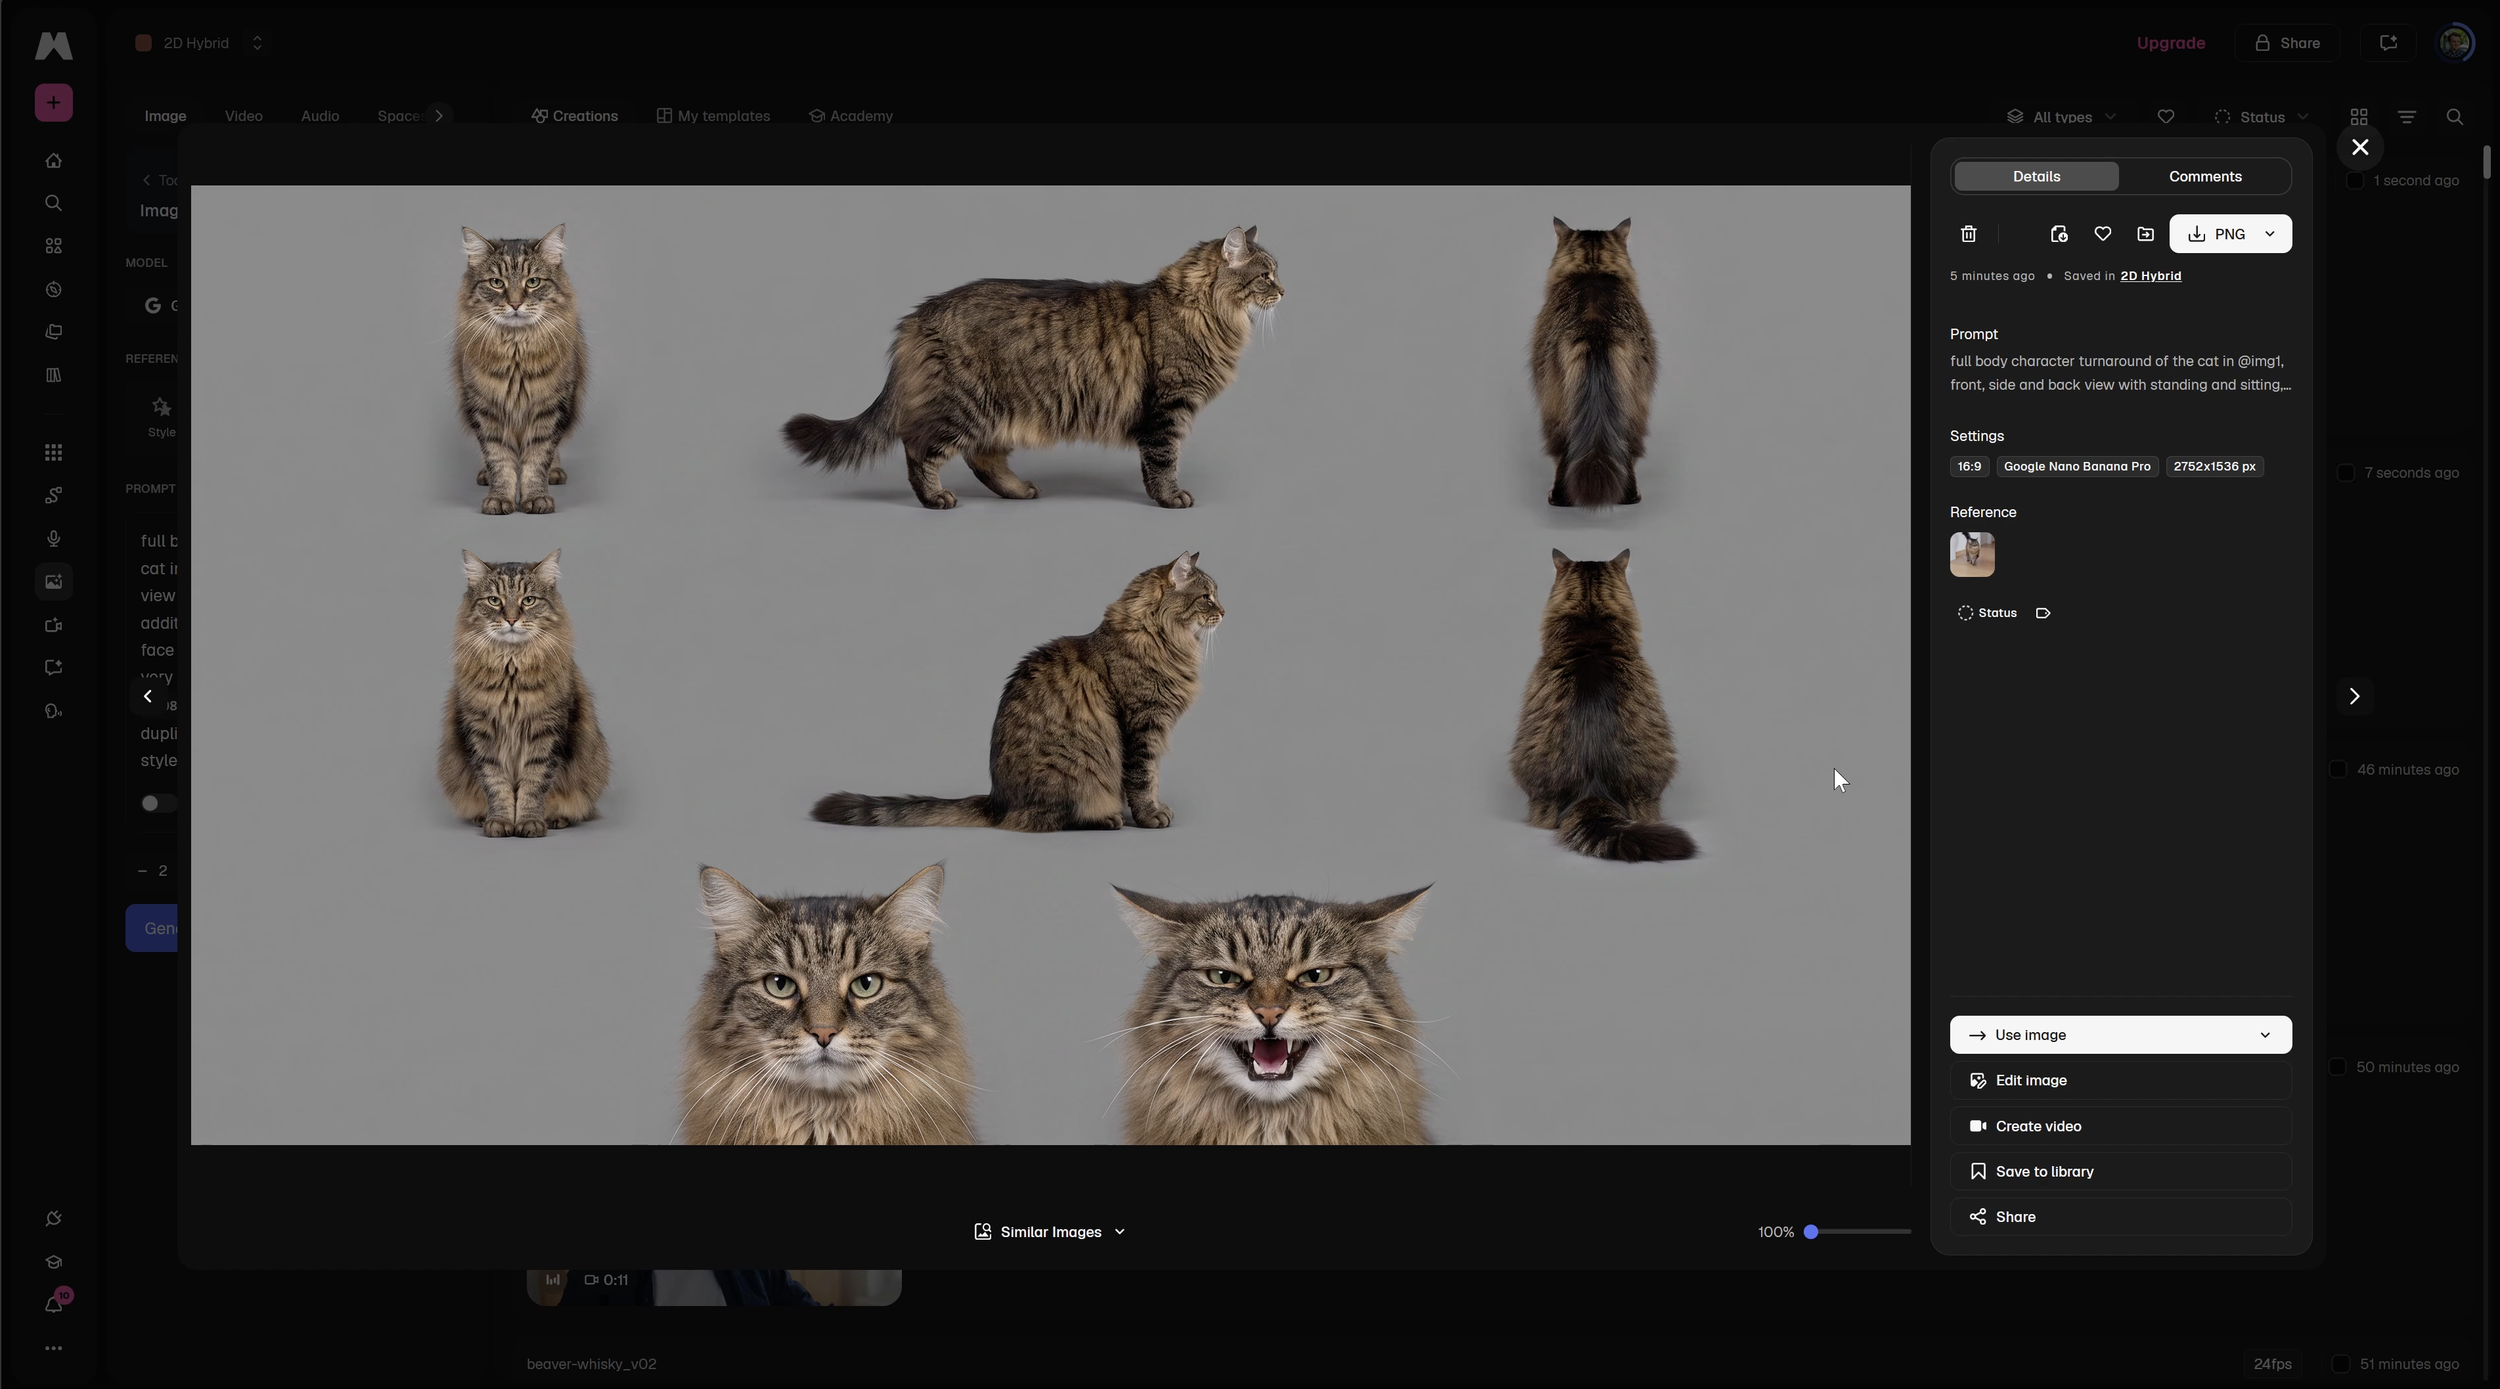
Albert grabbed reference frames from the real footage and used the same character-reference process from earlier to create a turnaround of the cat.
The turnaround doesn’t need to be perfect. It just needs to give Seedance enough visual information to understand what the cat should look like from multiple perspectives.
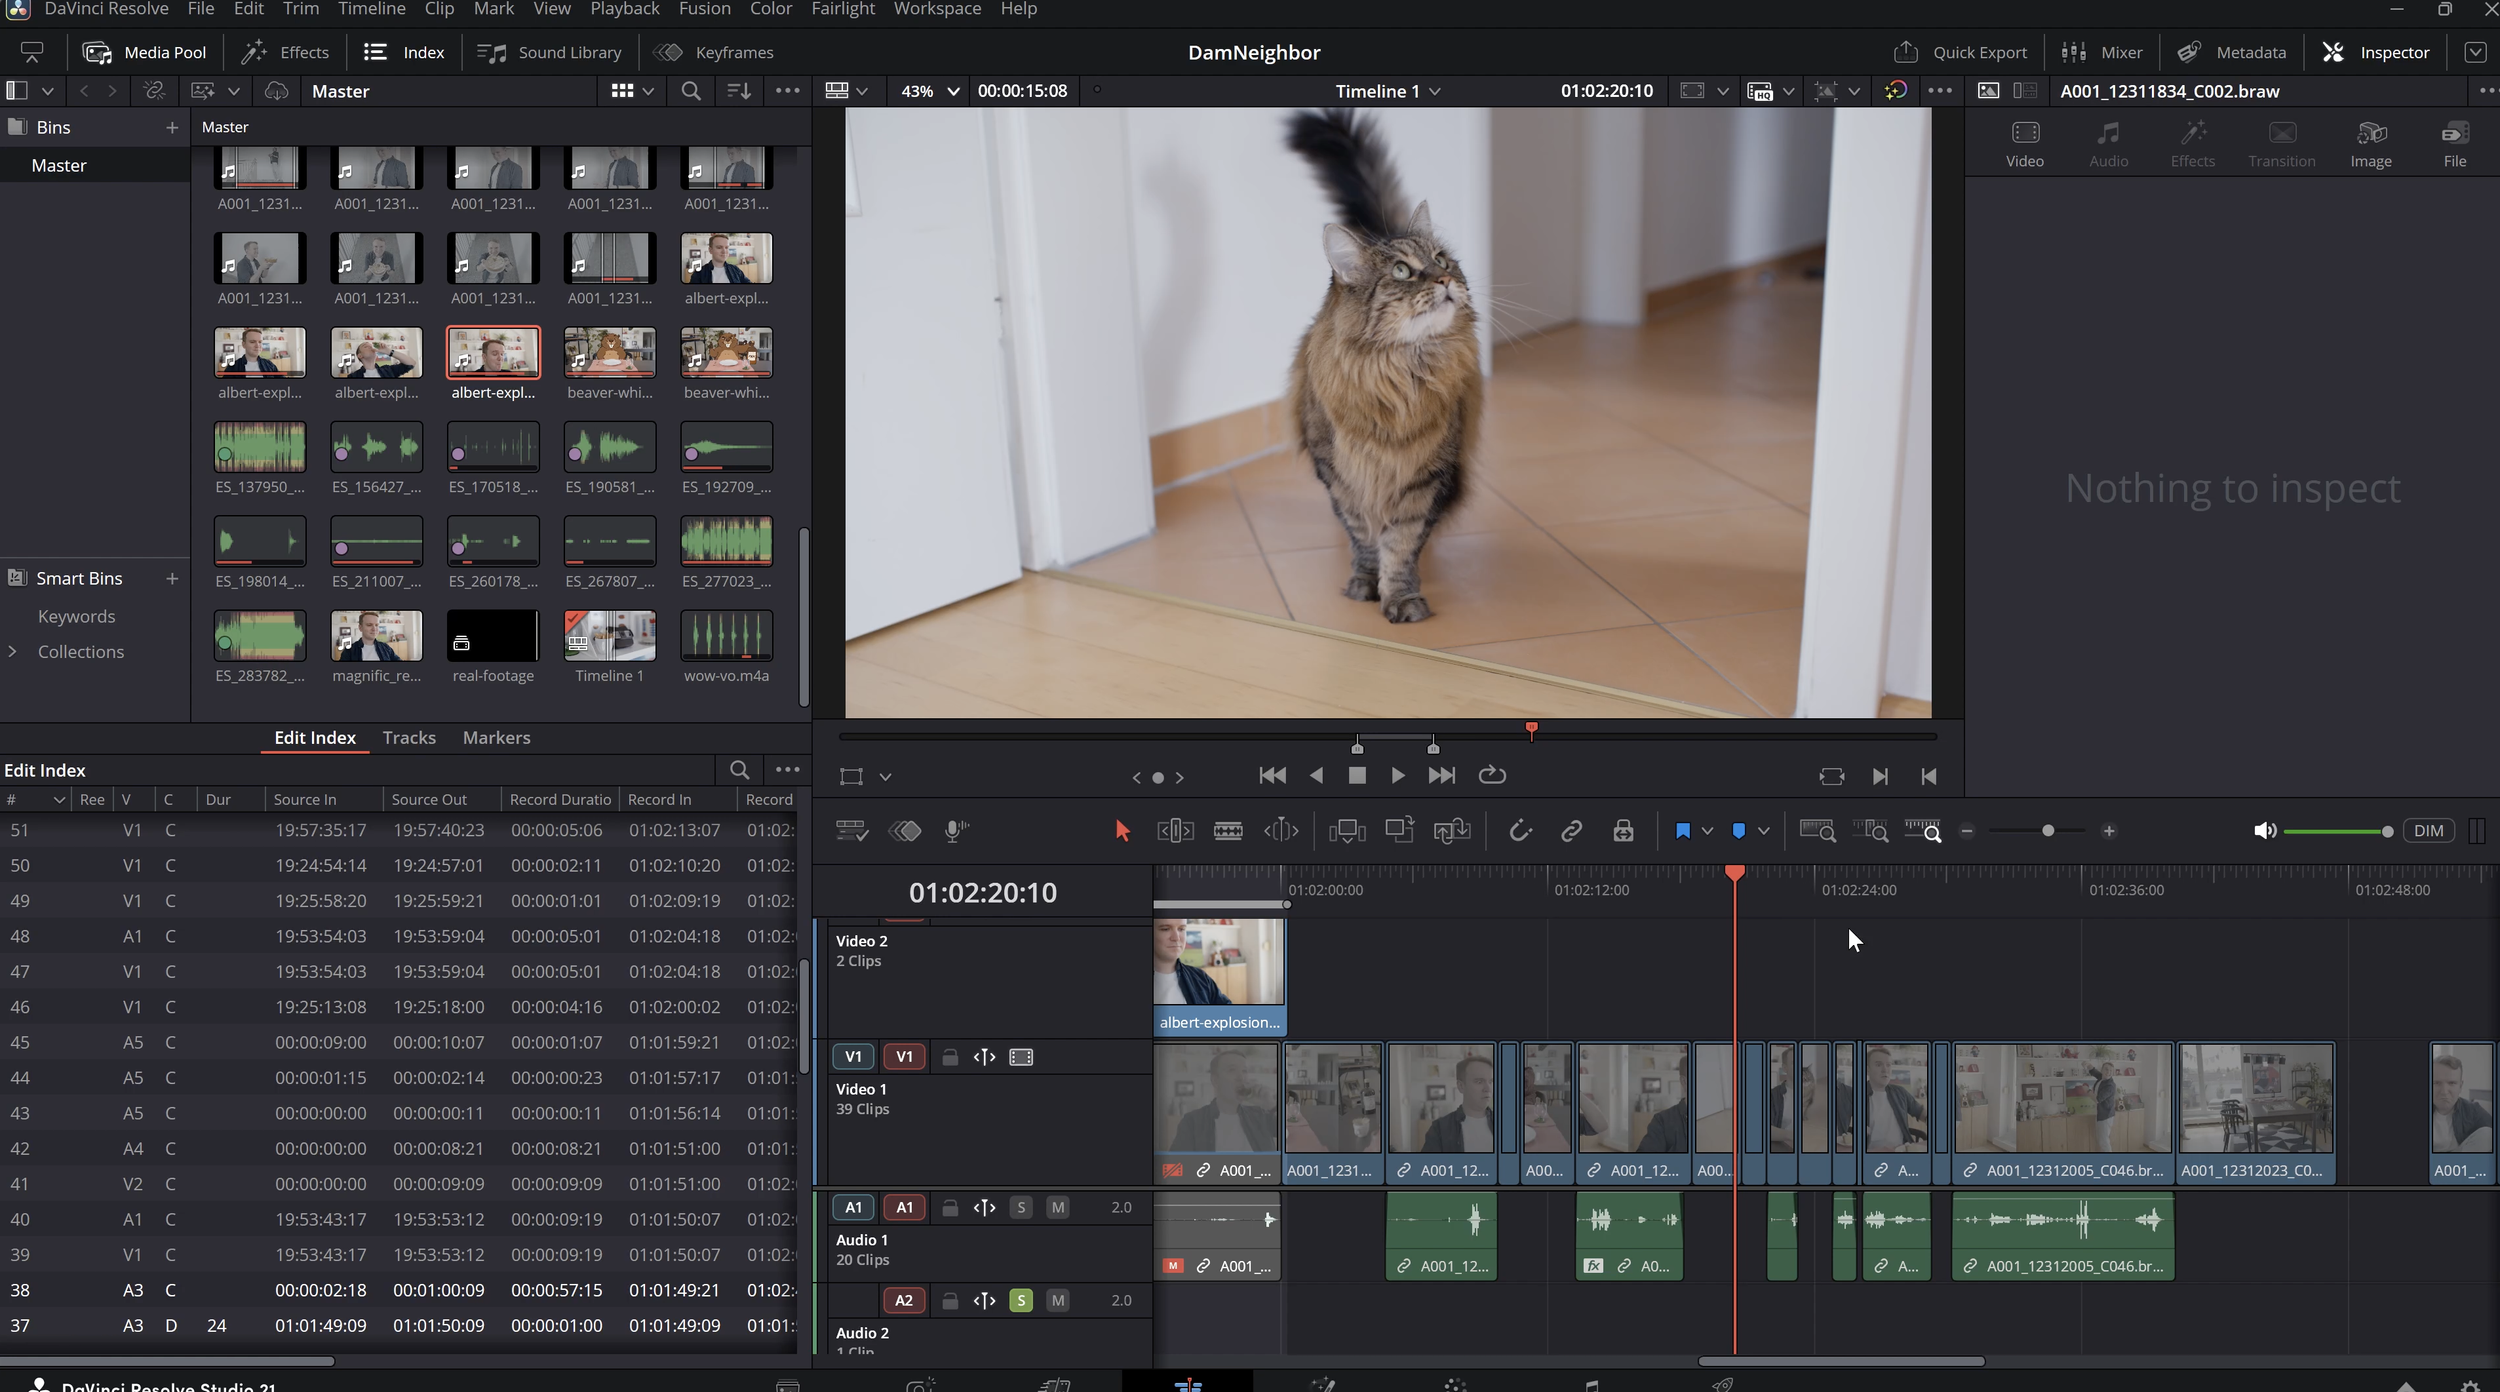
Now Seedance has references for both characters while the original live-action footage provides the environment and camera movement.
Step 8: Generate the 2D Cartoon Fight
This was one of the trickiest shots in the entire project.
The goal was to create a classic cartoon fight tornado between the cat and beaver while having the fight move around and interact with the real living room.
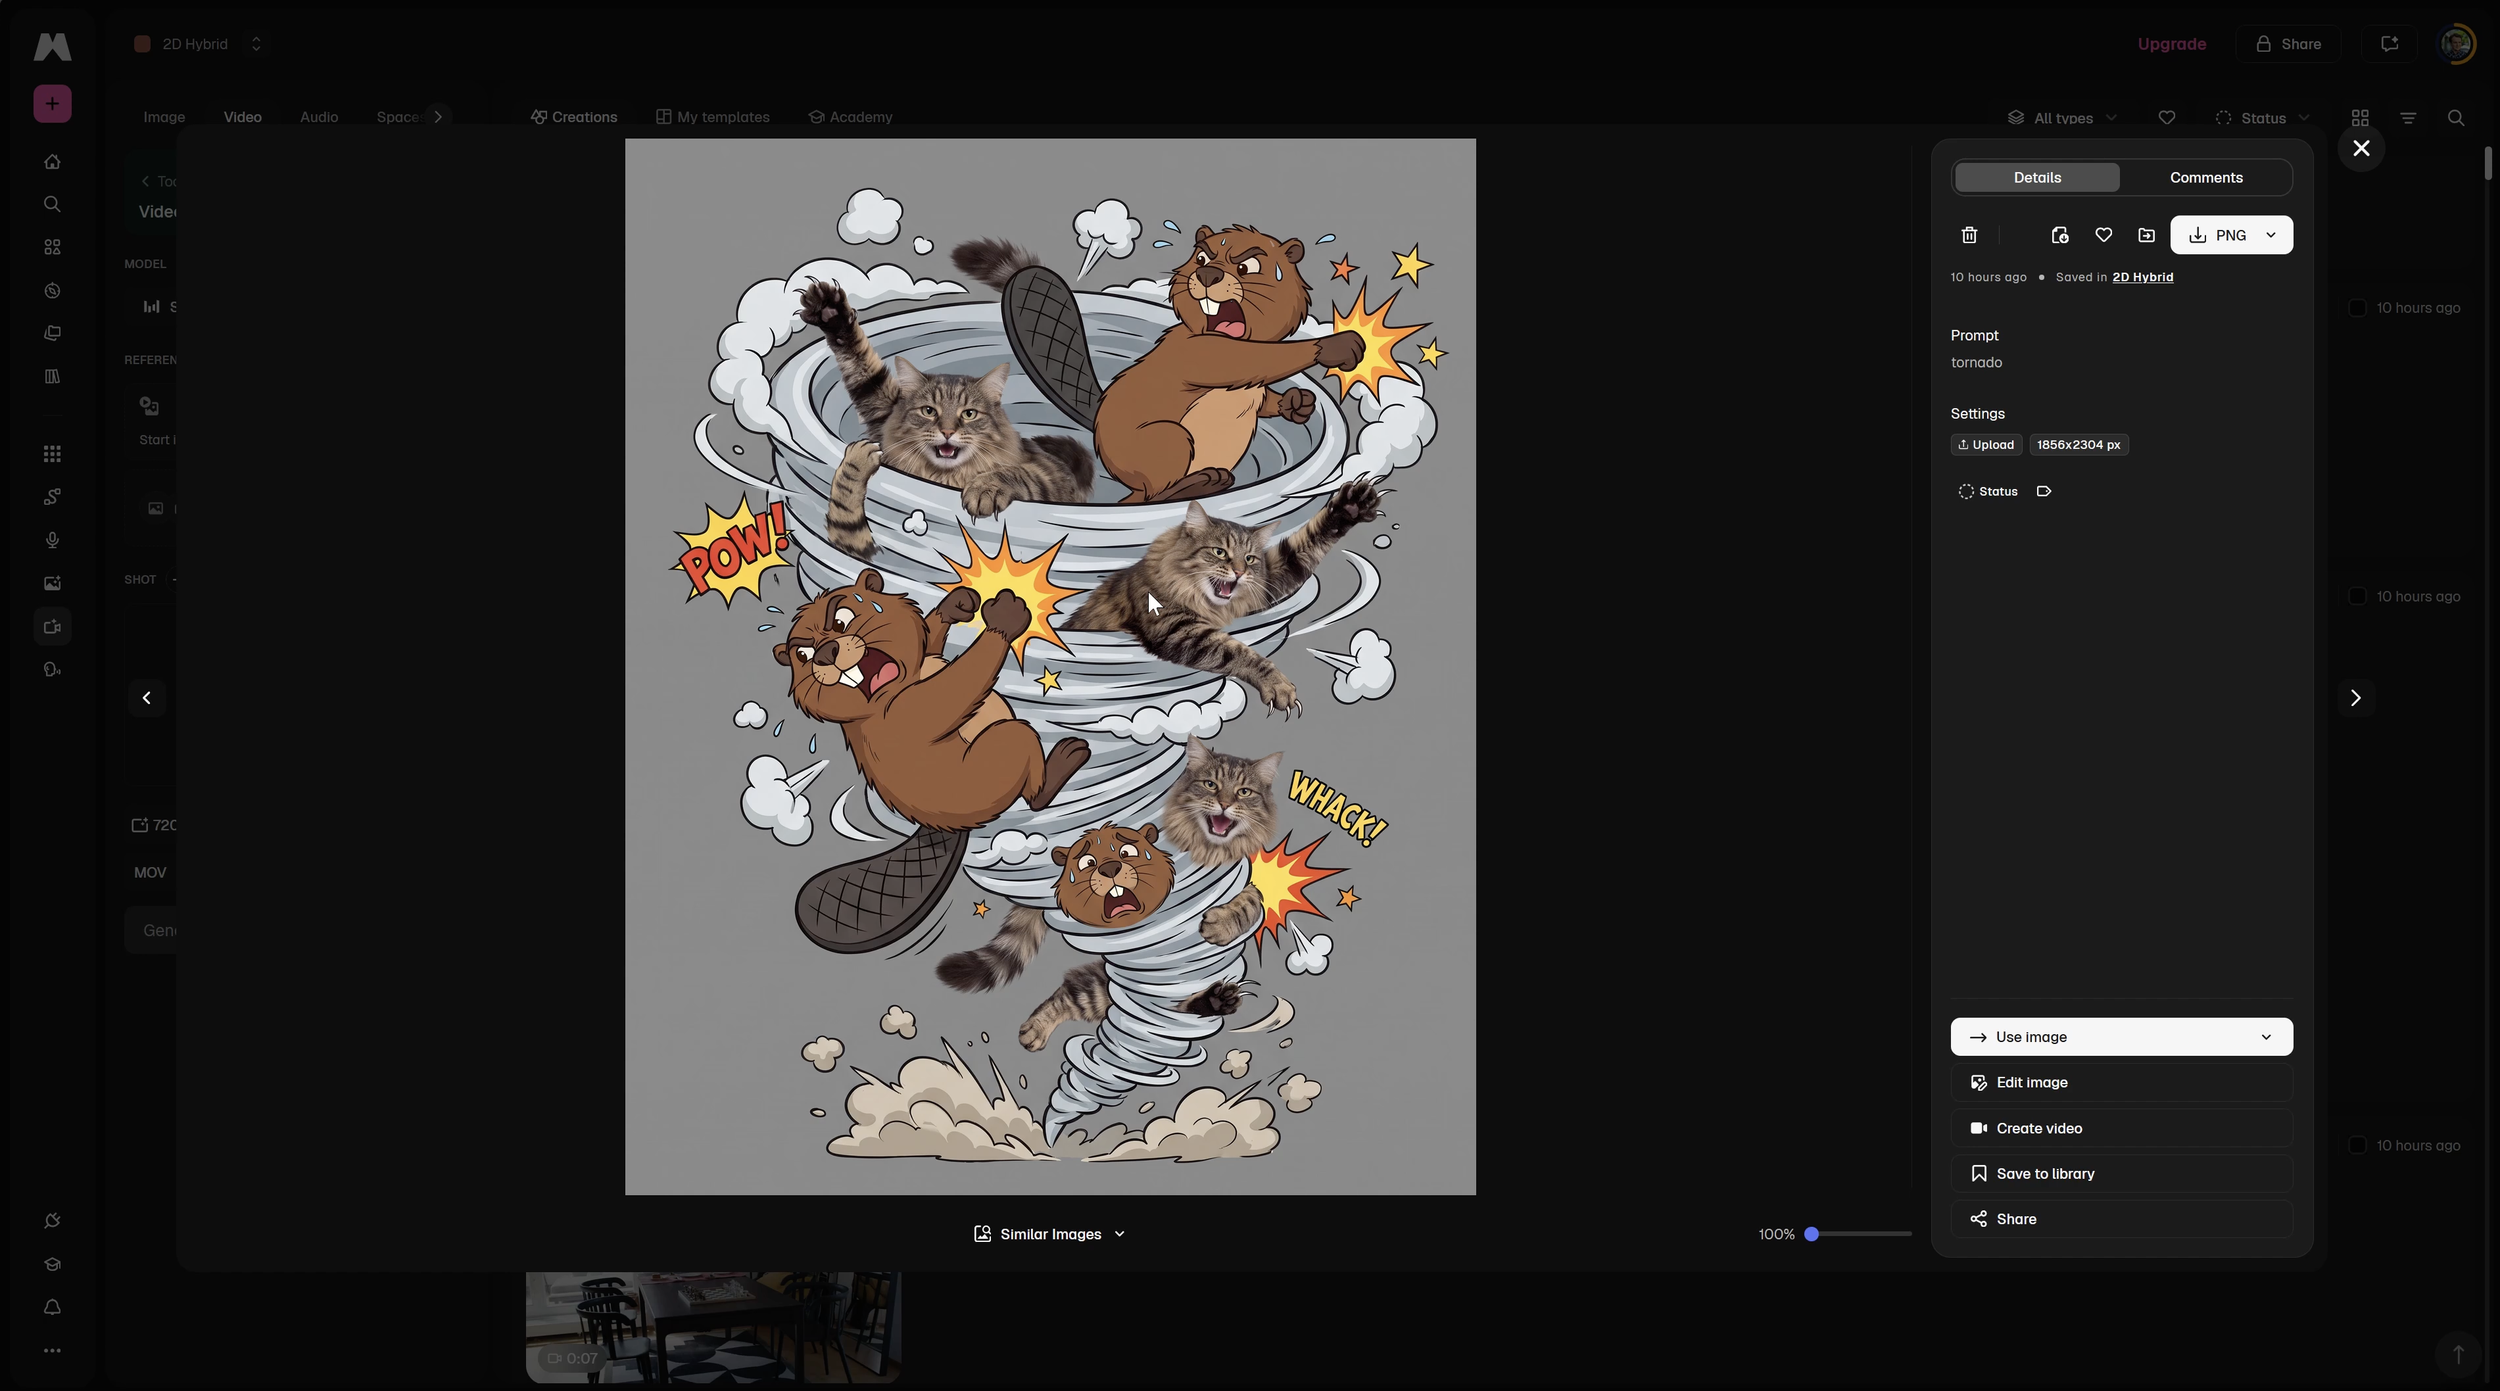
Initially, Albert tried creating an image reference of the cartoon tornado itself.
But Seedance took the reference too literally.
Instead of feeling like a three-dimensional fight happening inside the room, the result looked more like a flat 2D tornado moving across the screen.
So Albert changed strategies.
Rather than showing Seedance exactly what the tornado should look like, he gave it the character references and described the fight through text.
That gave the model more freedom to interpret the action spatially.
But there was another challenge: continuity.
Albert wanted the fight to knock over specific chairs, paintings, and objects because those changes needed to match the next shot. At the same time, other pieces of furniture, including the table, needed to stay where they were.
AI is very good at generating chaos.
The harder part is getting it to show restraint.
So instead of simply prompting Seedance to destroy the room, Albert used the timeline to control what changed and when.
That becomes especially important when an AI-generated shot has to connect with the shots around it.
Clean Up Your AI Shots in After Effects
Even when you get a strong AI generation, you don’t have to accept every detail exactly as it comes out.
Traditional post-production tools are still incredibly useful for fixing smaller inconsistencies.
For example, the animated whiskey changed slightly between shots, so Albert adjusted its color and blur in After Effects to make the sequence feel more consistent.
The beaver’s glass also disappeared toward the end of one generation.
Instead of regenerating the entire shot, Albert grabbed a freeze frame of the glass, masked it, tracked the camera movement, and composited it back into the scene.
Problem solved.
That’s really the larger lesson from this entire workflow.
You don’t need to solve every problem with AI.
Sometimes Seedance is the right tool. Sometimes Photoshop makes more sense. Sometimes the fastest solution is a simple After Effects composite or an edit.
The best workflow is usually a mix of all of them.
Final Thoughts
Combining 2D animation with live-action footage still requires planning, iteration, and a good eye for continuity.
But AI is making this style of filmmaking much more accessible.
Final Cut
The biggest takeaway from Albert’s workflow is that AI works best as one part of the filmmaking pipeline, not the entire pipeline.
Plan your shots with the animated elements in mind. Lock your live-action edit. Create strong character and prop references. Give the AI clear instructions about what needs to happen and when.
Then use traditional filmmaking and post-production tools to solve the remaining problems instead of expecting a single AI generation to do everything.
Learn More AI Animation Workflows Like This
There are so many fun ways to mix AI with traditional animation and filmmaking, and this is just one of them.
If you want to learn more workflows like this, check out our AI Animation course, where Albert and the rest of our instructors walk you through how to create consistent characters, animate your shots, and bring your ideas to life using the latest AI tools.
We’d love to have you join us!
